How to Crochet a Flat Circle (Without Ruffling or Cupping)
The increase sequence that keeps a crochet circle flat, plus why circles ruffle, cup, or spiral when it's off, and how to fix each one.
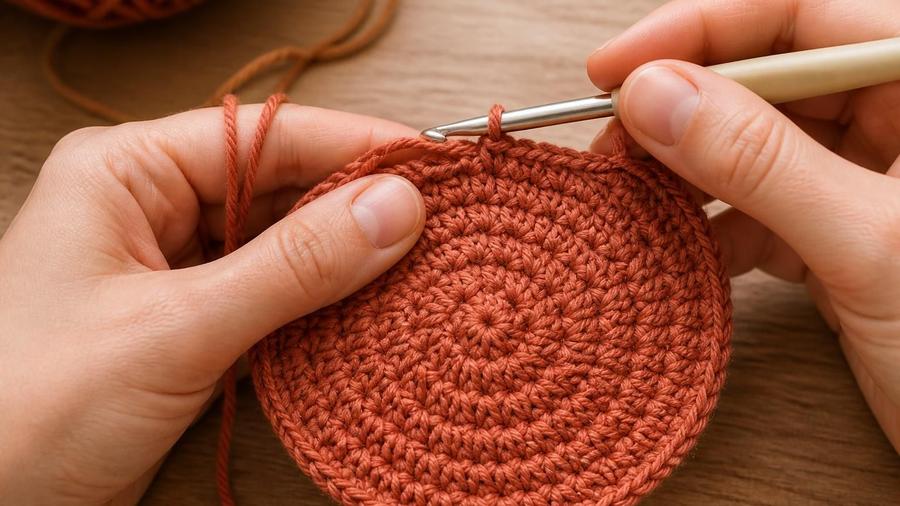
My first attempt at a flat circle looked more like a small satellite dish. It cupped upward at the edges, and no amount of blocking convinced it to lie flat. I'd been increasing by feel, adding a stitch here and there whenever the piece looked like it needed it, which turns out to be exactly the wrong approach. A flat circle isn't a matter of feel at all, it's arithmetic: each stitch height needs a specific, fixed number of new stitches added every round, and getting that number right is the entire difference between a circle that lies flat and one that ruffles, cups, or spirals.
This guide covers the standard increase sequence for both single crochet and half double crochet, the stitch-count table to check your work against round by round, and the specific fixes for the three problems that come up most: ruffling, cupping, and increases that stack into a visible spiral line instead of scattering evenly.
Materials
- Any worsted-weight yarn and a hook matched to it (5mm is a common starting point)
- Stitch marker or a short length of contrasting scrap yarn
- Yarn needle for weaving in the end
Abbreviations (US terms)
| Abbr. | Means |
|---|---|
| sc | Single crochet |
| hdc | Half double crochet |
| inc | Increase (2 stitches in the same stitch) |
| st(s) | Stitch(es) |
See our abbreviations glossary for the full list including UK terms.
Notes
- Worked in continuous rounds (a spiral) rather than joined rounds, which is the more common method for a flat circle used as a base.
- Start with either a magic ring or a chain-and-slip-stitch ring; both work with the increase sequence below.
- The increase rate is fixed per stitch type, not per project, so the same sequence applies whether you're making a coaster, a hat crown, or an amigurumi base.
The increase sequence
Work 6 sc (or 8 hdc) into a magic ring or a ring made from a small starting chain joined with a slip stitch. Pull the ring closed if using a magic ring.
Work an increase (2 sts in the same st) in every stitch around, doubling your count: 12 sc (or 16 hdc) total.
*Sc in next st, inc in next st* around (or the equivalent for hdc). This adds 6 new sc (or 8 new hdc), for a running total of 18 sc (or 24 hdc).
Each round, one more plain stitch is worked between increases than the round before: round 4 is *sc in next 2 sts, inc in next st*, round 5 is *sc in next 3 sts, inc in next st*, and so on. Every round still adds exactly 6 new sc (or 8 new hdc) total, however many plain stitches sit between the increases.
Stop increasing once the circle reaches your target diameter, then either fasten off (for a flat piece like a coaster) or continue in straight rounds with no more increasing (to turn the flat circle into the base of a hat crown or an amigurumi shape).
Stitch-count tables
Check your total stitch count at the end of every round against the numbers below. Catching a miscount one round late is a quick fix; catching it three rounds later usually means unraveling back to where it happened.
| Round | Single crochet total | Half double crochet total |
|---|---|---|
| 1 | 6 | 8 |
| 2 | 12 | 16 |
| 3 | 18 | 24 |
| 4 | 24 | 32 |
| 5 | 30 | 40 |
| 6 | 36 | 48 |
The pattern continues the same way past round 6: add 6 to the previous total for sc, or 8 for hdc, every round. Double crochet follows the same logic at a faster rate, roughly 12 new stitches per round, since a taller stitch needs proportionally more width added each round to keep the circle flat.
Offsetting increases to avoid a spiral line
If every round's increases land in exactly the same stitches as the round before, directly on top of each other, they build a visible diagonal line running from the center of the circle out to the edge. It doesn't affect how flat the circle lies, but it does look unintentional, like the increases were rushed rather than planned.
The fix is to shift where each round's first increase falls. A simple way to do this: start each new round one stitch later than where the previous round started, so the increase pattern staggers around the circle instead of stacking in a single column. Many written patterns build this offset in for you automatically as part of the stitch counts; if you're improvising your own circle from the sequence above, add the offset deliberately rather than starting every round in the same spot.
Where a flat circle shows up
A short flat circle, usually 4-5 rounds, is the entire base of a basic coaster; see our coasters pattern for a full written version using exactly this sequence. A longer flat circle becomes the crown of a top-down hat, like our beanie pattern, where the increasing stops once the circle reaches the wearer's head circumference and the pattern switches to straight rounds for the sides. In amigurumi, a flat circle worked to a specific stitch count and then closed or continued into a 3D shape forms the base of many toy bodies. Getting comfortable with the plain increase sequence here means you can adapt any of these without following someone else's exact round-by-round instructions.
The same sequence also shows up, slightly disguised, inside projects that aren't circles at all. A granny square's first round is worked as a flat circle in miniature before the corners turn it square; a bag or basket base is a flat circle that then switches to straight rounds to build height, exactly like a hat crown but worked upside down; and a doily is often nothing more than a flat circle continued for many more rounds than a coaster needs, sometimes swapping in a lace or shell stitch instead of plain sc for decorative rounds along the way. Once the underlying math clicks, a lot of shapes that look unrelated on the surface turn out to be the same increase pattern applied at different scales.
It's worth practicing the sequence on its own, with no pattern in front of you, before relying on it inside a bigger project. Work a scrap circle to 6-8 rounds, checking your count against the table after every round, and notice how the fabric behaves as you go: does it stay flat, or does an early miscount already start pulling it toward a cup or a ruffle by round 4? Catching that in a low-stakes practice swatch is a much easier lesson than discovering it three rounds into an amigurumi body you don't want to unravel.
Fixing a circle that won't lie flat
Fix: you're increasing too often for the stitch you're using; check your round-by-round count against the stitch-count table and remove any extra increases you added by feel rather than by the pattern.
Fix: the opposite problem, not enough increases for the round; add one more increase pair to the round where the cupping started and check the following round's total against the table before continuing.
Fix: offset where each round's increases fall rather than starting every round's increase pattern in the same stitch; see the offsetting section above.
Fix: place a stitch marker or a scrap of contrasting yarn in the first stitch of each round and move it up every round, so you can always see where the current round started even after setting the work down.
Fix: measure against your actual target (a head circumference for a hat, a specific diameter for a coaster) as you go rather than committing to a fixed number of rounds in advance; gauge varies enough between crocheters that a written round count is only a starting estimate.
Flat circle FAQ
Why does my circle ruffle instead of staying flat?
Ruffling means you're increasing too often for the stitch you're using. Every stitch has a rate that keeps a circle flat: 6 new stitches per round for single crochet, 8 for half double crochet, and roughly 12 for double crochet. Adding increases faster than that rate makes the circle grow wider than it grows around, so the extra fabric has nowhere to go but wave and ruffle at the edge.
Why is my circle cupping into a bowl shape instead of lying flat?
Cupping is the opposite problem: not enough increases for the stitch height, so the outer rounds are too tight relative to how far around they need to reach, and the fabric pulls inward into a shallow bowl. Add one more increase pair to the round it started cupping on and it should flatten back out.
Why do the increases stack into a visible spiral line?
When every round's increases land in exactly the same spot as the round before, they build a visible diagonal line running from the center out to the edge. Offset your increase placement by one stitch at the start of each round instead of stacking them directly on top of each other, and the increases scatter across the circle instead of lining up.
How do I keep track of which round I'm on?
Use a stitch marker or a scrap of contrasting yarn in the first stitch of each round and move it up as you go, and count your total stitches at the end of every round against the stitch-count table before starting the next one. Catching a miscount one round late is a five-second fix; catching it three rounds late usually means unraveling.
How big should my circle be for a coaster, hat, or amigurumi base?
A coaster is usually 4-5 rounds of single crochet, about 4in across. A beanie crown starts the same way and switches to straight rounds (no more increasing) once the circle reaches the wearer's head circumference divided by roughly 3.14. An amigurumi base is typically 6-8 rounds depending on the finished toy's size, then also switches to straight rounds once the widest point is reached.
Can I use this same increase method for double crochet or treble circles?
Yes, the same underlying principle applies to any stitch, just with a different round-1 stitch count and increase rate: taller stitches need more new stitches per round to stay flat, roughly 12 for double crochet and closer to 16 for treble, since a taller stitch covers more vertical distance per round and needs proportionally more width added to match.
Should I start with a magic ring or a chain-and-slip-stitch ring?
A magic ring gives a tighter, hole-free center and is the more common choice for amigurumi and anything meant to hide the starting point. A chain-and-slip-stitch ring is a bit faster to work and leaves a small visible hole in the middle, which is fine for something like a coaster or a doily where a tiny center opening won't be noticed. See our magic ring tutorial for the step-by-step technique.
CrochetGuides is a participant in the Amazon Services LLC Associates Program. As an Amazon Associate we earn from qualifying purchases, at no extra cost to you.