Crochet Mini Christmas Tree Pattern
A small stuffed cone-shaped tree, topped with a star and dotted with tiny bead ornaments.

In my first December of teaching, a student arrived determined to fill every windowsill in her house with a crochet mini Christmas tree. She finished the whole cone in a single evening and was delighted right up until she stood it up and watched it flop over. The fix wasn't the stitching — it was a handful of dried rice tucked into the base before the stuffing went in. I've taught this same little tree every holiday season since, and it's become one of my favourite beginner projects: small enough to finish in front of a film, forgiving enough to redo, and genuinely charming lined up on a mantel. Because it's worked entirely in continuous rounds, it also makes a gentle way to practise the spiral technique in our how to crochet in the round guide.
The part nobody sees coming is the base, because a cone wants to stand on its point unless you deliberately flatten and weight the bottom. I keep a jar of dried rice next to my yarn for exactly this pattern, and I seal a couple of tablespoons in a small fabric bag before it goes in, so it stays put instead of leaking through the stitches. Once the base is sorted, the rest is pure play — the cone grows almost on its own, and the beads and star are where each person's tree becomes theirs.
What you need
- Worsted weight (#4) green yarn
- 4.0mm (US G/6) hook
- Polyester fiberfill, or dried rice/poly pellets for the base plus fiberfill above it
- Small beads or seed beads in bright colors, for ornaments
- A small amount of gold or yellow yarn for the star topper
- Yarn needle
Base
Steps
- Magic ring, 6 sc into the ring. (6 sts)
- Round 2: 2 sc in each st around. (12 sts)
- Round 3: *sc, 2 sc in next st* around. (18 sts)
- Round 4: *2 sc, 2 sc in next st* around. (24 sts) — this becomes the flat base the tree stands on.
Cone body
Steps
- Without further increasing, work even in sc for 14–18 rounds, working in the back loop only for the first round after the base to create a defined edge where the cone rises.
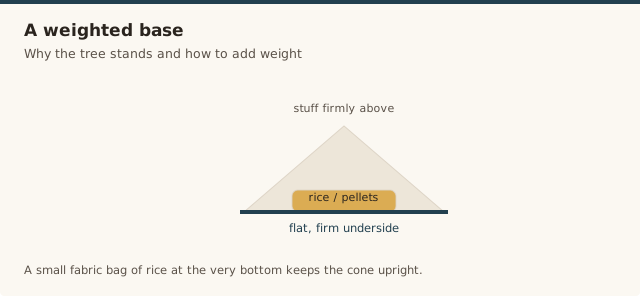
- As you work, add a few tablespoons of dried rice or poly pellets in the very bottom of the base for stability, then continue stuffing firmly with fiberfill as the cone grows.
- For the final 4–5 rounds, decrease by 3–6 sts per round to close the cone to a small point at the top, stuffing right up until it closes.
- Fasten off, leaving a small tail at the top for attaching the star.
Decorating
Steps
- Star topper: work a tiny 5-point star from gold yarn (chain a small star shape, or use a small crocheted circle as a simpler stand-in), and stitch it to the point of the tree.
- Sew small beads scattered over the surface of the cone to look like ornaments.
- Optional: add a thin strand of yarn spiraled loosely around the cone and tacked in a few places to look like a garland.
Choosing yarn and colours
For the cone, a worsted cotton holds its shape best and gives a crisp, almost bristly silhouette that reads as a pine tree, while acrylic is softer and cheaper if you're crocheting a whole forest. Avoid anything slippery or silky, which wants to slide rather than hold the firm cone you're building. The green matters too — a deep forest green reads classic, while a lighter sage or a speckled green gives a more modern, hand-dyed look, and any of them work as long as the beads you choose contrast against it.
For the star and beads, I like a gold or mustard star against green, with beads in a single bright accent colour — red, white, or silver — rather than a rainbow, which can look busy at this small scale. If you're unsure how the yarn will behave, the yarn weight guide explains how fibre and weight change the finished fabric, which is handy when you want a stiffer or softer tree.
Sizing up or down
The size of your tree is set almost entirely by two things: the diameter of the base and the number of straight rounds you stack on top. For a taller centrepiece tree, work more increase rounds into the base before switching to working even — every extra round adds roughly 6 stitches of width — then keep going for more rounds before the decreases. A bulky yarn with a 5.5–6.0mm hook will roughly double the finished height on its own.
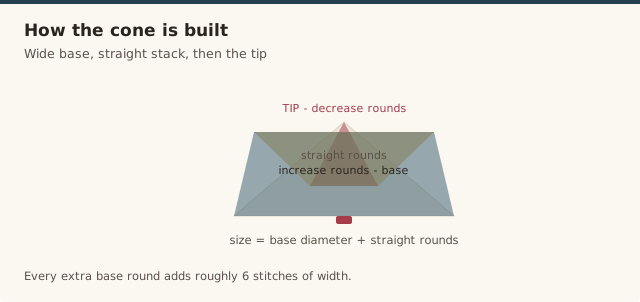
For a tiny ornament tree, start with a smaller base (stop at 12 or 18 stitches) and work fewer straight rounds, using DK yarn and a 3.0mm hook. A set of three graduated sizes on a mantel looks deliberate rather than random, and the small ones finish in under an hour. The spiral shaping is the same technique in our how to crochet in the round guide, so if you've worked that, the cone will feel familiar.
Decorating beyond beads
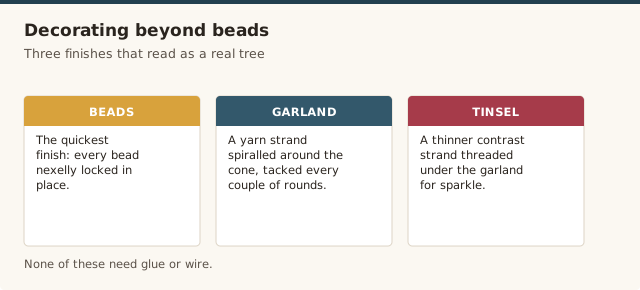
Beads are the quickest finish, but they're only one option. A thin strand of yarn spiralled loosely around the cone and tacked every couple of rounds makes a garland, and a second, thinner strand in a contrast colour threaded under it looks like tinsel without any glue or wire. I've also had students sew on tiny crocheted flowers or stars in place of beads, which is lovely if you want the whole piece to be yarn rather than mixed materials.
For the top, the five-point star in the pattern is one route, but a small crocheted circle, a fluffy pom-pom, or a single bright bead all finish the point just as neatly. Whatever you choose, keep the topper light — a heavy embellishment will make the soft cone tip over even with a weighted base. If you'd like the star to sit crisply, a quick block firms up the points; our guide to blocking crochet shows how without any special tools.
A step-by-step look at a small tabletop tree, useful for seeing how the tiered rounds build the cone shape.
Common mistakes & fixes
Fix: the base wasn't weighted. Add a couple of tablespoons of dried rice or poly pellets sealed in a small fabric bag right at the very bottom, then stuff the rest firmly. A flat, firm underside is what holds the whole cone upright.
Fix: the stuffing went in unevenly or in one big clump. Add small pinches as you work up the cone and press the sides with your fingers between additions, so the fill spreads evenly before you close the point.
Fix: you likely skipped the back-loop-only round that creates that defined rim. Work the first round after the base into the back loop only, and the bottom will sit flat with a clean corner.
Fix: sew each bead on with a slightly loose stitch and don't pull the thread taut. Space them out rather than clustering, so no single spot carries too much tension in the fabric.
Fix: you started the decreases too late. Begin them two or three rounds earlier and decrease a little more each round so the top narrows smoothly to a point, then use the tail to cinch the last few stitches closed.
Fix: the topper is too heavy for the soft cone. Use a lighter crocheted star or a single bead, and if you love the heavier one, push a short chenille stem up the top of the cone before attaching it to give the point some backbone.
Frequently asked questions
How do I keep the tree standing upright?
Weight the very bottom of the base with a little dried rice or poly pellets sealed in a small bag before adding regular fiberfill above it.
Can I make a whole forest of different sizes?
Yes — use a smaller base and fewer rounds for mini trees, or a larger base and more rounds for a taller centerpiece tree.
What if I don't want to make a star topper?
A simple pom-pom, a small bead, or even a tiny bow works just as well on top.
What yarn should I use for a mini Christmas tree?
Worsted weight cotton or acrylic both work well; cotton gives a slightly firmer, cleaner cone, while acrylic is softer and cheaper for making a whole forest. Just avoid anything too slippery, which can make the cone harder to shape.
How do I make the tree look fuller?
Work a couple of extra increase rounds at the base for a wider, sturdier silhouette, and stuff firmly so the sides don't look dented. A fuller tree also stands better once you've weighted the bottom.
Can I use real baubles or wire on the tree?
Small lightweight baubles and short lengths of soft wire can work, but keep anything sharp or heavy off the soft cone — both will dent the stuffing and pull the stitches out of shape. If you're making the tree as a toy for a small child, skip the beads and wire entirely and stick to sewn yarn decorations, which are safer if it gets grabbed.
How do I store the tree between holidays?
Let it dry completely if it's been cleaned, give it a gentle re-shaping with your hands, and pack it loosely in a box rather than crushing it under heavier decorations. A slightly firm stuffing holds up best in storage, and the rice-weighted base keeps the tree standing straight year after year as long as the fabric bag stayed sealed.
CrochetGuides is a participant in the Amazon Services LLC Associates Program. As an Amazon Associate we earn from qualifying purchases, at no extra cost to you.