Free Baby Bunting Crochet Pattern (Hooded)
A cozy hooded baby bunting sack for 0-6 months, worked as one wide body panel with a wrap-style button closure and a securely stitched pom-pom.
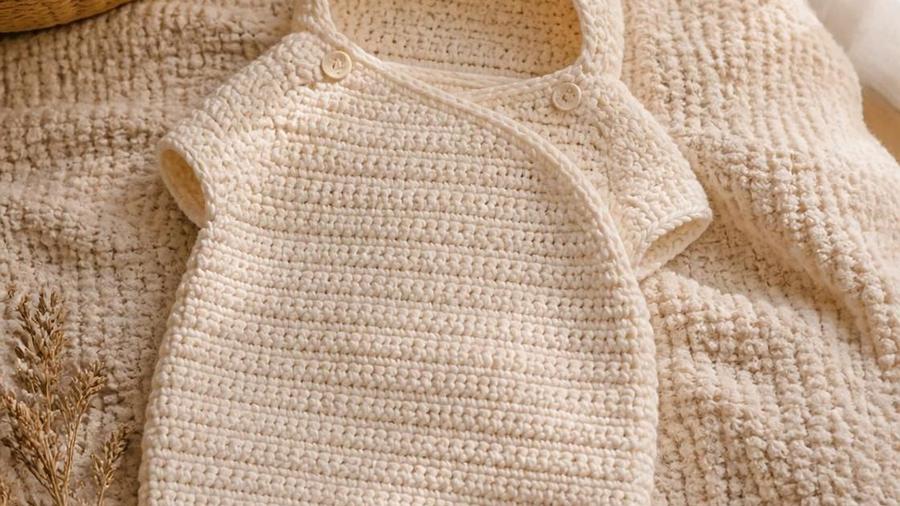
A bunting is one of those baby items that looks deceptively simple, a wide sack with a hood, and is easy to underestimate right up until you're trying to actually dress a wriggling newborn in it at seven in the morning. My first attempt had arm openings positioned by eye rather than measured against a garment the baby already wore, and they ended up so high that getting an arm through required more contortion than either of us had patience for. Since then I've measured every armhole placement against something the baby is already comfortably wearing, and it's made every subsequent bunting a genuinely easy thing to use rather than a daily small struggle.
This pattern covers that armhole placement, the hood worked as a direct continuation of the body rather than a separately-seamed piece for a cleaner and warmer join, and the wrap-style button closure that's easier to manage one-handed than a zipper while still holding securely. Because this is a sleep-adjacent item that sits against a baby's whole body for extended stretches, it also covers the safety details in more depth than a typical accessory pattern: reinforced buttons, no loose ties anywhere on the piece, and a pom-pom finished so it can't shed loose strands.
Buntings are a genuinely practical gift for exactly the season most baby items don't cover well: the newborn stretch when a baby is too small for a full sleep sack but still needs something warmer and more contained than a loose blanket for a stroller ride or a car seat transfer. A wearable, hooded, fully enclosed piece like this handles that gap in a way a flat blanket simply can't.
Materials
- About 350–450 yards of soft worsted or chunky-weight cotton-blend yarn
- 5mm hook
- Two large buttons plus small fabric or felt backing discs
- Small amount of yarn for a securely stitched pom-pom (or a purchased pom-pom trim)
- Yarn needle, sewing needle and thread, scissors, stitch markers
Abbreviations (US terms)
| Abbr. | Means |
|---|---|
| sc | Single crochet |
| inc | Increase |
| dec | Decrease |
| st(s) | Stitch(es) |
See our abbreviations glossary for the full list including UK terms.
Notes
- Worked as one wide body panel from the bottom up, in a soft cotton-blend yarn.
- The hood continues directly from the body's top edge, it is not seamed on as a separate piece.
- This item is intended for supervised use; follow standard safe-sleep guidance if used at bedtime.
Pattern
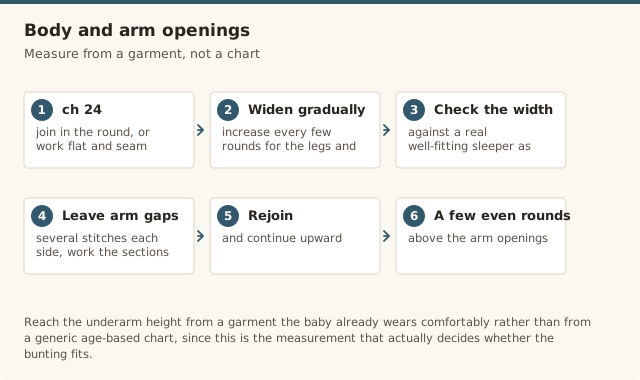
Ch 24, join in the round (or work flat and seam later, depending on preference). Rnd 1: sc around (24). Work even for several rounds, increasing gradually every few rounds to widen the base to accommodate the body and legs comfortably, checking width against an actual well-fitting sleeper as you go.
Continue working even, increasing width gradually as needed, until you reach the height measured from an actual garment for where the underarm should sit. Leave a gap of several stitches on each side for the arm openings (work back and forth briefly across the front and back sections separately, or chain across the gap and continue in the round, depending on your preferred method), then rejoin and continue upward.
Work a few more rounds even above the arm openings, then begin the hood transition: rather than fastening off and seaming on a separate hood, continue the same working method directly upward, gradually shifting from the body's round shape toward the narrower, front-to-back curve of a hood.
Work the hood at the gauge specified (not looser), continuing until the hood reaches a comfortable depth for the baby's head, then decrease at the back to close the top seam smoothly. Check the finished hood's circumference against the baby's actual head measurement before finishing.
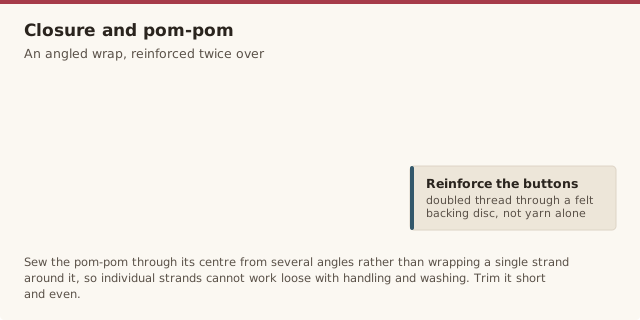
Work the front opening as a wrap-style overlap rather than a straight center seam, one side extending further than the other so it closes at an angle. Mark and sew on two buttons at the overlap points, using doubled sewing thread through a small fabric or felt backing disc on the inside for reinforcement, not yarn alone through the crochet fabric.
Make a small pom-pom and trim it short and even. Stitch it to the hood's peak by sewing directly through its center multiple times from different angles, rather than tying it on with a single wrap of yarn, so individual strands can't work loose with handling and washing.
The one-piece hood join
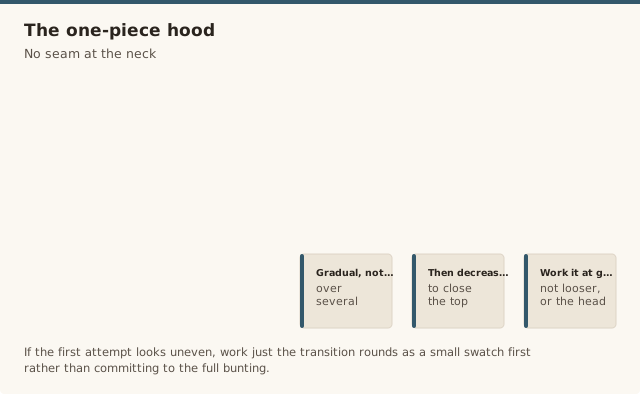
Working the hood as a direct continuation of the body's top edge, rather than crocheting it separately and seaming it on afterward, does two genuinely useful things at once. First, it removes a seam from exactly the spot that gets the most contact with a baby's head and neck, which means one less ridge of fabric that could feel scratchy or uncomfortable against sensitive skin. Second, it's simply warmer, since a seam is a small gap in the fabric's continuity no matter how neatly it's sewn, and a continuous piece has no such gap at the join.
The trickiest part of this transition is judging when to start shifting the stitch pattern from the body's round shape toward the hood's narrower curve. Do this gradually over several rounds rather than as a single abrupt change, tapering the width in small increments so the resulting shape curves naturally around the head rather than creating a visible corner where the body ends and the hood begins.
If your first attempt at this transition looks a little uneven, it's a genuinely common thing to need a second try at, working a swatch through just the transition rounds on a smaller scale first, without committing to the full bunting, is a reasonable way to get a feel for the pacing before working it for real.
A note on softness and safety
Check the button attachments and the pom-pom stitching regularly as the piece gets used and washed, since repeated handling and machine washing both put more stress on these points than a single day of normal wear would suggest. A quick check before each use, rather than assuming the original stitching will hold indefinitely, is a reasonable habit for any handmade item that goes directly on a baby.
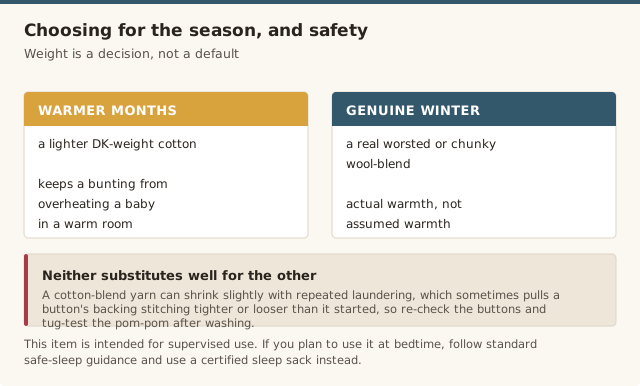
Choose yarn weight deliberately for the season the bunting will actually be used in, rather than defaulting to whichever weight you happen to have on hand. A lighter DK-weight cotton keeps a warmer-month bunting from overheating a baby, while a genuine worsted or chunky wool-blend gives real warmth for winter use, and neither substitutes well for the other.
Sizing and safety mistakes
Fix: check the stated body width against a well-fitting sleeper the baby already wears, and add width at the base rather than just the length if it runs narrow.
Fix: work the hood transition rounds at the gauge specified rather than looser, and check the finished hood circumference against the baby's actual head measurement.
Fix: measure from an actual well-fitting garment for armhole placement rather than guessing proportionally.
Fix: sew each button on with doubled sewing thread through a reinforcing backing, not just yarn through the fabric, and check them regularly as the piece gets washed.
Fix: choose yarn weight deliberately for the season, a lighter DK-weight cotton for warmer months, worsted or chunky wool-blend for winter, don't default to one weight regardless of when it'll be used.
Once the bunting has been through a few wash cycles, take a moment to re-check every safety detail rather than assuming the original construction still holds exactly as finished. A cotton-blend yarn can shrink slightly with repeated laundering, which sometimes pulls a button's backing stitching tighter or looser than it started, and the pom-pom's core stitching is worth a quick tug-test after washing too, since machine agitation is a genuinely different kind of stress than everyday handling.
Our pick for baby-soft yarn
Bernat Baby Blanket, Little Dove
A genuinely gentle, machine-washable chunky-weight yarn suited to an item worn against a baby's whole body for extended periods, giving real warmth without the scratchiness some wool blends have.
View on Amazon →Baby bunting FAQ
What age range does this fit, and how do I size it up?
This pattern is written for 0-6 months. To size up for an older baby, add width at the base in multiples of the stitch repeat and add extra length before the arm openings, checking both measurements against an actual well-fitting garment the baby currently wears rather than a generic age-based chart.
What yarn is safest and warmest for a baby item like this?
A soft, machine-washable cotton-blend yarn in a worsted or chunky weight, chosen deliberately for the season rather than defaulting to one weight year-round. A lighter DK-weight cotton suits warmer months, while a chunkier wool-blend suits genuine winter warmth.
How does the button closure work day-to-day?
The front overlaps in a simple wrap style and closes with two buttons, sewn on with reinforced double-thread stitching or backed with a small fabric disc so they resist working loose with normal handling and regular washing.
Is this safe for unsupervised sleep?
Answering this honestly: no handmade item, crocheted or otherwise, should be treated as a certified sleep-safety product. This bunting is intended for supervised use. If you plan to use it at bedtime, follow standard safe-sleep guidance for infants and use a properly fitted, certified sleep sack for unsupervised crib sleep instead.
How much yarn does the project take?
About 350-450 yards of worsted or chunky-weight yarn for the 0-6 month size, depending on final length and how densely you work the stitch pattern.
What's the best gifting timing, baby shower or after birth?
A baby shower gift usually has to be made without a confirmed size, so this pattern's 0-6 month range is a genuinely safe bet either way. An after-birth gift lets you check the newborn's actual measurements first if you want a snugger fit at the smaller end of the range.
CrochetGuides is a participant in the Amazon Services LLC Associates Program. As an Amazon Associate we earn from qualifying purchases, at no extra cost to you.