Crochet Laptop Sleeve Pattern: Thick & Protective
Protect your tech with a sturdy, custom-sized crochet laptop sleeve made using dense stitches for extra cushioning.
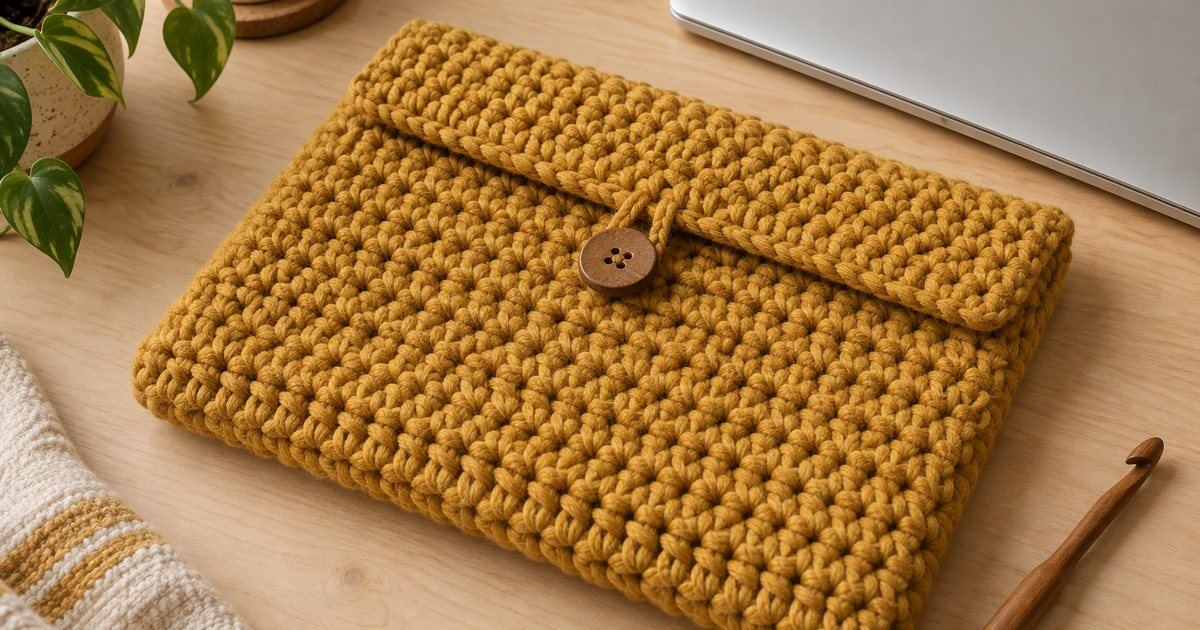
AI-generated illustration, not a photograph of the finished item. About our images
Store-bought laptop sleeves are often generic, overpriced, and lack real personality. Making your own tech accessories is one of the most practical projects you can tackle. This pattern helps you create a heavily padded, custom-sized case that actually fits your specific device snugly without sliding around or leaving corners exposed to bumps.
The secret to a good laptop sleeve is choosing the right yarn and stitch combination to create a dense, shock-absorbing fabric. Instead of delicate lacy patterns, we will use a sturdy stitch worked in a heavy-weight yarn. Whether you are protecting a sleek tablet or a bulky work laptop, this straightforward guide walks you through sizing, construction, and adding a secure closure.
Choosing the Right Yarn and Hook Size
When making a protective sleeve, yarn choice is far more important than color or brand. You want a fiber with minimal stretch and high durability. 100% mercerized cotton or a sturdy wool-acrylic blend works best because they hold their shape well and resist sagging over time. Avoid slippery bamboo or delicate mohair, as they lack the structural integrity needed to shield your electronics from daily bumps and drops.
Pair your chosen yarn with a hook size that is one or two sizes smaller than recommended on the yarn label. This creates a tight, stiff fabric with very little space between the stitches, preventing your laptop corners from poking through. A dense fabric also means you rarely need to add a fabric lining, keeping the project simple and beginner-friendly.
- Use heavy worsted weight or bulky yarn for natural thickness.
- A smaller hook size creates the dense, protective gauge you need.
- Cotton yarn offers great durability and structure for tech accessories.
Measuring and Customizing Your Dimensions
Every laptop and tablet has different measurements, which is why working from a rigid pattern rarely yields a good fit. Start by laying your device flat and measuring its width, height, and thickness with a tape measure. You will want your initial foundation chain to match the width of your laptop plus a tiny bit of ease so it slides in smoothly without a struggle.
Keep in mind that crochet fabric has a tendency to stretch slightly with weight. It is always better to err on the side of a slightly snug fit rather than a loose one. As you work your rows upward, pause occasionally to hold your work directly against the device to check your progress and adjust your row count accordingly.
- Measure width, height, and depth before starting your foundation chain.
- Add a quarter-inch of ease for smooth insertion and removal.
- Check your work against the device every few inches.
Selecting a Dense, Protective Stitch
Standard double crochet stitches leave far too many gaps for a secure tech sleeve. Instead, rely on the humble single crochet worked in the back loop only, or step it up with the thermal stitch if you want extreme padding. These techniques stack the yarn tightly, creating a thick barrier that absorbs minor impacts and keeps stray pen tips or keys in your bag from scratching the surface.
If you want a bit of visual interest without sacrificing protection, the half double crochet worked in the third loop creates a lovely ribbed texture that adds extra thickness. Whichever stitch you choose, maintain an even tension throughout your rows so the finished sleeve looks neat and professional on all sides.
- Single crochet provides a solid, gap-free fabric.
- Thermal stitch doubles the thickness for maximum padding.
- Consistent tension ensures straight edges and a professional finish.
Seaming and Adding a Secure Closure
Once your main rectangle reaches twice the height of your laptop plus the flap length, fasten off and fold it in half. Use a whip stitch or mattress stitch with a matching strand of yarn to seam the two side edges securely. Make sure your seams are tight and knot them firmly at the corners where stress is highest.
For the closure, you can crochet a simple loop extension that fastens over a sturdy wooden button sewn onto the front body of the sleeve. Alternatively, a length of velcro sewn securely to the inside flap works wonderfully if you prefer a streamlined look. Test the closure mechanism before calling the project finished.
- Fold the completed rectangle in half and seam the two side edges.
- Reinforce the bottom corners to handle the weight of the device.
- Add a button, loop, or velcro strip to keep the laptop securely inside.
Frequently asked questions
Do I need to line my crochet laptop sleeve with fabric?
Not usually. If you use a dense stitch like single crochet with heavy cotton yarn, the fabric is thick enough on its own. However, adding a flannel or cotton lining is a great option if you want extra scratch protection.
What is the best yarn for a laptop sleeve?
100% mercerized cotton or a sturdy cotton-acrylic blend is ideal. They offer great durability, minimal stretch, and enough structure to protect your device from bumps.
How do I make sure the sleeve isn't too loose?
Use a hook size smaller than the yarn label recommends to create a tight gauge. Measure your laptop before starting and hold your work against the device as you go to check the fit.
Can I adapt this pattern for a tablet or e-reader?
Yes! The sizing method is completely customizable. Just take the specific measurements of your tablet, iPad, or e-reader and adjust your foundation chain and row count to match.
How do I clean a handmade crochet laptop sleeve?
If you used cotton yarn, you can typically hand wash the sleeve in cool water with mild detergent and lay it flat on a towel to dry completely before inserting your tech device again.