Free Crochet Pullover Sweater Pattern (Raglan)
A closed, raglan-seamed pullover built from the same rectangle-panel approach as our cardigan, just without the open front and button band.
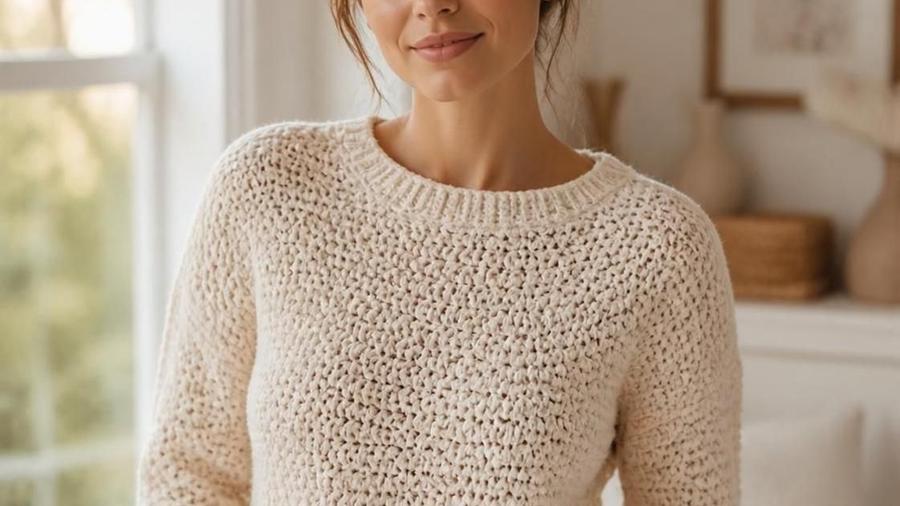
Once our cardigan pattern had been live for a while, the question I got most often was some version of "can I just close the front and make this a pullover instead?" The honest answer was almost, but not quite. A cardigan's open front forgives a lot: if the neckline sits a little wide or the panels aren't perfectly matched, a button band and an open front hide most of it. A pullover has nowhere to hide. It has to actually go over someone's head and then sit correctly once it's on, which changes a few things about how you build it.
The panel construction itself carries over directly: a back rectangle, two front rectangles seamed together (this time down the whole center front, not left open with a button band), and two sleeves. What's different is the shoulder line. Rather than a straight seam or a set-in sleeve, this pattern uses raglan shaping, diagonal seam lines running from each underarm up to the neckline, which is both easier to sew accurately as a beginner and more forgiving of small fit variations than a set-in sleeve cap.
It's worked flat in half double crochet rather than single crochet, which gives a smoother, less visibly holey fabric that reads more like a knit sweater than a typical crochet garment. Below is the full pattern in US terms, with sizing guidance, the neckline-stability fix that keeps a pullover from stretching out with no button closure to hold its shape, and the raglan-alignment habit that saves you from mismatched seams.
Materials
- About 1,100–1,300 yards of worsted-weight yarn (size M-L; see sizing section for other sizes)
- 5mm (US H-8) crochet hook
- Yarn needle, scissors, stitch markers (at least 8, for marking raglan lines on all 5 panels)
- Measuring tape
Abbreviations (US terms)
| Abbr. | Means |
|---|---|
| ch | Chain |
| sc | Single crochet |
| hdc | Half double crochet |
| st(s) | Stitch(es) |
See our abbreviations glossary for the full list including UK terms.
Gauge
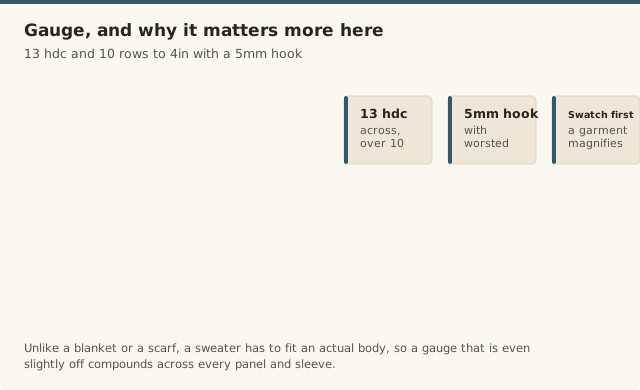
13 hdc and 10 rows measures about 4in / 10cm square with a 5mm hook and worsted yarn. Swatch and adjust hook size before starting; a garment this size magnifies even a small gauge difference across every panel.
Notes
- Worked flat in rows throughout, in half double crochet unless noted.
- Panel width in the instructions below is for size M-L; see the sizing section to calculate other sizes from your gauge swatch.
- Mark raglan seam lines on all 5 panels with stitch markers before seaming any of them.
Pattern
Chain to your calculated panel width (see sizing section) plus 2. Hdc in 3rd ch from hook and each ch across. Ch 2, turn. Hdc in each st across. Repeat until the panel measures 24in / 61cm from the foundation, or your desired body length. Fasten off.
Work each front panel at half the back panel's width (since two front panels together equal the back panel's width once seamed at center front), following the same row-by-row instructions as the back panel until it matches the back panel's length. Fasten off each.
Chain to your calculated upper-sleeve width plus 2. Hdc in 3rd ch from hook and each ch across. Ch 2, turn, hdc across. Repeat for 4 rows even. Begin tapering: dec 1 st at each end every 4th row (working a regular hdc decrease by working 2 sts together) until the sleeve reaches your desired cuff width, then continue even to the desired sleeve length. Fasten off.
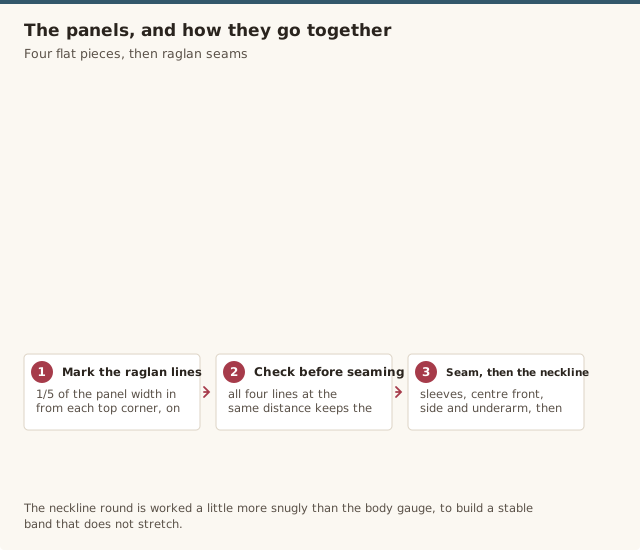
On the back panel, place stitch markers a consistent distance in from each top corner (roughly 1/5 of the panel width) to mark where each raglan seam will run diagonally down to the underarm. Repeat the same marker placement, at the same distance from the corresponding edge, on both front panels and at the top of both sleeves. Checking that all 4 raglan lines sit at the same marked distance before seaming anything is what keeps the finished raglan symmetrical.
Seam each sleeve's raglan line to the corresponding raglan line on the back panel and the matching front panel, working from the marked point down to the underarm on both sides of each sleeve. Seam the two front panels together down the center front, from the hem up to where the neckline shaping begins. Seam the side seams (back to each front panel, hem to underarm) and the sleeve underarm seams.
Join yarn at the neckline opening. Work 2-3 rounds of sc firmly around the entire neckline, working the stitches a little more snugly than your body gauge to build a stable, non-stretchy band. Join, fasten off, weave in all ends.
Why raglan seams suit a first sweater
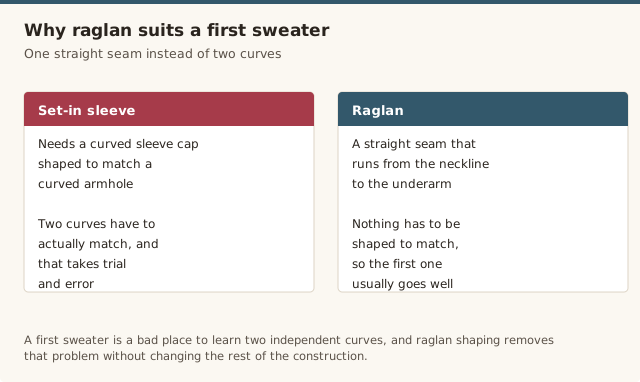
A set-in sleeve needs a curved sleeve cap shaped to match a curved armhole, and getting those two curves to actually match takes real trial and error even for experienced makers. Raglan shaping sidesteps that problem entirely: the seam is a straight diagonal line running from the underarm to the neckline on all four sides (both sleeves, both body sides), which is far easier to mark accurately with stitch markers and far more forgiving if your gauge shifts slightly partway through a panel. It's also, not coincidentally, one of the most common shoulder constructions in both knit and crochet beginner sweater patterns for exactly this reason.
Sizing by bust measurement
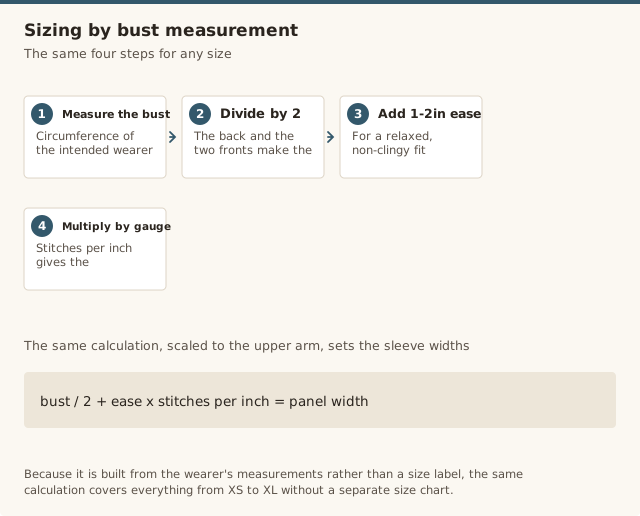
Work a gauge swatch first, in the same yarn and hook you'll use for the sweater, and count how many stitches per inch it produces. Take the intended wearer's bust measurement, divide by 2 (since the back panel and the two front panels combined make up the full circumference), add 1-2in of ease for a relaxed, non-clingy fit, then multiply that target width by your swatch's stitches-per-inch to get your foundation chain length. The same calculation, scaled to the upper arm and wrist measurements, sets your sleeve widths. This gauge-based approach works for any size from XS through XL without needing a separate size chart, since it's built from the wearer's actual measurements rather than a generic size label.
Yarn choice, care, and washing
Cotton-blend yarn breathes well and holds crisp stitch definition but runs heavier than wool at an equivalent gauge, which matters over a full garment's worth of fabric. Wool is lighter and warmer for its weight but generally needs a gentler wash. Acrylic is the lowest-maintenance option and often the most affordable, though it doesn't breathe as well and can feel warmer to wear in mild weather. Whichever you choose, hand wash or use a gentle cold machine cycle, and always dry flat rather than hanging, since a wet garment this size can stretch permanently out of shape under its own weight if left hanging to dry.
Raglan-specific troubleshooting
Fix: work 2-3 rounds of tight single crochet (or reverse single crochet for extra structure) around the neckline as a finishing band, worked snugger than your body gauge specifically to resist stretching.
Fix: mark the raglan line on all 5 panels with locking stitch markers before seaming any of them, and check that all 4 lines fall the same distance from their respective corners before committing to a single stitch of seaming.
Fix: check the neckline's actual circumference against a sweater the wearer already owns and likes, not just your gauge math, before finishing the neckband; the neckband round itself can also be worked slightly looser if the opening feels tight.
Fix: spread the decrease rounds evenly every 4th row across the whole sleeve length rather than clustering them all near the cuff at the end.
Fix: swap to a DK or light worsted yarn instead of a full worsted weight if the fabric feels dense; half double crochet in a lighter yarn still gives the same smooth texture with noticeably better drape.
Our pick
Lion Brand Wool-Ease Yarn
A wool-acrylic blend worsted yarn that balances warmth, drape, and easy care, a solid choice for a garment-weight sweater project.
View on Amazon →Sweater FAQ
How do I know what size to make?
Measure the intended wearer's bust circumference and divide by 2 to get the width each panel (back and each front piece) needs to measure once seamed, adding 1-2in of ease for a relaxed fit. Work a gauge swatch first and use it to calculate how many stitches across gets you to that panel width.
What's the best yarn for a wearable sweater?
Cotton-blend yarn is breathable and holds its shape well but can feel heavier than wool at the same gauge. Wool is warm and lightweight but needs gentler washing. Acrylic is the easiest care and most affordable, though it breathes less and can feel warmer to wear than natural fibers. Any of the three works for this pattern; choose based on climate and care preference.
How much yarn do I need for XS through XL?
Roughly 900-1,000 yards for XS-S, 1,100-1,300 yards for M-L, and 1,400-1,600 yards for XL, in worsted weight. Buy an extra skein beyond your estimate for a garment this size, since running short partway through a panel is a much bigger setback than with a smaller project.
Why does gauge matter so much for a garment like this?
Unlike a blanket or a scarf, a sweater has to fit an actual body, so a gauge that's even slightly off compounds across every panel width and sleeve measurement. Always swatch before starting, the same advice we give in our cardigan pattern, since the two garments share this exact risk.
How do I wash and care for a crochet sweater?
Hand wash or use a gentle machine cycle in cold water, and always lay flat to dry rather than hanging, since a wet crochet garment can stretch out of shape under its own weight if hung. Reshape gently while damp and let it dry completely before wearing.
Can I adjust the sleeve length?
Yes, simply work more or fewer rows before starting the cuff taper for a longer or shorter sleeve, trying the sleeve on periodically against the wearer's actual arm if possible rather than relying purely on a measured length.
Can I add stripes or color-blocking to this pattern?
Yes, and half double crochet's smooth, even rows make colour changes read cleanly. Plan stripe placement in the body panels before starting, since the raglan seams will visually interrupt a stripe pattern where two panels join, which is worth accounting for in your color plan.
Can a beginner realistically finish this as a first garment?
Yes, if you're already comfortable with basic half double crochet and can follow a gauge swatch. The rectangle-based construction and raglan seaming are more forgiving than a fitted, shaped garment, and it's genuinely a reasonable choice for a first sweater rather than something to work up to.
CrochetGuides is a participant in the Amazon Services LLC Associates Program. As an Amazon Associate we earn from qualifying purchases, at no extra cost to you.