Free Crochet Cardigan Pattern for Beginners
A boxy, oversized cardigan worked as five flat rectangles — no shaping, no fancy stitches, just single crochet and a few confident seams.
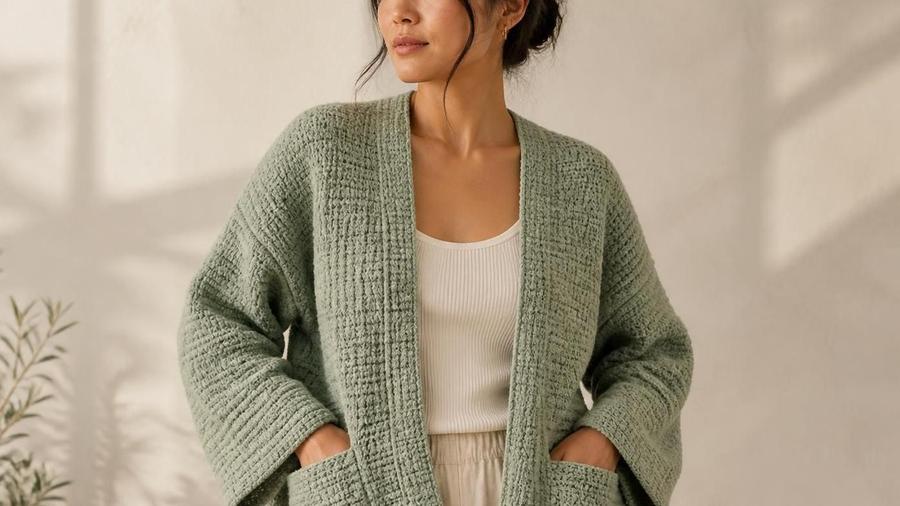
I still have the first cardigan I ever crocheted hanging in my wardrobe, and the sleeves are, frankly, a crime. I'd only ever made flat things before — a scarf here, a dishcloth there — and I assumed a cardigan was just a bigger version of the same. It isn't. A cardigan is usually the first real garment a person makes, and the part that trips everyone up is never the crochet itself. It's the measuring. You can work every single stitch perfectly and still end up with a sleeve that reaches your knees if you skip the gauge swatch. So before you cast on anything, I want to walk you through this the way I would in one of my classes: slowly, with real numbers, and with full permission to unravel.
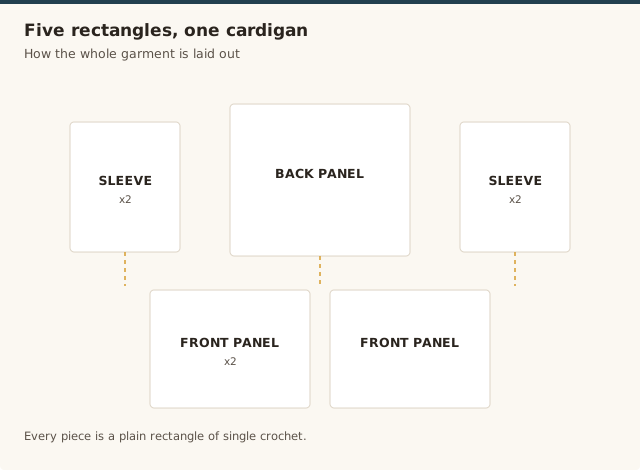
This pattern keeps things deliberately simple. Instead of shaping armholes and necklines and wondering where the decreases go, we crochet five flat rectangles — a back, two front panels, and two sleeves — and sew them together into a relaxed, boxy cardigan that actually fits and forgives small mistakes. It's worked entirely in single crochet in US terms, so if you can chain and single crochet, you can make this. The real skill is in the gauge and the seaming, and I'll hold your hand through both.
Materials
- 5–6 skeins worsted-weight yarn (about 1,100–1,300 yards total)
- 5.0mm (US size H) crochet hook
- Stitch markers, for marking panel edges and seaming points
- Measuring tape
- Scissors
- Yarn needle, for seaming
- 4–5 buttons, about 1in / 2.5cm across
Abbreviations (US terms)
| Abbr. | Means |
|---|---|
| ch | Chain |
| sc | Single crochet |
| st(s) | Stitch(es) |
| rep | Repeat |
| RS / WS | Right side / Wrong side |
For the full list including UK equivalents, see our abbreviations glossary.
Gauge
14 sc and 16 rows measures about 4in / 10cm square with a 5.0mm hook and worsted yarn. On a fitted garment this matters more than on a scarf — swatch before you start and adjust your hook until your square matches, because a quarter-inch difference per 4in becomes several inches across a whole cardigan.
Notes
- Written in US terms and worked flat in rows. The ch 1 at the start of each row does not count as a stitch, so your first sc always goes into the same stitch you just worked.
- This makes one oversized adult size with a finished bust of about 46in / 117cm. The resizing formula in the sizing section scales it up or down.
- New to following written patterns? Our how to read a pattern guide walks through the shorthand above.
- Blocking your panels before seaming makes the seams line up beautifully — see how to block crochet for the full method.
Choosing your yarn & colour
For a first cardigan, I tell every student the same thing: pick a worsted-weight (category 4) yarn in a light or mid tone, and pick something you actually want to wear. Worsted is forgiving because it's thick enough to hide slightly uneven tension but light enough that a full cardigan doesn't feel like a suit of armour. A soft acrylic or an acrylic-wool blend is my usual recommendation for beginners — it holds its shape, washes without drama, and costs a fraction of what a whole garment in pure wool would. You can absolutely use wool if your budget and skin allow it; just check the ball band so you buy the same fibre and the same dye lot throughout.
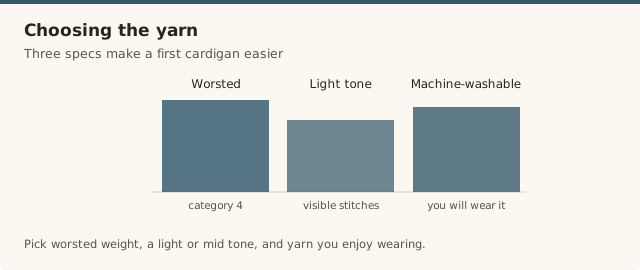
The colour choice is more important than people expect, and it's not just about taste. Dark yarn in black, navy, or deep brown is genuinely harder to see, and when you're counting your rows for a hundred rows straight, seeing matters. Save the midnight charcoal for your second cardigan. Choose a mid tone — oatmeal, sage, terracotta, dusty blue — and the individual stitches will read clearly enough that you can count them at a glance without leaning in.
One thing I've learned across twelve years of teaching is that the texture you get is half the look. Single crochet worked flat gives a dense, squishy fabric that hangs in a satisfyingly heavy way, which is exactly what you want for an oversized cardigan. If your fabric is coming out stiff and board-like, your hook is too small or your tension too tight; if it's flopping and holey, the opposite. Before you commit to five panels, crochet a little swatch and drape it over your hand. If it doesn't feel like something you'd wrap around yourself, tweak the hook now, not after panel three.
If you're after more wearable projects to go with it, our free cowl pattern uses the same single crochet skills in a smaller time investment.
Sizing & gauge
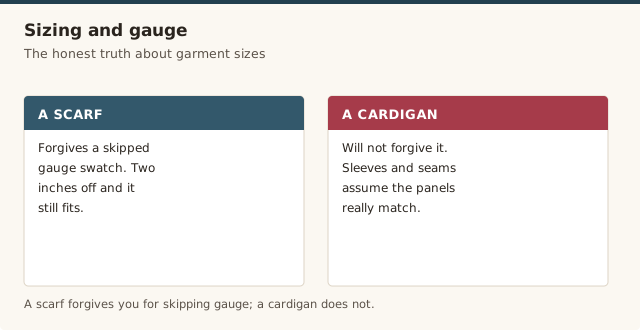
Here's the honest truth I give every first-time garment maker: a scarf will forgive you for skipping gauge, but a cardigan will not. A scarf that's two inches narrower than planned is still a scarf. A cardigan that's two inches narrower than planned doesn't do up. That's why this is the one section I ask you not to skim. The whole pattern hangs on a single number: 14 single crochet and 16 rows should measure 4in / 10cm square on a 5.0mm hook. Make a swatch at least 5in square (a little bigger than the measurement, so the edges don't skew your count), then measure the middle.
If you're getting more than 14 stitches per 4in, your fabric is denser than mine, which means your cardigan will come out smaller — move up a hook size and swatch again. If you're getting fewer, your fabric is looser and the cardigan will come out larger, so move down a hook size. It's a slow few minutes of work that saves you from frogging an entire back panel later. I once watched a student crochet an entire sleeve before measuring it against her own arm, and I promise you the look on her face is the reason I now start every garment class with a swatch.
The finished measurements for this pattern, before seaming allowances, are: back panel 22in / 56cm wide by 26in / 66cm long, each front panel 12in / 30.5cm wide by 26in / 66cm long, and each sleeve 16in / 40.5cm wide by 20in / 51cm long. Sewn up, that lands around a 46in / 117cm finished bust with generous, slouchy ease on most bodies. If it's coming out a different size and you want to understand exactly what went wrong, our fixing project size guide covers the common causes.
To resize, you don't have to redesign anything — you just change the numbers. Each panel's width in stitches is its finished width in inches multiplied by 3.5 (our gauge), and its length in rows is its finished length in inches multiplied by 4. So for a narrower cardigan, make the back 20in instead of 22in: that's 70 stitches plus a starting chain, so chain 71 and work 70 sc. Work the front panels at half the back width plus a little for overlap, and shorten the sleeves to whatever your own arms measure from shoulder to wrist. Keep the construction identical and the garment scales cleanly.
The rectangles: back, front panels & sleeves
Every piece in this cardigan is a plain rectangle of single crochet. There's no increasing, no decreasing, and no counting out shaping — just a starting chain, then row after row until the panel is the right length. The only two numbers to hold onto are how many stitches across (which never changes) and how many rows tall (which you can simply measure instead of counting if you'd rather). Work all five panels with the same tension and the same hook, and they'll seam together like they were made for each other, because they were.
For the back and the fronts, I work the first stitch of every row into the very first stitch, not into the turning chain. The ch 1 turn is just there to bring your hook up to height. That's what keeps the side edges straight and gives you a clean edge to sew into later.
Ch 78. Row 1: sc in 2nd ch from hook and each ch across. (77 sts) Row 2: ch 1, turn, sc in each st across. (77 sts) Repeat Row 2 until the panel has 104 rows, or measures about 26in / 66cm. Fasten off.
Ch 43. Row 1: sc in 2nd ch from hook and each ch across. (42 sts) Row 2: ch 1, turn, sc in each st across. (42 sts) Repeat Row 2 until the panel has 104 rows, matching the back. Fasten off.
Ch 57. Row 1: sc in 2nd ch from hook and each ch across. (56 sts) Row 2: ch 1, turn, sc in each st across. (56 sts) Repeat Row 2 until the sleeve has 80 rows, or measures about 20in / 51cm. Fasten off.
A quick sanity check before you seam: lay the back and one front panel side by side and make sure their lengths match, then hold the two fronts together and check they're identical. Five rectangles that are all the same gauge should sit flat against each other with no easing or stretching needed.
Seaming & assembly
This is the part that turns five boring rectangles into something you'll actually wear, and it's nowhere near as scary as it looks. The whole job is done with a yarn needle and the mattress stitch: you work into the little horizontal bars between stitches, pulling the yarn through so the edges butt together rather than overlap. Keep the tension firm but relaxed — if you yank it tight, your seams pucker and dig in; if you leave it slack, the pieces gap. I tell students to imagine they're drawing the yarn snug, not strangling it.
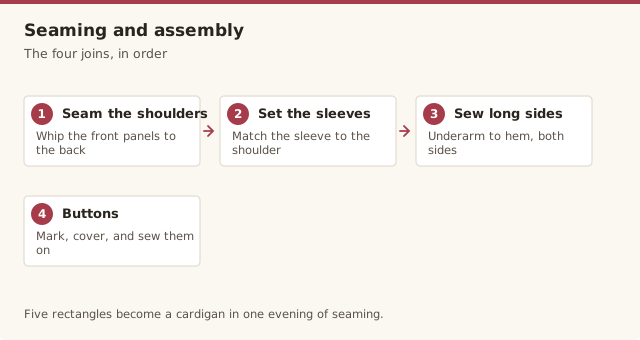
Start with the shoulders. Lay the back panel flat with the right side facing you, then place the two front panels on top of it, right sides together, with their top edges lined up. Sew each shoulder seam along the outer edge for about 4in / 10cm from the shoulder, leaving a wide, comfortable gap in the middle for your neck. The gap is generous on purpose — an oversized cardigan wants a relaxed neckline, not one that rubs.
Next, the sleeves. Fold each sleeve rectangle in half lengthwise, right sides together, and sew the long edge to close it into a tube. Then lay the body flat again and centre each sleeve over its shoulder seam, sewing the top of the sleeve to the body along the armhole opening — roughly 8in / 20cm down from the shoulder on each side. Pin first if it helps, and don't rush this bit: it's the one seam that decides whether the whole cardigan hangs straight.
Finally, close the sides. With right sides together, sew from the bottom hem up to the underarm, then continue that same seam straight down the open edge of the sleeve to the cuff, in one continuous line. Do that on both sides and the body and sleeves close together neatly. Turn it right side out, try it on, and let it settle before you decide it's done — the first try-on is where you'll spot any sleeve you'd like a touch shorter or a neckline you'd like wider.
Care, blocking & buttons
Blocking is the single step that makes a homemade cardigan look handmade instead of homemade, and it's worth the extra evening. Wet the panels (or steam them, if your fibre allows) and pin them out flat to their finished measurements before you seam. For acrylic, a light steam from a few inches away relaxes the stitches without the full soaking that wool prefers. Blocked edges lie flat and meet each other cleanly, which makes the seaming measurably easier. If you've never done it, my how to block crochet guide walks through the whole process step by step.
The buttons come last, and they're the one part you can overthink. Four or five buttons down one front edge is plenty for this relaxed, open style. Sew them to one side, then use the natural gaps between single crochet stitches on the other side as your buttonholes — no fiddly buttonhole chains required. Space them evenly and mark their positions with stitch markers before you commit with the needle, so you're not unpicking and re-sewing buttons at the last minute.
For washing, follow the yarn's ball band, and dry the cardigan flat rather than hanging it. Single crochet fabric is heavy, and a wet cardigan hung by the shoulders will stretch itself into a tunic before you've made your morning coffee. Fold it in a drawer rather than hanging it between wears, too — gravity is not your cardigan's friend over the long term.
Cardigan troubleshooting
Our pick
Stitch marker & tapestry needle kit
Locking stitch markers keep your panel edges and button positions honest, and a sharp tapestry needle is exactly what you need for those tidy mattress-stitch seams.
View on Amazon →Cardigan FAQ
How long does it take to crochet a cardigan for beginners?
Working at a relaxed evening pace, most beginners finish this cardigan in about three to four weeks. The crochet itself is straightforward single crochet; it is the five rectangles that add up, so the time is mostly steady repetition rather than difficulty.
How much yarn do I need for a crochet cardigan?
This oversized adult size uses roughly 1,100 to 1,300 yards of worsted-weight yarn, which is about five to six 100-gram skeins depending on the brand. Always buy one extra skein in the same dye lot so you never run short mid-panel.
Why is my cardigan coming out wider than the measurements say?
If your fabric is wider than expected, your gauge is looser than the pattern's. Crochet a swatch and count stitches per inch; if you have fewer than 14 single crochet across 4 inches, drop down a hook size and try again before starting the real panels.
Can I use a different yarn weight for this cardigan?
You can, but the stitch counts above are tuned to worsted-weight yarn and a 5.0mm hook. With a lighter or heavier yarn, crochet a gauge swatch first and adjust your hook until the fabric drapes nicely, then recalculate each panel so its width in stitches still matches your finished measurements.
How do I sew the pieces together without bulky seams?
Use a yarn needle and mattress stitch, working into the bars between stitches rather than pulling the edges tight. Keep the tension firm but relaxed, and leave a long tail so you can seam each edge in one go without joining new yarn.
Why do my rows have uneven, wonky edges?
Uneven edges usually come from a turning chain that is either counted as a stitch on some rows and not on others, or worked at an inconsistent tension. In this pattern the chain 1 does not count as a stitch, so work it loosely and place your first and last single crochet in the same spots every row.
How do I make this cardigan bigger or smaller?
Keep the rectangle construction and change each panel's stitch count and row count. Decide your finished width in inches, multiply by 3.5 to get stitches, add 1 for the starting chain, and multiply your finished length in inches by 4 to get the number of rows.
CrochetGuides is a participant in the Amazon Services LLC Associates Program. As an Amazon Associate we earn from qualifying purchases, at no extra cost to you.