How to Crochet Invisible: Join, Fasten Off and Hide Ends
Four different techniques get called "invisible". Here's which one you need, and how to do it in UK terms.
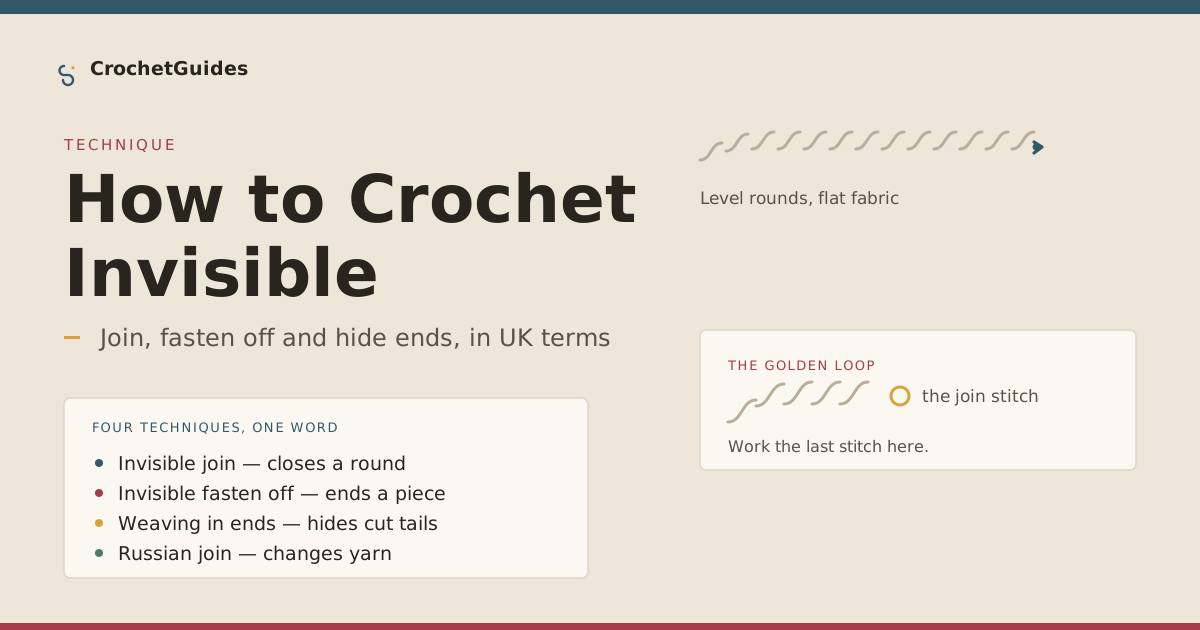
Search for an invisible finish in crochet and you will find four different techniques sharing one word. They solve genuinely different problems, they use different steps, and two of them have nothing to do with each other. Confusing them is why people follow a "perfect" tutorial, do exactly what it says, and still end up with a visible join.
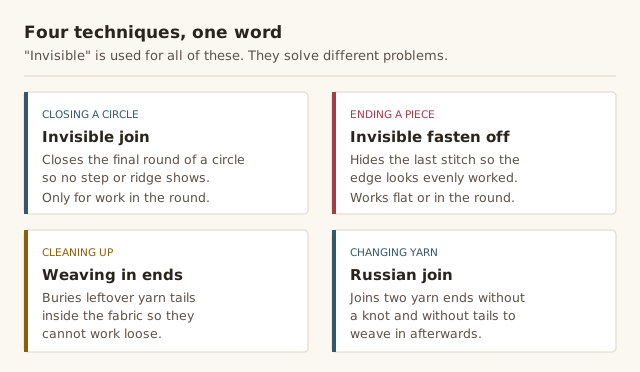
Which technique do you need?
All four are legitimate, but they answer different questions. Work out which one you're actually facing before you start, because the steps are not interchangeable.
| If you want to… | Use | Applies to |
|---|---|---|
| Close the last round of a circle without a step | Invisible join | Rounds only |
| Finish a piece so the edge looks worked | Invisible fasten off | Rows or rounds |
| Stop a cut end working loose | Weaving in ends | Anywhere |
| Change yarn or run out mid-row | Russian join | Rows or rounds |
The invisible join: closing a round flat
When you work in the round, the first stitch of each round sits slightly higher and slightly tighter than the others. That single uneven stitch is why a crocheted circle can drift upwards instead of lying flat, and it's why two people working the same number of rounds end up with visibly different heights.
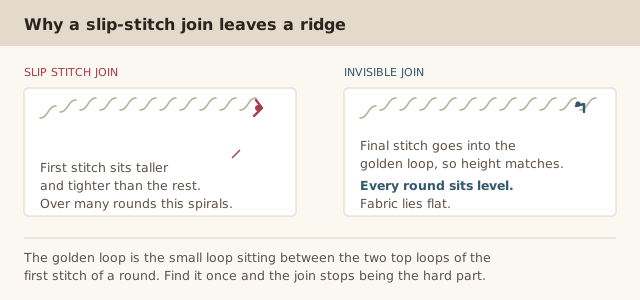
The golden loop is the small loop sitting between the two top loops of the first stitch of a round. Instead of slipping your hook through both loops to close the round, you work the last stitch of your round into that golden loop. The round closes at the same height as everything else, so the seam disappears.
- Croch your round as normal, but leave your final stitch unworked.
- Look at the first stitch of the round, the one you started on. You'll see two loops at the top with a third small loop tucked between them. That's the golden loop.
- Insert your hook into the golden loop, yarn over, and pull up a loop as you would for a normal stitch.
- Complete the stitch as normal to finish the round. The round now closes level with the rest.
- Fasten off as you normally would. Because the join is already tidy, a standard fasten off is now invisible enough.
This method matters most for anything where height is visible: the body of an amigurumi piece, a flat circle, or a round where you've already noticed the fabric turning. It also nudges your row count, because removing one taller stitch per round changes the total height over a long piece — the same effect described in our guide to crochet gauge.
The invisible fasten off: ending a piece neatly
The invisible fasten off hides the very last stitch so the finished edge looks like every other stitch rather than a knot on show. It works in both flat rows and rounds, and it's the technique most people actually mean when they search for this.
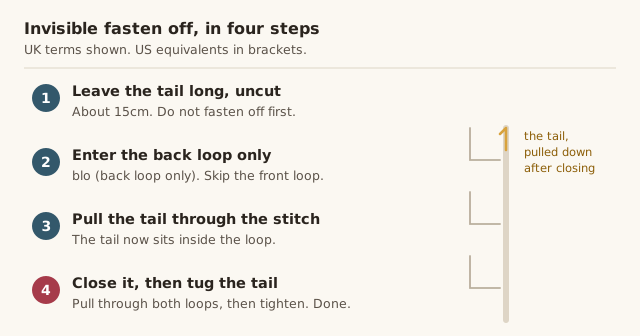
- Leave the tail long and uncut. Around 15cm is enough. Do not fasten off first, because you need the working loop free.
- Slip your hook into the back loop only of the previous stitch, leaving the front loop alone. Abbreviated
blo. - Catch the long tail and pull it through the stitch you just entered, so the tail now sits inside the loop rather than across the front.
- Yarn over and pull through both loops on your hook to close the stitch.
- Tug the tail firmly downward. The stitch cinches, the tail disappears inside it, and nothing shows.
If your last stitch was a tall one, remember that a turning chain can count as that first stitch. If the turning chain is part of your stitch, skip over it and take the back loop of the stitch before it instead, so you don't lose a stitch of height.
This technique is easier on the hand than it looks. You are only using one loop at a time, so it suits anyone who finds working through both loops uncomfortable — our hooks for arthritis guide covers more ways to make crochet easier on your hands.
Hiding yarn ends so they can't work loose
A tail that is woven in only once, in one direction, has a straight path back out. Give it a little tension and it will find it. The fix is simple: change direction each time you change rows.
- Weave the tail through the back loops of four or five stitches along a row.
- Change direction and weave back along the row below, again using back loops.
- Change direction once more on the next row. Three passes in three directions is enough to lock it.
- Stretch the fabric gently, check the tail has not shown through on the right side, then trim it close.
Working along the back of the fabric keeps the tail invisible, but on strongly textured stitches like a shell or popcorn stitch there is no flat back to hide in. In that case run the tail through the bases of the stitches below rather than across their faces, and check the front before you trim. Our full guide to weaving in ends covers how to handle those stitches and how to deal with tails that keep reappearing.
The Russian join: changing yarn with no knot
The Russian join interlocks two yarn ends inside their own fibres, so there is no knot and no long tail to bury afterwards. It's the answer when you run out of yarn half way through a row, or when you want to change colour without a join you can spot.
- Overlap the two ends, then twist one around the other loosely to form a loop, working along the twist for about four turns.
- Take the second yarn end and work it through the loop you just made.
- Pull both ends in opposite directions, as hard as you can, to tighten the join. The twist disappears inside the fibres.
- Cut both tails short. There is nothing left to weave in.
How invisible it looks depends entirely on the fibre, and published advice disagrees on this. Most sources agree it works best on smooth animal fibres such as wool. On cotton, linen and other plant-based yarns, opinions split: some say it works fine, others warn the join will be more visible. Rather than settle it, test it on a swatch in your actual yarn. Thick, loosely spun yarns and high-ply DK also tend to show the join more, so give those a trial run too.
Unlike the invisible join, this technique works anywhere — in the middle of a flat row as readily as in a round. If you would rather not join at all and are happy to carry two yarns through the same stitches, that approach leaves nothing to hide at all; it's explained in our guide to changing colours.
Common mistakes & fixes
Fix: leave it at least 15cm and uncut. You need the working loop open to pull the tail through, and you need the length to bury afterwards.
Fix: the golden loop only exists when a round returns to its own first stitch. In flat rows, use the invisible fasten off instead.
Fix: change direction on each row. A straight path has tension pulling straight along it, which is exactly how tails work loose.
Fix: stretch the fabric gently and look. On textured stitches the tail can ride up to the front, and you can never unpick a trimmed tail.
Fix: that is a cast-on technique for joining circular knitting. Crochet uses different mechanics entirely, and following the knitting version will not work on a hook.
Frequently asked questions
What is an invisible join in crochet?
An invisible join closes the final round of a circle without the small raised seam a slip stitch leaves behind. Instead of slipping the hook through both loops of the first stitch to close the round, you work the last stitch of the round into the golden loop, the small loop sitting between the two top loops of that first stitch. Because the stitch closes at the same height as the others, every round lies flat and the piece stops spiralling upwards.
How long should the yarn tail be for an invisible fasten off?
About 15 centimetres, or 6 inches. That length is enough for the tail to travel through the stitch twice and still have enough left to bury securely in the fabric afterwards. Much shorter and the stitch can loosen; much longer and the excess is awkward to tuck away.
Can I use an invisible fasten off in flat rows, or only in the round?
You can use it in both. The invisible join, however, only applies to work in the round, because it depends on closing a round back to its own first stitch. In flat rows the invisible fasten off is what you want at the end of your work.
What is a Russian join and is it better than a knot?
A Russian join interlocks the two yarn ends inside their own fibres, so there is no knot and no long tail left to weave in afterwards. It is useful when you run out of yarn mid-row or want to change colour without a visible join. How invisible it looks depends on the fibre: it works best on smooth animal fibres like wool, and can be harder to see on cotton, linen or other plant-based yarns.
How do I fix a ridge where each round joins?
The ridge is the first stitch of each round sitting slightly taller and tighter than the rest. You cannot flatten work that is already finished without changing the stitch itself, but you can stop it happening on the next piece by using the golden loop. To soften an existing ridge, use a blocking mat and pin the piece so the join stitches are eased flat, then leave it to dry fully. Our guide to blocking crochet covers the pinning method.
How do I hide a yarn tail so it can't work loose?
Weave the tail through the back of several stitches in more than one direction rather than just once, then trim it close. Going through the same row twice leaves a path that can unravel; changing direction each time locks the tail in place. On textured stitches, weave it along the back of a row rather than across the right side, where it would show.
CrochetGuides is a participant in the Amazon Services LLC Associates Program. As an Amazon Associate we earn from qualifying purchases, at no extra cost to you.