Free Crochet Poncho Pattern for Beginners
Two flat rectangles and one seam — a poncho that only looks complicated.
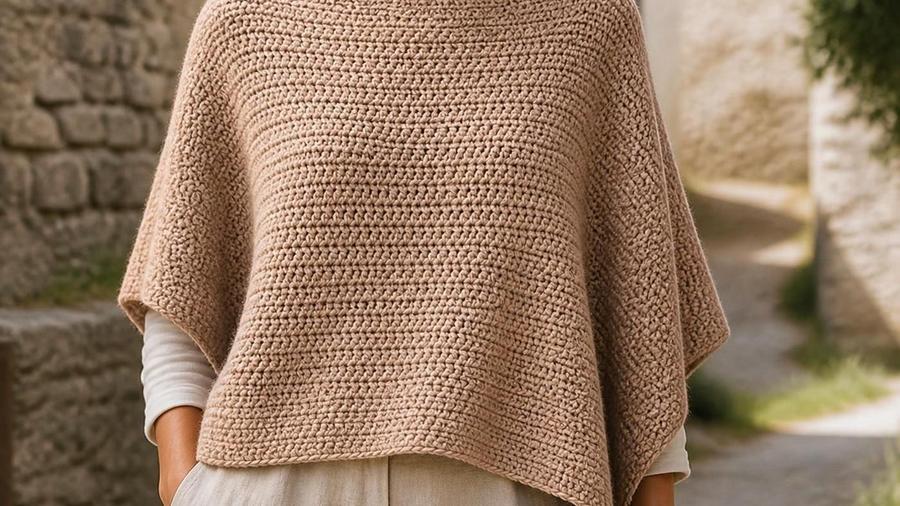
The poncho is the project I recommend to every knitter-turned-crocheter and every total beginner who finishes a scarf and immediately wants something bigger. It looks like a real, wearable garment, but it's secretly just two flat rectangles seamed together — no shaping, no increases, no counting rounds in a circle. I made my first poncho the autumn after I started teaching, in a burnt-orange worsted yarn that pooled in a way I'd never planned, and I still pull it out every year when the weather turns. The whole thing is worked in double crochet, which gives it the drape a poncho needs and grows far faster than single crochet, so you actually finish it before the season ends.
Materials
- 4–5 skeins worsted-weight yarn (about 900–1,100 yards total)
- 6.0mm (US size J) crochet hook
- Stitch markers, to mark the neck opening before seaming
- Scissors
- Yarn needle, for seaming and weaving in ends
Abbreviations (US terms)
| Abbr. | Means |
|---|---|
| ch | Chain |
| dc | Double crochet |
| st(s) | Stitch(es) |
| sl st | Slip stitch |
For the full list including UK equivalents, see our abbreviations glossary.
Gauge
12 dc and 7 rows measures about 4in / 10cm square with a 6.0mm hook and worsted yarn. Gauge matters here for width, since two panels seamed at the shoulders set how the poncho hangs — swatch first if you want a predictable fit.
Notes
- Written in US terms and worked back and forth in rows, turning at the end of each row. The
ch 3at the start of each row counts as the first dc. - You will make two identical rectangles, then seam them together at the shoulders, leaving a gap in the middle for the neck.
- Each rectangle is 72 stitches wide and 49 rows long, for a finished panel of about 24in / 61cm by 28in / 71cm.
- Working your first double crochet project? Our basic crochet stitches guide covers dc step by step.
Pattern
Chain 74.
Dc in the 4th ch from the hook and in each ch across. Turn. (72 dc)
Ch 3 (counts as first dc), dc in each dc across. Turn. (72 dc)
Repeat Row 2. Work until the rectangle measures about 28in / 71cm long (49 rows total). Fasten off, leaving a long tail for seaming.
Repeat the foundation, Row 1 and Rows 2–49 to make an identical second rectangle.
Stack the two rectangles with right sides together, matching all edges. On the top short edge, count 21 stitches in from each outer corner and place a marker; the 30 stitches between the markers stay open for the neck. Whip stitch through both layers from each outer corner to its marker, then fasten off.
Weave in all ends with a yarn needle, including the seaming tails.
Yarn & colour choice
For a poncho you want fabric that drapes rather than stands up stiff, and that's why I reach for a worsted-weight yarn and a 6.0mm hook here — a touch larger than I'd use for a hat. The double crochet opens the fabric up just enough that the two panels hang softly from the shoulders instead of sitting on them like a board. I made the mistake of working a poncho in single crochet once, out of habit, and it came out so dense it felt like a tunic of chain mail; it never hung right no matter how much I blocked it. If you're unsure how the different weights behave, our yarn weight guide explains it properly.
Colour is where a poncho gets interesting, because you're working a lot of yarn across a big flat surface, so any pooling or striping shows up boldly. Solid or heathered yarns are the safest first choice — they let the simple rectangle shape do the talking. A variegated yarn will pool in unpredictable ways on a piece this size, sometimes beautifully, sometimes like a bullseye across your back, so if you're set on a variegated skein, swatch a full 20 stitches wide first so you can see how the colours actually fall before committing to seventy-two stitches a row.
You'll need about 900 to 1,100 yards of worsted weight, which usually means four to five 100-gram skeins, so buy from the same dye lot whenever you can. I once ran out of a rust-coloured yarn one skein shy of finished, and the second dye lot was visibly lighter; I disguised it by frogging back and adding a two-row border stripe so it looked intentional, but I'd rather you just buy the fifth skein up front. If you plan to add fringe or a border, add one more skein on top of that.
Sizing
This pattern makes one generously roomy adult poncho — each rectangle is 24 inches wide and 28 inches long, and the two of them together give you a garment that skims the hips on most people. Because there's no shaping, resizing is just arithmetic. The gauge is 12 double crochet and 7 rows to 4 inches, which means every inch of width is 3 stitches and every inch of length is 1.75 rows. Hold that in your head and you can scale this up or down without ever touching a measuring tape.
To change the width, decide how wide you want one panel, multiply by 3, and chain that number plus two. For a narrower, more fitted look around 20 inches, chain 62 (which gives you 60 double crochet); for a wider, wrap-around drape around 32 inches, chain 98 (for 96 double crochet). To change the length, work 7 rows for every 4 inches you want: 32 inches of length is 56 rows, and a shorter 24-inch poncho is 42 rows.
The neck opening is set by how much of the top edge you leave unsewn. The pattern leaves 30 stitches, or 10 inches, open in the centre, with a 21-stitch seam on each side. If you want a larger opening for a bigger head or a looser neckline, leave 36 stitches open instead and seam only 18 in from each outer corner — the maths still adds up to 72.
Construction & seaming
Here's the part that trips people up on their first poncho, so let me slow down. You are making two identical rectangles. That's it. When they're finished, you stack one on top of the other and sew them together along one short edge, leaving a gap in the middle. The sewn parts become the shoulder seams, the gap becomes the neck hole, and the two rectangles hang down as your front and your back. When it's on, the sides stay open — that's a poncho, not a sweater.
Mark before you sew. The top edge has 72 stitches, so count 21 in from each outer corner and pop a stitch marker into the 22nd stitch on both ends; the 30 stitches between the markers stay open for the neck. With right sides together, whip stitch through both layers using your yarn needle, working from the outer corner to the marker on each side. I prefer a yarn needle and whip stitch for beginners because you can see exactly what you're joining, but you can also slip stitch the seam with your hook if you'd rather not thread a needle. Just keep the tension relaxed so the seam doesn't pucker.
Seam slowly and match the stitches one to one, because it's surprisingly easy to sew the two panels together slightly off, and that twists the whole poncho when it hangs. Lay the rectangles flat, pin or clip the corners, and check that the row edges line up before you commit. If a seam comes out a stitch off, it's usually invisible once worn, but a full row of drift is worth undoing — ten minutes of careful unpicking beats a poncho that's always fighting you.
Care & styling
Worsted-weight acrylic and wool-blend ponchos both benefit from a gentle block before their first wear, mostly to relax the edges and even out your double crochet. Wet the finished poncho, roll it in a towel to press out most of the water, then lay it flat to the finished measurements and let it dry. Our blocking guide walks through the whole thing, and it makes a real difference on the corners, which like to curl inward while you work.
For washing, check your ball band, but most worsted-weight yarns will take a gentle cool machine cycle in a mesh bag, dried flat. Never hang a wet poncho by the shoulders to dry — the weight of the soaked fabric will stretch the neck seam out of shape. I fold mine once over the bar of a drying rack so the neckline stays put.
A plain rectangle poncho is a blank canvas, so don't be shy about making it yours once the seams are done. Add fringe along the bottom edge, work a few rounds of a border around the neckline for a finished look, or belt it at the waist when you want a shape. I wear mine over a long-sleeved tee with the seam forward so the open sides sit at my elbows; a friend of mine turns hers so a point hangs down the front like a cape. Both work, and neither requires touching the pattern.
Common mistakes & fixes
Our pick
Cotton worsted-weight yarn, 3-pack
Three coordinating skeins in one order — two packs cover a full adult poncho with a little left over for a border.
View on Amazon →A beginner-friendly poncho walkthrough, useful for seeing how the two rectangles are seamed into shape.
Frequently asked questions
How much yarn do I need for a crochet poncho?
Roughly 900 to 1,100 yards of worsted-weight yarn, or four to five 100-gram skeins, for the adult size. Add an extra skein if you are enlarging the panels or adding a border or fringe.
Can a complete beginner crochet a poncho?
Yes, it is two flat rectangles with no shaping, worked in one stitch (double crochet). If you can chain and double crochet, and seam a straight line, you can finish this poncho.
How do I resize this poncho pattern?
Because the gauge is 12 double crochet to 4 inches, every inch of width is 3 stitches. Decide your desired panel width in inches, multiply by 3, and chain that number plus two. For length, work 7 rows for every 4 inches. The sizing section below gives worked examples.
How do I make the neck opening bigger?
Leave more of the top edge unsewn. Instead of leaving the centre 30 stitches open, leave 36 stitches open and seam only 18 stitches in from each outer corner for a roomier neckline.
Can I use a different yarn weight?
Yes, though the stitch counts above are for worsted weight with a 6.0mm hook. With a bulkier or lighter yarn, make a gauge swatch, then recalculate your chain from your own stitches per inch rather than following 72 blindly.
Why are my rectangles coming out wobbly at the edges?
This usually means a stitch was added or dropped at the row ends, often by working into the turning chain. Count 72 stitches at the end of a few rows and you will catch it early, before the drift becomes visible.
How do I add fringe to a crochet poncho?
Cut lengths of yarn about twice as long as the fringe you want, fold each in half, pull the loop through a stitch on the bottom edge with your hook, then draw the ends through the loop and tighten. Space them evenly, or add them only to the two bottom corners for a lighter look.
CrochetGuides is a participant in the Amazon Services LLC Associates Program. As an Amazon Associate we earn from qualifying purchases, at no extra cost to you.