Free Crochet Heart Pattern for Beginners
Two little lobes joined into one soft, stuffed heart — the perfect first project for learning increases, decreases, and shaping.
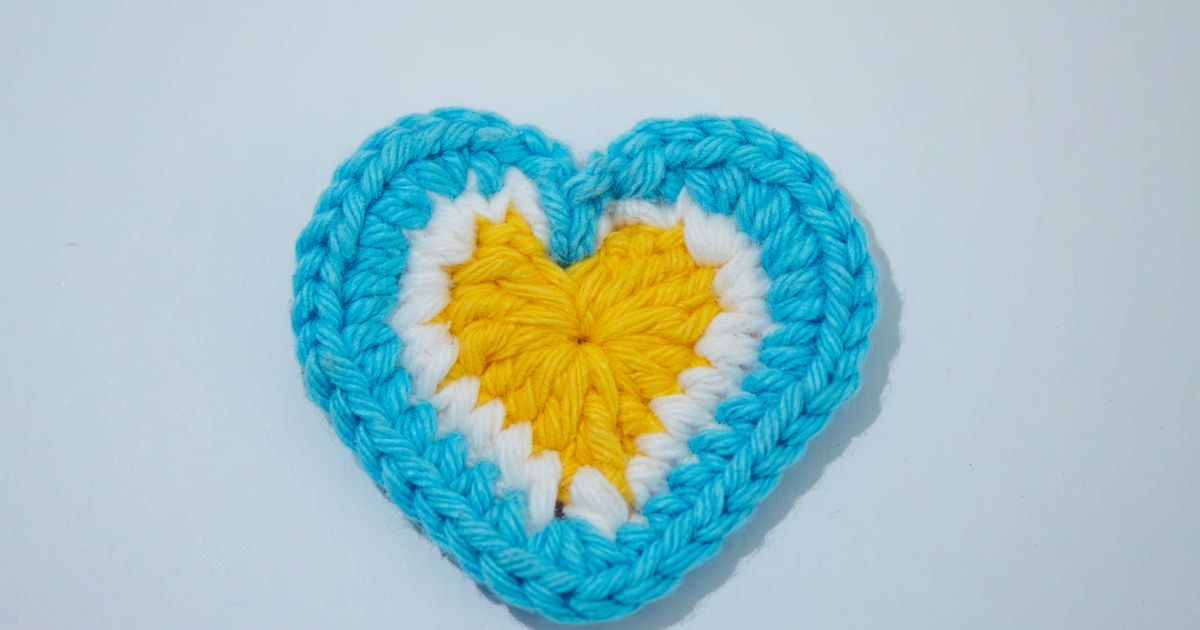
In the run-up to Valentine's Day, my classroom fills with more red yarn than I see all year, and the heart is the project everyone asks for. It's the first thing my students make that they're genuinely excited to hand to someone else, and that changes how they crochet — suddenly the wonky stitch in the middle matters, because it's going on a card for a partner or a teacher, not in the back of a drawer. I've watched a beginner frog an entire lobe three times in one evening rather than let a visible hole go into a gift, which tells me the heart teaches something a plain square never does: pride in the finished thing. If you can make this, you understand increases, decreases, and joining two pieces, which is most of what amigurumi is.
This version is worked in the round in US terms, the same way I teach the mini amigurumi ball. You make two identical lobes, join them into one round, then taper down into a point while you stuff. If the ball was your first taste of shaping, the heart is the natural next step — same skills, with a join and a proper point to aim for.
Materials
- Small amount of worsted-weight yarn (about 30–40 yards in your heart colour)
- 3.5mm hook (smaller than standard, for tight stitches that hide the stuffing)
- A palm-sized amount of polyester fiberfill stuffing
- Stitch marker, to track the start of each round
- Scissors
- Yarn needle, for closing and weaving in ends
Abbreviations (US terms)
| Abbr. | Means |
|---|---|
| sc | Single crochet |
| st(s) | Stitch(es) |
| inc | 2 sc in same stitch (increase) |
| dec | Sc 2 sts together (decrease) |
| rnd(s) | Round(s) |
See our abbreviations glossary for the full list including UK terms.
Gauge
Gauge isn't critical for a heart — the goal is a tight, even fabric that hides the stuffing rather than an exact measurement. If you can see fiberfill through your stitches, go down a hook size.
Notes
- Written in US terms and worked in a continuous spiral. If the spiral is new to you, our how to crochet in the round guide walks through it stitch by stitch.
- Round 1 of each lobe begins with a magic ring, so pull that starting tail tight before you move on — a loose ring leaves a hole right in the middle of the heart.
- Stuff gradually while closing the final rounds, pinching the bottom into a point as you go, rather than stuffing all at once at the end.
Pattern
Make a magic ring, 6 sc into ring, place marker. (6 sts)
Inc in every st around. (12 sts)
[sc 1, inc] around. (18 sts)
Sc in every st around, no increases or decreases. (18 sts each round)
Fasten off and leave a short tail — you'll close the gap later with the working yarn from Lobe 2.
Repeat the first five rounds of Lobe 1, but do not fasten off. (18 sts)
With Lobe 2 still on the hook, sc around Lobe 1 (18 sts), then sc around Lobe 2 (18 sts). (36 sts)
Make that first joining stitch snug, and work one stitch into the last stitch of each lobe where they meet, then pull the yarn tight to close the cleft between the two bumps.
Sc in every st around. (36 sts)
[sc 4, dec] around. (30 sts)
Sc in every st around. (30 sts)
[sc 3, dec] around. (24 sts)
Sc in every st around. (24 sts)
[sc 2, dec] around. (18 sts)
Sc in every st around, and begin stuffing now. (18 sts)
Pinch the bottom of the heart into a point as you fill, so the decreases form a visible V rather than a flat base.
[sc 1, dec] around. (12 sts)
Add more stuffing if needed to fill the point evenly.
Dec in every st around. (6 sts)
Fasten off, leaving a long tail. Thread the tail through the front loop of each remaining stitch, pull tight to close the opening, and weave in the end through the centre of the heart.
Colour choice
Red is the obvious answer, but it's worth thinking about how much your yarn will show or hide the shaping. A light or medium colour, like a soft pink or a warm cream, makes your increases and decreases easy to read while you're still learning, which is genuinely helpful when you're counting around the point. Dark red and deep burgundy look richer, but they swallow the stitch definition, so if you go dark, count carefully rather than relying on what you can see. I keep a small ball of bright coral on my classroom shelf for beginners for exactly this reason, and I swap to the deep reds only once a student can read their own work.
Fibre matters too. A smooth worsted-weight cotton or acrylic is the friendliest choice here — cotton holds the heart's shape and shows each stitch cleanly, while a fuzzy or chenille yarn hides mistakes but is much harder to count, and a slick bamboo can be frustratingly slippery on a smaller hook. If you want help narrowing it down, our best yarn for amigurumi guide runs through the trade-offs so you can pick with confidence.
Flat vs stuffed
I've written this as a stuffed heart because it teaches the most — the join, the stuffing, and the tapering decreases are all skills you'll reuse on toys. But a flat heart is a perfectly good, faster alternative, and sometimes it's the better fit for the job. You'd work the two lobes flat in rows of double crochet instead of single crochet in the round, sew the two pieces together, then work a round of double crochet around the outside edge to join them and sharpen the point. Flat hearts are lighter, they sew onto cards and garlands cleanly, and they don't use any stuffing at all, which makes them ideal for classroom or party situations where you're making a dozen at once.
Stuffed hearts are chunkier and feel more like a real gift in the hand — that's the one you give a person rather than stick on a card. The nice thing is that the two versions are closely related, so if you learn the round version first, the flat one will feel like a variation rather than a whole new skill. Whichever you choose, the same principle applies: keep the two halves symmetrical and give the bottom a proper point, and it will read as a heart from across the room.
Sizing
At the counts above you'll end up with a heart roughly 3.5 inches tall, which is a good "hand it to someone" size. To make it bigger, add one more increase round to each lobe — for example [sc 2, inc] to bring each lobe up to 24 stitches — and then add one matching decrease round after joining so the taper stays proportional. The rule that keeps the shape right is symmetry: however many increase rounds you add at the top, add the same number of decrease rounds at the bottom, with a straight round or two in between to keep the lobes from puckering.
If you want a mini heart for a keyring or earrings, go the other way and stop each lobe after Round 3, then join and taper down with one fewer decrease round. The finished count matters less than keeping the increases and decreases balanced; that's the same instinct you'll lean on if you've made the amigurumi ball before, where the two halves of the sphere mirror each other.
Gifting & valentine uses
This is where the heart earns its place. A single stuffed heart tucked into a card is lovely, but the pattern really shines when you make it in multiples: string five or six along a length of yarn for a Valentine's garland, stitch a loop into the top for a hanging ornament, or make a pair as earrings in a fingering weight with a tiny hook. I've had students sew a small heart onto the corner of a scarf or a hat as a signature detail, and the flat version slips into a handmade card with nothing more than a couple of stitches to hold it.
Because each heart only takes about an hour once you're comfortable, they make a genuinely satisfying batch project — a class of beginners can each leave with one to give away, and no two ever come out quite the same. For the same reason, they're a good scrap-buster: keep a little pile of leftover reds and pinks, and every February you'll have exactly what you need without buying anything new.
Common mistakes & fixes
Fix: the taper into the point wasn't worked firmly enough. Keep the
[sc 1, dec] round and the final decrease round snug, and pinch the bottom into a point while you stuff so the decreases form a visible V instead of a flat base.
Fix: this comes from a loose join. Work one snug stitch into the last stitch of each lobe where they meet, then pull the yarn tight before continuing around, and use a scrap of the same yarn to sew the cleft shut from the inside if a gap remains.
Fix: your stitches are too loose for this yarn. Drop to a smaller hook and keep an even tension, especially on the decrease rounds at the bottom, which is where the fabric gets pulled tightest.
Fix: the fiberfill went in unevenly or in one big clump. Add small pinches gradually as you close the final rounds, checking the shape with your fingers between additions instead of cramming it all in at the end.
Fix: the decreases near the point were spaced too far apart or the point wasn't closed evenly. Work the final decrease round into every stitch and pull the closing tail tight through each front loop, then pinch the bottom once more as you weave the tail away.
Fix: the starting tail wasn't pulled tight enough before you worked the second round. Give it a firm tug and check for a gap before you fasten off each lobe; our how to crochet in the round guide shows how to get that first ring snug.
Our pick
Fairfield Poly-Fil Premium Fiber Fill, 32oz
Far more than a single heart needs, but it stays soft and doesn't clump over time, so the same bag will fill every heart, ball, and toy you make afterward.
View on Amazon →A demonstration of working in the round and shaping a curve, useful for seeing how the increase and decrease rounds create the heart's two lobes and point.
Frequently asked questions
How do I join the two lobes without a gap between them?
Join by working the first stitch of Lobe 1 into the very last stitch of Lobe 2 with a snug pull before continuing around. Work one stitch into the last stitch of each lobe where they meet and tug the yarn tight, which closes the centre cleft and stops a hole from forming between the two bumps.
Can I make a flat heart instead of a stuffed one?
Yes. You can work the same two lobes flat in rows of double crochet instead of single crochet in the round, then sew them together and work a round of double crochet around the outside edge to join the pieces and shape the point. It is a faster, flatter alternative that still reads clearly as a heart.
Why does my heart look more like a ball than a heart?
A heart needs a clear taper into a point. If yours looks round, the decrease rounds near the bottom were likely skipped or worked too loosely. Keep the [sc 1, dec] round and the final decrease round even and snug, and pinch the bottom into a point as you stuff so the decreases form a visible V instead of a flat bottom.
Can I make the heart bigger?
Yes. Add one extra increase round to each lobe, such as [sc 2, inc] to reach 24 stitches, then add a matching extra decrease round after joining. Keep the increase and decrease halves symmetrical so the point stays sharp rather than rounded off.
What yarn is best for a valentine heart?
A soft worsted-weight cotton or acrylic works best. Cotton holds the heart's shape and shows the stitches clearly, while plush or chenille yarn hides mistakes but is much harder to count. Any smooth worsted yarn will give you a clean, evenly shaped heart.
How do I stop the stuffing from showing through?
Use a hook one or two sizes smaller than the yarn label suggests and keep an even tension, especially on the final decrease rounds. Tight stitches stop the white fiberfill from peeking through between your pink or red stitches.
How long does this heart take to make?
A finished heart takes about 45 minutes to an hour once you are comfortable with the magic ring and single crochet, which makes it easy to batch a handful for a class party or a Valentine's garland in a single evening.
CrochetGuides is a participant in the Amazon Services LLC Associates Program. As an Amazon Associate we earn from qualifying purchases, at no extra cost to you.