Free Crochet Amigurumi Bear Pattern for Beginners
A simple stuffed bear built from the same shaping as our mini ball pattern, with four limbs and rounded ears added on.
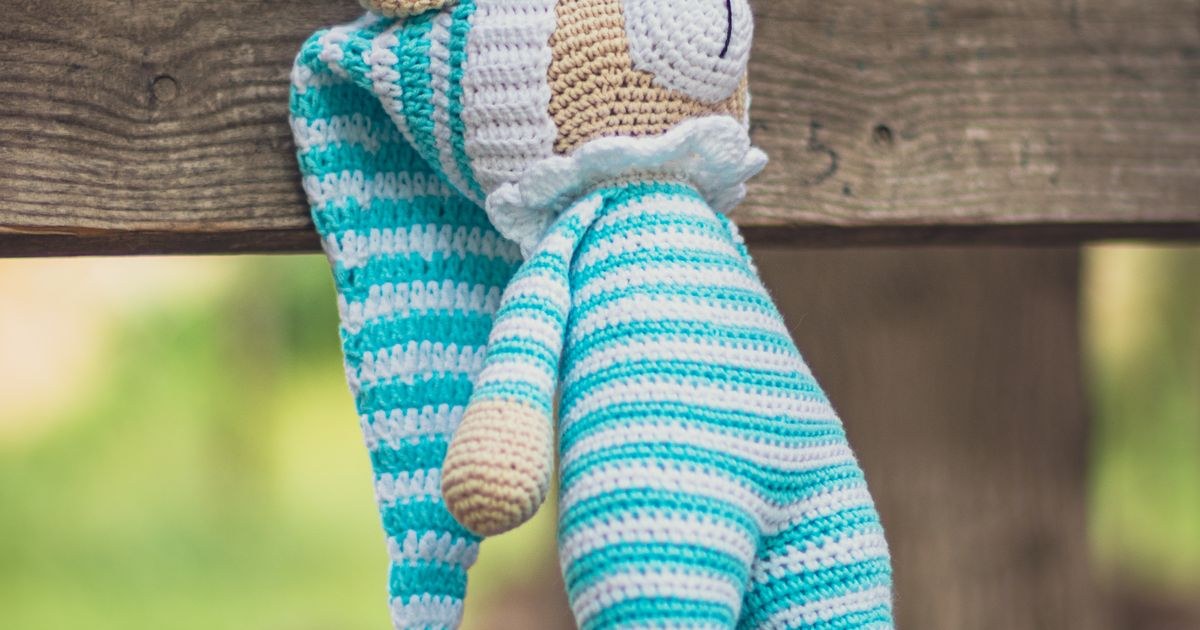
I've taught this bear enough times to know the moment a class really enjoys a project: it's when someone sews on the first ear and it immediately looks like a bear instead of a lump. One of my students brought her finished bear back the next week with one ear noticeably higher than the other, and told me her daughter had named him Surprised and refused to let her fix it. I think about that every time I write assembly instructions now — the details people actually agonise over aren't the rounds, they're the placement of ears and eyes. Get the face right and even a slightly wonky bear looks charming; get it wrong and the most even stitching can't save it.
Materials
- 1–2 skeins worsted-weight yarn (about 80–100 yards)
- 3.5mm hook (smaller than standard, for tight amigurumi stitches)
- Polyester fiberfill stuffing
- Safety eyes, or embroidery thread for a child-safe embroidered face
- Stitch marker, to track the start of each round
- Scissors and a yarn needle
Abbreviations (US terms)
| Abbr. | Means |
|---|---|
| sc | Single crochet |
| st(s) | Stitch(es) |
| inc | 2 sc in same stitch (increase) |
| dec | Sc 2 sts together (decrease) |
| rnd(s) | Round(s) |
See our abbreviations glossary for the full list including UK terms.
Gauge
Gauge isn't critical — the goal is tight, even stitches that hide the stuffing. If you can see stuffing through your stitches, try a smaller hook.
Notes
- Written in US terms, worked in a continuous spiral, same technique as our mini amigurumi ball pattern.
- Made from five separate pieces (head, body, 2 arms, 2 legs, 2 ears) sewn together at the end.
- For a child under 3, skip plastic safety eyes and embroider the face instead.
Pattern
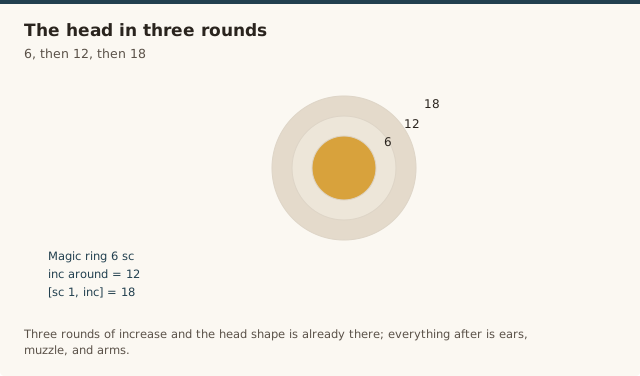
Magic ring, 6 sc. (6) → Inc around. (12) → [sc 1, inc] around. (18)
Sc every st around for 5 rounds, no shaping. (18 sts each round)
[sc 1, dec] around. (12) → Dec around, stuffing firmly as you close. (6)
Fasten off, leaving a long tail for sewing to the body.
Magic ring, 6 sc. (6) → Inc around. (12) → [sc 1, inc] around. (18)
Sc every st around for 4 rounds. (18 sts each round)
[sc 1, dec] around. (12) → Dec around, stuffing as you close. (6)
Fasten off, leaving a long tail for sewing to the head.
Magic ring, 5 sc. (5). Sc every st around for 5 rounds, no shaping, stuffing lightly. Fasten off, leaving a tail for sewing.
Magic ring, 6 sc. (6). Sc every st around for 4 rounds, stuffing lightly. Fasten off, leaving a tail for sewing.
Magic ring, 5 sc into ring. Fasten off, leaving a short tail for sewing on flat, without stuffing.
Sew the body to the bottom of the head using the tails from each. Sew the two ears onto the top of the head, and the two arms and two legs onto the body, checking placement is even before securing each with small, tight stitches. Attach safety eyes before stuffing the head if using them, or embroider a simple face with yarn once assembly is complete for a child-safe alternative.
A tutorial on crocheting an amigurumi teddy bear, useful for seeing how the head, ears, and limbs are assembled.
Giving it personality
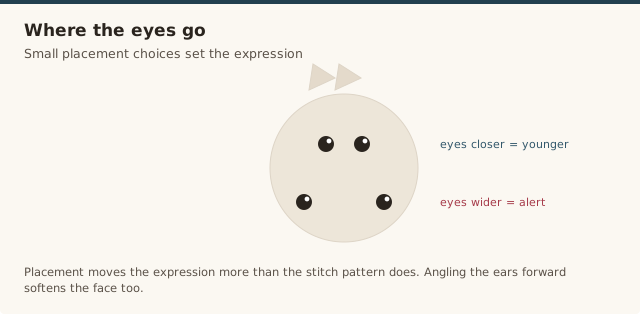
Small placement choices change the bear's expression more than the stitch pattern does. Setting the safety eyes slightly closer together than feels natural reads as younger and more endearing; spacing them wider gives a more alert, wide-eyed look. Angling the ears slightly forward rather than straight up also softens the face, and a few embroidered stitches for eyebrows above the eyes can add surprising character for very little extra work.
A small accessory is an easy way to make a plain bear feel finished: a scrap-yarn chain tied as a bow around the neck, a few single crochet stitches worked as a tiny scarf, or a contrast-colour patch of single crochet sewn on as a belly panel all take under ten minutes and make the bear feel like a deliberate design rather than a basic shape. If you're unsure which yarn to pick before you start, our guide to the best yarn for amigurumi walks through the trade-offs.
Common mistakes & fixes
Fix: lay all pieces out on a flat surface before sewing anything, checking placement from directly above, and pin or mark the spot with a scrap of yarn before stitching each one in place.
Fix: insert the eye posts but don't lock the backings on yet — hold the head up and check the spacing looks right from a normal viewing distance before securing them permanently.
Fix: stuff each piece to a similar firmness as you close it, and compare pieces side by side before sewing — a piece that looks slightly small can often be evened out with a bit more stuffing pushed in through the opening before it's fully closed.
Our pick
Fairfield Poly-Fil Premium Fiber Fill, 32oz
Enough for this bear and future amigurumi projects, staying fluffy without clumping over time.
View on Amazon →Frequently asked questions
Is this amigurumi bear pattern safe for young children?
For children under 3, embroider the facial features with yarn instead of using plastic safety eyes, since even securely attached safety eyes carry some small-parts risk for very young children.
How long does an amigurumi bear take to make?
Including the head, body, and four limbs, most beginners finish this bear over two to three sessions, roughly 3 to 4 hours of total crochet time plus assembly.
How do I attach the limbs to an amigurumi body?
Sew each limb on with the tail left from finishing it, using a yarn needle and small, tight stitches around the entire attachment point rather than just a few anchor points.
Can I wash a finished amigurumi bear?
Spot clean with a damp cloth and mild soap where possible; a full wash risks matting the stuffing and loosening safety eyes, so it's best avoided unless the bear is machine-washable by design.
What's the best stuffing for an amigurumi bear?
Polyester fiberfill is the standard choice because it stays soft, holds its shape, and is washable and hypoallergenic, unlike natural fibers that can clump or felt over time.
Why does my amigurumi bear's head look bigger on one side?
Usually it's uneven stuffing or off-centre placement of the ears and eyes. Stuff the head evenly in small pieces, and before sewing the ears on, lay everything out flat and check placement from directly above so both sides match.
Can I make the bear bigger or smaller?
Yes. To scale it up, add one more increase round to the head and body before the straight rounds, and one more decrease round at the end. For a smaller bear, stop one increase round earlier and shorten the straight rounds by a round or two.
CrochetGuides is a participant in the Amazon Services LLC Associates Program. As an Amazon Associate we earn from qualifying purchases, at no extra cost to you.