Free Amigurumi Cat Crochet Pattern
An 8in sitting cat with a crisp color-block face, worked in continuous rounds so there's no seam running down the back of the head.
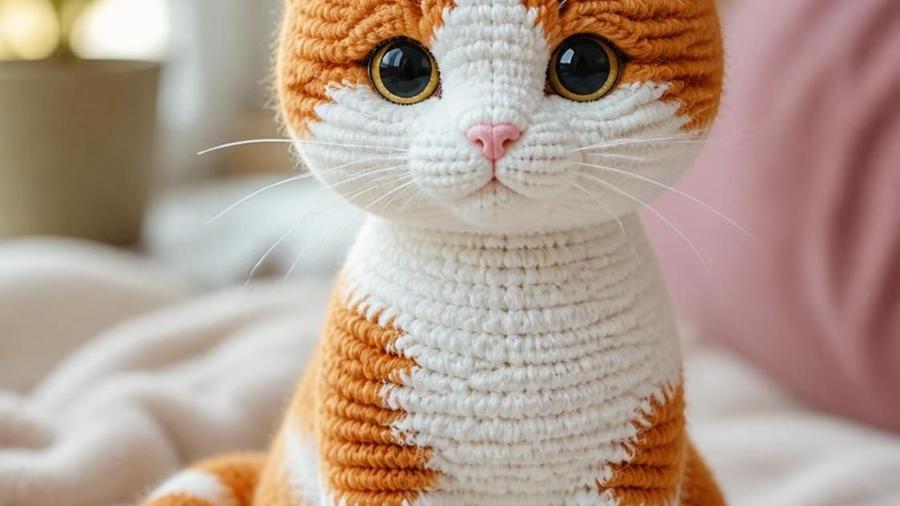
I'd made a fair number of amigurumi animals before I tried a cat, and I assumed it would be roughly the same job as everything else: round head, round body, four legs, done. What actually slowed me down was the face. A cat's markings aren't symmetrical decoration the way a bear's nose patch is, they're a specific, recognizable shape, and the first two attempts I made looked less like a cat and more like a startled snowman with orange smudges.
The fix turned out to be construction order, not skill. Working the white muzzle panel as its own small flat piece first, then fitting it onto the finished head like a puzzle piece, gave me far more control than trying to color-change mid-round on a sphere and hoping the shape landed where I wanted. Once that clicked, the rest of the cat, the cone-shaped body, the four stubby legs, the curled tail, came together the way most amigurumi does: predictably, if you follow the shaping in order.
This pattern is written for a sitting cat about 8in tall in worsted-weight yarn, with a full breakdown of the color-block face technique, the four legs (yes, four, stitched on separately for stability rather than shaped into the body), and the small details, embroidered whiskers and nose, a curled tail, triangle ears with a contrast inner color, that make it read as a cat rather than a generic four-legged blob.
Materials
- About 120 yards main colour (orange) worsted-weight cotton-blend yarn
- About 60 yards white for chest, paws, muzzle, and inner ears
- 3.5mm (US E-4) crochet hook
- 2 safety eyes, 8-9mm (skip if making for a child under 3, see the eyes section)
- Polyester fiberfill
- Yarn needle, stitch marker, dark embroidery thread for nose and whiskers
Abbreviations (US terms)
| Abbr. | Means |
|---|---|
| sc | Single crochet |
| inc | 2 sc in same stitch |
| dec | Invisible decrease (see our invisible decrease guide) |
| st(s) | Stitch(es) |
See our abbreviations glossary for the full list including UK terms.
Gauge
Gauge isn't critical for amigurumi, but a tighter fabric than usual keeps stuffing from showing through. Aim for stitches that feel snug on your 3.5mm hook with worsted yarn.
Notes
- Worked in continuous rounds throughout (no joining, no turning) unless a piece is specifically noted as flat.
- Use a stitch marker to track the start of every round; it's easy to lose your place in a solid colour.
- Make 4 identical legs, 2 ears, and 1 tail before assembly.
Pattern
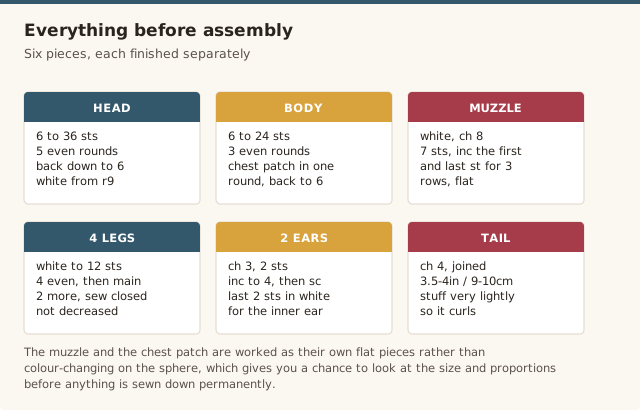
Magic ring, 6 sc. [Inc] around (12). [Sc 1, inc] around (18). [Sc 2, inc] around (24). [Sc 3, inc] around (30). [Sc 4, inc] around (36).
Sc in each st around for 5 rounds. (36 sts each round) Switch to white partway through round 9 to begin the muzzle panel, following the muzzle steps below rather than continuing the full round in main colour.
In white, ch 8. Sc in 2nd ch from hook and each ch across (7 sts). Ch 1, turn. Inc in first and last st of the row for 3 rows, increasing the panel to a rounded oval about 1.5in / 4cm across. Fasten off, leaving a long tail for sewing.
[Sc 4, dec] around (30). [Sc 3, dec] around (24). [Sc 2, dec] around (18). [Sc 1, dec] around (12). [Dec] around (6). Stuff firmly, then fasten off and close the opening by weaving the tail through the last 6 sts.
Magic ring, 6 sc. [Inc] around (12). [Sc 1, inc] around (18). [Sc 2, inc] around (24). Sc even for 3 rounds. (24 sts) Switch to white for a chest patch on the front-facing stitches of one round, working [sc 3 main, sc 6 white, sc 3 main] repeating around, rather than a full colour change.
[Sc 2, dec] around (18). [Sc 1, dec] around (12). Stuff firmly, then [dec] around (6) and close.
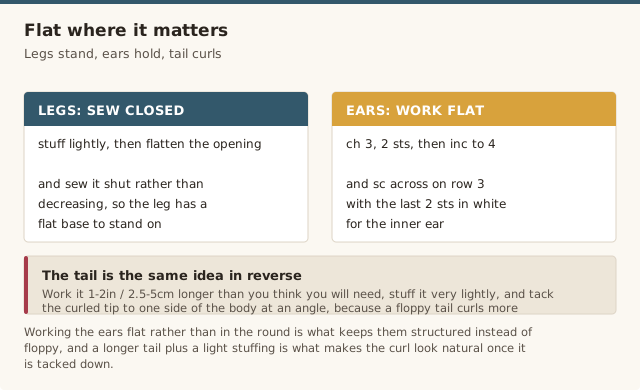
In white, magic ring, 6 sc. Inc around (12). Sc even for 4 rounds. Switch to main colour, sc even for 2 more rounds. Stuff lightly and flatten the opening; sew closed rather than decreasing, so the leg has a flat base to stand on.
In main colour, ch 3. Sc in 2nd ch from hook, sc in next ch (2 sts). Row 2: ch 1, turn, inc in each st (4 sts). Row 3: ch 1, turn, sc across, changing to white for the last 2 sts to build the inner-ear colour block. Fasten off. Working ears flat, not in the round, is what keeps them structured rather than floppy; see the trouble spots section for more on this.
In main colour, ch 4, join with a slip stitch to form a ring. Ch 1, sc in each ch around (4). Sc even in a continuous round for 3.5-4in / 9-10cm, about 1-2in longer than you think you'll need, since a longer tail curls more convincingly. Stuff very lightly (a floppy tail curls better than a stiff one), fasten off.
Sew the muzzle panel onto the lower-front section of the head, checking placement against where you plan to set the eyes before stitching it fully in place. Attach safety eyes just above the muzzle's upper edge (or embroider eyes here for under-3s). Embroider a small pink or dark triangle nose and 3-4 whisker stitches on each side. Sew the head to the top of the body. Sew all 4 legs to the underside of the body, spaced evenly. Sew the ears to the top of the head, angled slightly outward. Curl the tail and tack the tip to one side of the body at an angle, rather than leaving it straight.
Getting the color-block face right
The single biggest difference between a cat that reads as "a cat" and one that reads as "a round animal with some white on it" is the shape and placement of that muzzle panel. Working it flat, as its own small oval, rather than color-changing directly into the sphere shape, gives you a chance to actually look at the panel's size and proportions before it's sewn on permanently. Hold it up against the head, adjust its position by eye, and only then commit to stitching.
This same flat-panel approach works for the chest and paw markings too, if you'd rather have crisp, deliberate edges than the softer, blended look of an in-round colour change. It takes slightly longer than color-changing on the fly, but it's the difference between a face that looks planned and one that looks like it happened by accident.
Sizing up with bulkier yarn
Because every shaping round in this pattern is proportional (the same increase sequence regardless of yarn weight), you can scale the whole cat up simply by switching yarn and hook size, without touching the stitch counts at all. A chunky yarn with a 5-5.5mm hook produces a cat closer to 11-12in tall, using the exact same round-by-round instructions above. This is a much simpler way to resize amigurumi than trying to add extra rounds, since it keeps every proportion, head-to-body ratio, leg length, ear size, exactly the same at a larger scale.
Safety eyes vs. embroidered eyes
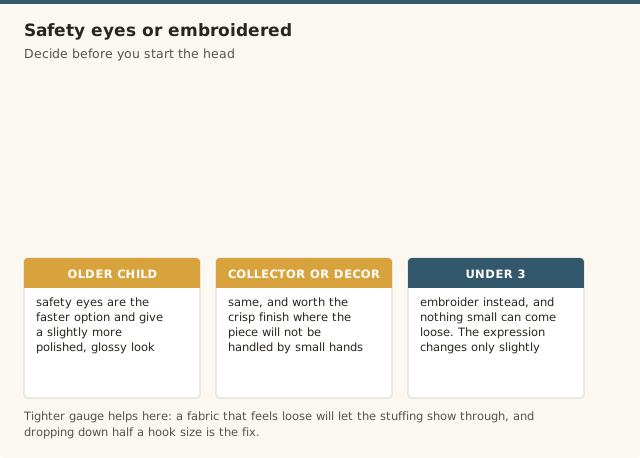
Plastic safety eyes, including the locking-washer style sold specifically for amigurumi, are still a small hard part that can detach under enough force, and they're not appropriate for a toy intended for a child under 3. If this cat is going to a young child, embroider the eyes instead, using dark thread worked directly into the head in two small satin-stitch circles where the safety eyes would otherwise sit. It changes the expression only slightly and removes the choking-hazard concern entirely. For an older child, a collector, or a decorative piece that won't be handled by small children, safety eyes are the faster option and give a slightly more polished, glossy look.
Care & stuffing notes
Use a soft, machine-washable yarn throughout, ideally cotton-blend rather than pure acrylic for the crisper stitch definition this pattern relies on for the face. Stuff with polyester fiberfill in small pinches rather than large handfuls, working it into the corners of each shape (the base of the legs, the tip of the muzzle, the curve of the ears) so nothing sits hollow or lumpy. Spot clean where possible; if the whole toy needs washing, a gentle hand wash and full air dry protects the safety eyes and embroidery better than a machine cycle would.
Cat-specific trouble spots
Fix: ears need to be worked flat in rows, not in continuous rounds, to have any structure at all. Lightly steam-block the finished ear flat before sewing it on if it still looks soft.
Fix: plan the colour join to fall on the side or back of the piece, ideally right where the tail will be tacked down, rather than the front-facing side where it's most visible.
Fix: dry-fit the eyes with straight pins before pushing the actual posts through, checking their position against the muzzle panel's upper edge rather than guessing by eye alone.
Fix: stuff in small, even pinches and check the chest from directly in front as you go, rather than stuffing the whole body first and hoping it settles evenly.
Fix: work the tail 1-2in longer than feels necessary and stuff it only lightly; a shorter, firmly stuffed tail simply doesn't have the length or flexibility to hold a curl once tacked down.
Our pick
Lion Brand 24/7 Cotton Yarn
A worsted-weight cotton with good stitch definition, ideal for the crisp color-block panels this pattern relies on for the face and chest.
View on Amazon →Amigurumi cat FAQ
What yarn and hook size should I use for this cat?
A worsted-weight cotton-blend yarn with a 3.5mm hook gives the tight, gap-free stitches an amigurumi needs to hold its shape and hide the stuffing underneath. A pure acrylic works too if that's what you have, but cotton-blend holds a crisper stitch definition for the color-block face.
How long does this take a beginner to make?
Budget somewhere around 6-9 hours total for a first attempt, split across the head, body, four legs, tail, and ears, plus assembly and embroidery. Experienced amigurumi crocheters typically finish in 3-4 hours once the shaping is familiar.
Can I make this cat bigger by using bulkier yarn?
Yes. Switching to a chunky yarn with a 5-5.5mm hook, following the exact same stitch counts, scales the finished cat up to roughly 11-12in without any changes to the pattern itself, since the shaping is proportional rather than tied to a specific gauge.
Is this pattern safe for toddlers under 3?
Plastic safety eyes, even the locking-washer kind, are a choking hazard for children under 3 and shouldn't be used on a toy meant for that age group. Substitute embroidered eyes worked directly into the yarn with dark thread instead, which removes the small hard part entirely while keeping the same expression.
How do I get the two-tone face pattern to look precise?
Work the muzzle panel as its own small flat piece first, checking it against the head shape before you commit to sewing it on, rather than trying to color-change mid-round on the sphere itself. This gives you a chance to adjust the muzzle's size and position before it's permanent.
What's the best stuffing for an amigurumi this size?
Polyester fiberfill is the standard choice, since it holds its shape, stays lightweight, and is machine-washable in most cases. Stuff in small pinches rather than large handfuls, working the filling into the seams and corners as you go so it doesn't clump in the center.
Should I use a tighter gauge than my usual single crochet?
Yes, for amigurumi specifically. A slightly tighter gauge than you'd use for a garment or blanket keeps the stuffing from showing through the stitches and helps the finished shape hold up over time. If your fabric feels loose or the stuffing peeks through, drop down half a hook size.
CrochetGuides is a participant in the Amazon Services LLC Associates Program. As an Amazon Associate we earn from qualifying purchases, at no extra cost to you.