Invisible Decrease for Amigurumi: Step-by-Step
The small hook-placement change that turns a bumpy, gappy decrease into a smooth one your amigurumi's surface won't show at all.
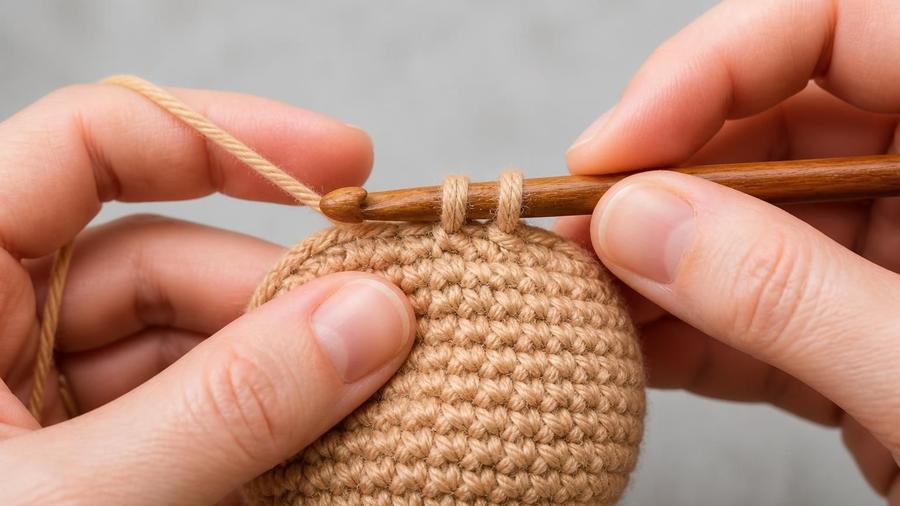
My first amigurumi bear had a head like a lumpy potato, and for a long time I assumed that was just what amigurumi heads looked like unless you were unusually skilled. I'd followed the pattern's decrease rounds exactly, sc2tog, sc2tog, all the way around, and the shaping was technically correct. But every single decrease left a small visible bump and the faintest gap next to it, and stacked up over three or four decrease rounds, that added up to a head covered in little pockmarks that no amount of careful stuffing could smooth out.
It turned out the fix wasn't a better decrease count or tighter tension, it was a completely different way of inserting the hook. The invisible decrease changes which loops of the two stitches you actually catch, and that one adjustment is the difference between a decrease round that reads as a series of small bumps and one that just looks like smoothly tapering fabric. It's one of those techniques that feels like a minor footnote until you actually compare the two side by side on the same toy, at which point it becomes hard to imagine going back.
What surprised me most, once I'd learned it properly, was how little else about my process needed to change. I didn't need a new hook, a different yarn, or a slower gauge; I just needed to catch a different loop on two insertions per decrease, and every pattern I'd already been making suddenly had a route to a noticeably cleaner finish. If you've been putting off learning it because it sounds like a specialty technique reserved for advanced designers, it really isn't — it's a small adjustment to a stitch you already know.
Regular decrease vs. invisible decrease
A standard single crochet decrease, often written sc2tog or "dec" in a pattern, takes two stitches and turns them into one. You insert your hook into the next stitch through both loops as usual, yarn over, pull up a loop, then insert into the following stitch through both loops again, yarn over, and pull through all three loops on the hook at once. That's a completely valid decrease, and it's what most beginners learn first because it uses hook placement identical to a normal single crochet.
The invisible decrease changes exactly one thing: instead of inserting through both loops of each stitch, you insert through only the front loop of each. Everything else, the yarn overs and the pull-throughs, stays the same. That's the entire technique. It sounds like a small adjustment, and mechanically it is, but the visual difference on a finished toy is substantial.
Working the invisible decrease
Steps
- Identify the two stitches you're about to decrease together, the current stitch and the next one.
- Insert your hook under only the front loop of the first stitch.
- Without yarning over yet, insert your hook under only the front loop of the second stitch. You should now have three loops sitting on your hook: the two front loops you just picked up, plus your existing working loop.
- Yarn over and pull through the first two loops on the hook (the two front loops), leaving two loops remaining on the hook.
- Yarn over once more and pull through both remaining loops to complete the stitch.
- Pull the yarn snugly as you finish so the two stitches draw together firmly, closing the small horizontal gap between them.
If that sequence of "insert, insert, yarn over, pull two, yarn over, pull two" feels familiar, it's because it's structurally identical to a regular sc2tog. The only change is which loop you catch on each of those two insertions, front loop only instead of both loops.
Why this actually removes the bump
A regular decrease's visible bump comes from the back loops of both stitches being pulled together and pushed slightly forward as the stitches merge. Because both loops of each stitch get caught, there's more bulk drawn into that one point, and that extra bulk has to go somewhere, which is usually a small raised lump on the front-facing side of the work.
Leaving the back loops out of the decrease removes that extra bulk from the join. The two front loops draw together cleanly, and the untouched back loops simply continue on as part of the surrounding fabric rather than getting bunched into the decrease point. The practical result is a decrease that blends into the surface texture of the surrounding single crochet rather than standing proud of it, which is exactly what you want on a smooth, rounded amigurumi shape where every bump is visible under stuffing.
Where to use it in a toy
Invisible decrease earns its keep anywhere a toy's shaping rounds are on a visible, smooth surface: the crown and sides of a head, the rounding at the top of a limb, the tapering tip of an ear, or the closing rounds at the very end of any piece. These are exactly the places where several decreases land close together in a small area, which is when a regular decrease's bumps become most noticeable, stacked visibly in a ring around the shape's narrowest point.
It matters less on parts that will be seamed, stuffed heavily enough to hide texture, or hidden against another piece, since the visual smoothness invisible decrease provides won't be seen there anyway. If you're seaming pieces together afterward, our guide to seaming crochet pieces covers joining limbs and panels once your shaping is done.
Practicing before your project
Because invisible decrease involves picking up two separate front loops before your first yarn over, it can feel fiddly compared to a regular decrease the first few times you try it, especially in a smaller yarn weight where the loops sit close together. A quick way to build the muscle memory is to crochet a small flat swatch in single crochet, then work a full row of invisible decreases across it, comparing how the resulting row looks and feels compared to a row of regular decreases worked right next to it on the same swatch.
Once it clicks, most crocheters find invisible decrease becomes just as automatic as a regular decrease, if a touch slower simply because of the extra insertion step. The speed difference is minor enough that it's rarely worth trading away the cleaner finished look, especially on a project where the decreases will be visible on the outside.
It's also worth practicing on the same yarn weight and hook size you plan to use for your actual project, rather than a random scrap, since finer yarn makes the two front loops sit noticeably closer together and changes how much control the technique takes. A few minutes spent decreasing on your actual materials before you start shaping a head or limb will tell you far more about how the stitch will behave than a swatch in a completely different weight.
Common mistakes & fixes
Fix: slow down on the two insertion steps and consciously check each one before yarning over. It's easy for the second insertion especially to slip into both loops out of habit, since that's the more automatic hand motion.
Fix: this is almost always a tension issue rather than a technique issue. Pull the yarn a little more firmly on the final pull-through so the two stitches draw fully together, rather than leaving them loosely joined.
Fix: count out loud or place a finger on the second stitch before you even pick up the first loop, so you know exactly where the second insertion needs to go before your hook is already holding two loops.
Fix: remember that every invisible decrease still reduces your total stitch count by exactly one, the same as a regular decrease. Count your stitches at the end of the round and compare against the pattern's expected total, rather than assuming the invisible technique changes the math.
Fix: on thin yarn, the front loops sit closer together and can be harder to isolate individually. Slow down, use good lighting, and consider a slightly smaller hook tip if your current hook feels too blunt to isolate a single loop precisely.
Frequently asked questions
What's the difference between a regular decrease and an invisible decrease?
A regular single crochet decrease inserts the hook through both loops of each of the two stitches being joined, which pulls a noticeable bump to the front of the work. An invisible decrease instead inserts the hook through only the front loop of each of the two stitches, then finishes as a normal decrease. That change alone is what removes the visible bump and gap.
Can I use invisible decrease on stitches other than single crochet?
It's specifically designed for single crochet decreases, which is what almost all amigurumi shaping uses. The front-loop-only principle can be adapted to other stitches, but you won't typically need to, since amigurumi patterns are worked in single crochet.
Does invisible decrease change my stitch count?
No. Like a regular decrease, invisible decrease takes two stitches and turns them into one, reducing your round's total stitch count by one for every decrease worked, exactly the same as a standard decrease would.
Why do amigurumi patterns specifically call for invisible decrease?
Amigurumi shaping relies on frequent decreases to round off heads, curve limbs, and close openings, and a regular decrease's small bump becomes very visible at that density, especially on a smooth, solid-colored toy. Invisible decrease keeps those same shaping rounds smooth, which matters much more on a stuffed toy than it would on, say, a blanket edge.
Is invisible decrease harder to learn than a regular decrease?
It takes a little more finger dexterity at first, since you're deliberately inserting the hook through just the front loops of two stitches rather than through all four loops as usual, but most crocheters pick it up within a swatch or two. It doesn't require any tools or materials beyond your regular hook.
Do I need a different hook or yarn for invisible decrease?
No, invisible decrease uses the same hook and yarn as the rest of your project. It's purely a change in how you insert the hook, not a change in materials.
My invisible decreases still show a small gap. What's going wrong?
This is almost always a tension issue rather than a technique issue: pull the yarn snugly when you complete the decrease so the two stitches close firmly together, and check that you're catching only the front loops, not accidentally slipping into both loops on one of the two stitches.
CrochetGuides is a participant in the Amazon Services LLC Associates Program. As an Amazon Associate we earn from qualifying purchases, at no extra cost to you.