Easy Crochet Crop Top Pattern (Beginner, Adjustable Fit)
A simple two-panel crop top built in double crochet rows — sized to your own gauge swatch, not a fixed chart.
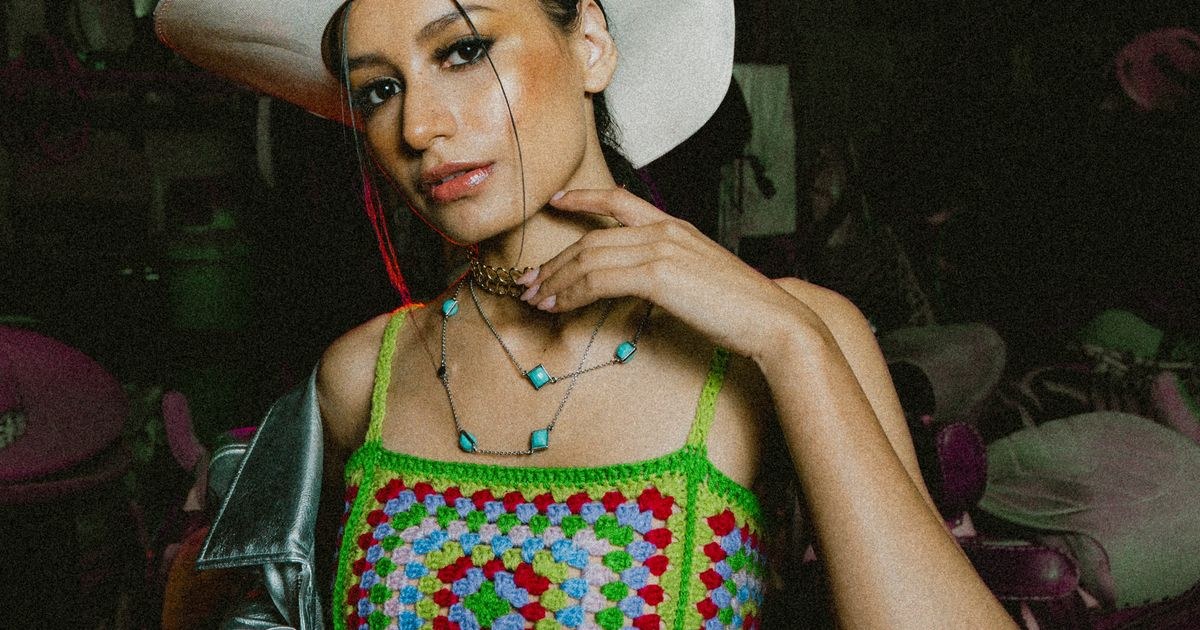
The mistake I see most often when someone makes their first crochet crop top is skipping the gauge swatch because it feels like homework. I've taught enough students to know the temptation — you're excited, so you chain off your chest measurement and hope for the best. I remember one woman whose top came out two sizes too small because her tension was tighter than the ball band expected. We frogged the whole thing, made a ten-minute swatch, and the second version fit her perfectly. A crop top made from two simple rectangles is wonderfully forgiving, but only if you measure honestly first — everything else follows from those few numbers.
The other thing that matters more than people expect is yarn choice, because a crop top in a stiff, scratchy yarn will sit in the drawer unworn no matter how well it fits. I've watched students finish a beautiful top in pure cotton and then never wear it because it felt like cardboard against the skin. A soft DK cotton or a cotton-bamboo blend gives you drape and comfort together, which is why I always suggest a swatch that doubles as a feel test before you commit to two whole panels.
What you need
- DK or worsted weight yarn, roughly 300–400g depending on your size
- 4.0–5.0mm hook to match your gauge
- Yarn needle, measuring tape, stitch markers
Before you start: swatch and measure
Steps
- Crochet a small swatch (about 12×12 sts in dc) in your chosen yarn and hook, then measure how many stitches and rows make up 10cm (4in) — this is your gauge.
- Measure your chest at its fullest point, then decide your desired finished width per panel: (chest measurement ÷ 2) + 2–3cm ease.
- Multiply your desired panel width by your stitch gauge (stitches per cm) to get your starting chain length, rounded to an even number.
Step 1: make two rectangle panels
Steps
- Chain the length calculated above, plus 3 turning chains.
- Row 1: dc in the 4th chain from the hook and each chain across.
- Rows 2 onward: chain 3 (counts as the first dc), turn, dc in each stitch across.
- Repeat until the panel measures your desired crop length, measured from underarm to hem on yourself or a well-fitting top.
- Make a second, identical panel.
Step 2: seam the sides and shoulders
Steps
- Lay the two panels together, right sides facing.
- Seam up each side from the hem, leaving the top 15–18cm open on both sides for the armholes.
- At the top edge, seam a few centimetres in from each outer corner toward the center, leaving a gap open in the middle for the neck — test the opening against your head before fully closing it.
Step 3: finishing edges
Work one round of single crochet around the neckline, both armholes, and the hem to neaten the raw edges and add a small amount of stretch-resistance. If the finished fit isn't quite what you hoped, our fixing project size guide walks through where to adjust before you commit to the seams.
Choosing yarn and colours
For a top you'll actually wear, softness and drape beat everything else. A DK cotton, a cotton-bamboo blend, or a soft acrylic all work, and each gives a slightly different feel — cotton is cool and crisp but can be stiff, bamboo adds a lovely swing, and acrylic is the most forgiving on a budget. Avoid anything scratchy or heavy, because a crop top sits directly against your skin and you'll notice it all day.
Colour is worth a moment too. A solid colour shows off the stitch texture and is the easiest to style, while a variegated yarn can look busy across two large panels. If you're unsure how the yarn will behave after a wash, the yarn weight guide explains how fibre and weight affect drape and shape, which matters a lot more in a garment than in a scarf.
Getting the fit right
Crochet fabric has almost no stretch compared to knitting, so ease is your friend. When you calculate your panel width, add the two to three centimetres the pattern suggests, and if you're between sizes, round up rather than down — a top that's a little roomy still looks intentional, while one that's too tight pulls at the side seams and gapes at the neck. The armhole opening matters just as much, so try the top on yourself before you finish the seams rather than trusting the numbers blindly.
The neck gap is the one place people always forget to test. You need to get the top over your head, so the opening between the shoulder seams has to clear your head comfortably. Pin the shoulders closed with a safety pin and try slipping it on before you sew them permanently — it's the single cheapest way to catch a too-small neckline before it's too late to fix.
Care and washing
Because a crop top sits against the skin, it'll be washed often, so treat it gently to keep its shape. Hand-wash or machine-wash cool on a gentle cycle, and always dry it flat — hanging a wet crochet garment stretches it out of shape fast, especially across the shoulders. Cotton and bamboo blends can lose a little crispness, so reshape the panels while they're damp and let them dry laid out.
If the top stretches slightly over time, a gentle steam block with your hands will bring the rectangles back into shape, and our guide to blocking crochet shows the process if you've never done it. Fold rather than hang it in the wardrobe, so the weight of the fabric doesn't slowly pull the shoulder seams out of line.
A garment-focused walkthrough, useful for seeing how shaping and tension work on a wearable piece.
Common mistakes & fixes
Fix: the gauge swatch was skipped or measured loosely. Always make a real swatch and measure it honestly — the whole pattern is built from those numbers, so an optimistic guess compounds across the whole garment.
Fix: count your starting chains carefully and keep the first panel beside you as a guide while you work the second. A stitch marker at the end of each row helps you stop at the same length on both pieces.
Fix: you seamed the sides too high. Leave a little more room at the top of each side — closer to 18cm than 15cm — and try the top on before finishing the seams so you can adjust the opening.
Fix: the neck gap is too small. Unpick the last few shoulder stitches and seam less far in from each corner, then test the opening against your head before sewing it closed again.
Fix: the single-crochet edging round is doing the work of holding the fabric flat. Make sure you worked it around the neckline, both armholes, and the hem, and block the finished top if the curl persists.
Fix: switch to half double crochet for a denser fabric, or drop down a hook size to tighten the stitches. A denser stitch gives more coverage and structure, which is usually what you want in a top.
Frequently asked questions
What if my gauge swatch doesn't match exactly?
That's expected and fine — the whole pattern is built from your own gauge, not a fixed chart, so as long as you measure your swatch honestly the math will still fit.
Can I add straps instead of full shoulder panels?
Yes, a halter or tie-strap version can be made by narrowing the top few rows of each panel into straps instead of seaming a full shoulder — a slightly more advanced adjustment.
What stitch works instead of plain double crochet?
Half double crochet gives a denser, less gappy fabric if you prefer more coverage.
How much yarn do I need for a crop top?
Plan for about 300–400g of DK or worsted weight for an average adult size; larger sizes or longer tops sit toward the top of that range, so an extra ball is safer than running short.
Can I make this longer into a full-length top?
Yes — simply keep working the rectangles until they reach your desired length, then follow the same seaming and edging steps.
How do I keep the edges from curling?
Make sure you work the single-crochet edging round around the neckline, both armholes, and the hem — that border is what holds the fabric flat. If the top still curls, block it gently with steam or a damp press to relax the stitches.
Can I make this with sleeves or a different neckline?
The rectangle base makes small changes easy. A deeper V or wider scoop neck just means seaming less far in from the shoulders, and short sleeves can be added by picking up stitches around the armhole and working a few rounds outward. Each is a small step up from the basic version, so try the plain top first.
CrochetGuides is a participant in the Amazon Services LLC Associates Program. As an Amazon Associate we earn from qualifying purchases, at no extra cost to you.