Crochet Granny Square: Complete Beginner Tutorial
The exact stitches for your first granny square, written in US terms, from magic ring to finished square.
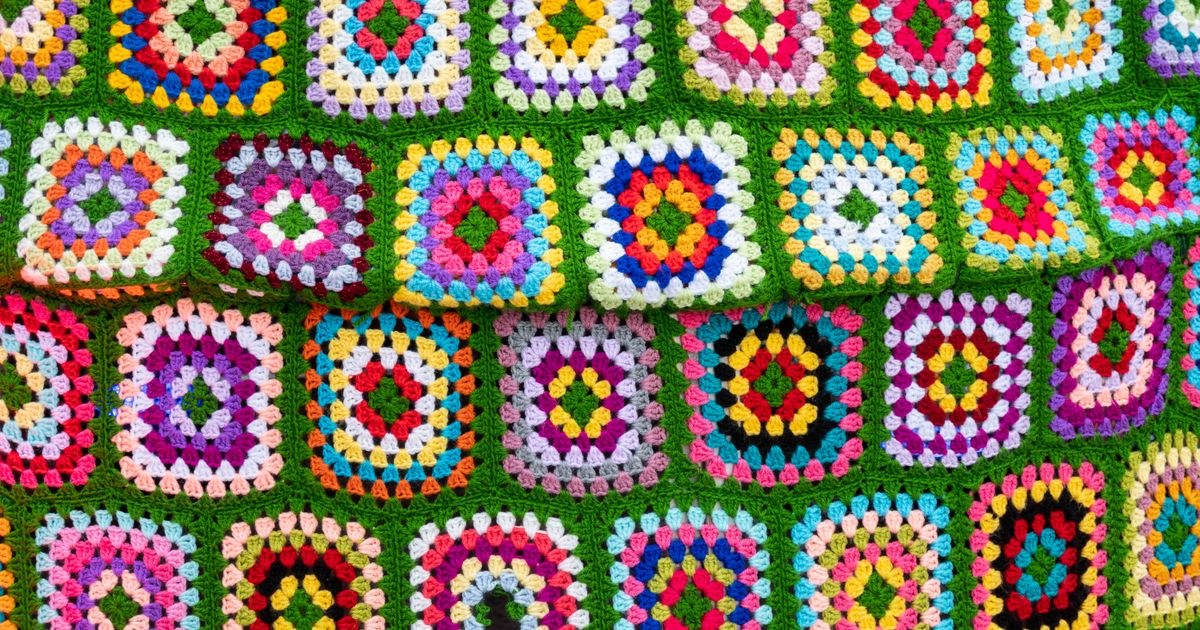
I taught my first crochet class twelve years ago to a room of nine absolute beginners, and I remember it clearly because of one student. By the end of those two hours, eight people were holding neat little squares, and the ninth was holding something shaped like a deflated kite and laughing about it. She's the reason I write these guides the way I do. The granny square isn't hard — it uses only two stitches — but it's the first project where you have to read your work instead of just following a count, and that's the jump most beginners trip on. Get through the three rounds below and you'll have a pattern you can use for the rest of your crochet life.
The granny square is the classic first "real" project for good reason. It's worked in rounds with no shaping to worry about, it uses nothing but chain stitch and double crochet, and every square you'll ever make is the same two moves repeated: a corner group and a side group. Master those and you can make a coaster, a tote bag, or an entire blanket without learning a single new stitch. This guide covers the first three rounds — the same three I teach in every class — in US terms, with the exact places people get stuck spelled out.
What you need
Every tool here earns its place — there's a specific reason I list it, not just tradition.
- A 5.0mm (H) hook — even if your yarn label suggests 4.5mm, go a size up for your first square. Bigger stitches are easier to see, and you can always drop back down once the rhythm is second nature. If you don't own one yet, our beginner crochet hooks guide walks through what to buy.
- Worsted-weight yarn (weight 4) in at least one colour. Choose something smooth and light — cotton or plain acrylic — so you can actually see each stitch. Dark, fuzzy, or textured yarn hides your work, which is the last thing you want while you're learning to spot chain spaces. If the weight numbers are confusing, yarn weight explained covers it in plain language.
- Scissors and a yarn needle for cutting and weaving in ends.
- A stitch marker, or a scrap of contrasting yarn tied into a loop. This one tiny habit prevents most of the "wonky square" problems in the mistakes section below.
How a granny square is actually built
Before the steps, understand what you're building toward, because a granny square is really the same move repeated with one small addition each round.
A corner group is 3 double crochet, chain 2, 3 double crochet, all worked into the same space. A side group is just 3 double crochet in a space. That's the entire vocabulary of the granny square.
Round 1 has no side groups yet — it's just four corner groups meeting each other directly, which is why it looks bunched up until the next round opens it out. From Round 2 onward, every round adds exactly one more side group per edge than the round before it: Round 2 has one side group between corners, Round 3 has two, Round 4 has three, and so on. Once that pattern clicks, you stop counting rows and start recognising the shape as you go — and that recognition is the actual skill, not the stitch count.
Round 1: the centre
Steps
- Chain 4, then join into a ring with a slip stitch into the first chain.
- Chain 3 (this counts as your first double crochet).
- Work 2 more double crochet into the ring.
- Chain 2 (this forms the corner).
- Work
[3 double crochet, chain 2]into the ring three more times — you'll have 4 groups of 3 double crochet, each separated by a chain-2 corner. - Join with a slip stitch to the top of your starting chain-3. Fasten off if changing colour, or continue to Round 2.
Everything in Round 1 goes into the same small ring, so it will look crowded and slightly bunched — that's expected, not a mistake. It opens out the moment Round 2 gives it somewhere to go.
Round 2: building the square
Steps
- Join your yarn (new colour or same) into any chain-2 corner space.
- Chain 3, then work
[2 double crochet, chain 2, 3 double crochet]into that same corner space — this makes the corner. - Chain 1, then work 3 double crochet into the next chain-2 space (this is now a side, not a corner).
- Repeat: corner in each corner space, chain 1 and 3 double crochet in each side space, going around all 4 sides.
- Join with a slip stitch to the top of your starting chain-3.
Round 3: repeat the pattern
Steps
Round 3 repeats the same logic as Round 2, just with one more side section per edge:
- Join into any corner space, chain 3, then
[2 double crochet, chain 2, 3 double crochet]in that corner. - Chain 1, 3 double crochet in the next space, chain 1, 3 double crochet in the next space (two side groups now, instead of one).
- Repeat around all 4 sides, then join with a slip stitch to close the round.
Every additional round follows this same pattern: a corner group in each corner, and one more side group per edge than the round before it.
Adding more rounds
Once you've finished Round 3, Round 8 is not actually harder — it's just more of the same decision, repeated. Each new round adds one side group per edge, so a 4-round square is about the right size for a coaster, and an 8-round square sits around 6 to 7 inches — a common size for blankets. The only thing that changes is how many chain-1 spaces you skip across between corners, so keep your stitch marker in the starting stitch and let the corners guide you rather than trying to hold the whole round in your head.
Common mistakes & fixes
Finishing and joining squares
Fasten off and weave in your ends with a yarn needle, working them back and forth through the stitches of the same colour so they stay put. For a single coaster, you're done. If you plan to join several squares into a blanket, there are three methods worth knowing:
- Whip stitch — the simplest option for a first attempt. Thread a needle, hold two squares edge to edge, and stitch through the outer loops of both together.
- Slip stitch join — a flatter, more flexible seam than whip stitch, worked with a hook instead of a needle.
- Single crochet join — gives a raised, decorative ridge between squares. It's the neatest-looking border but the least forgiving if your stitch counts don't match.
Whatever method you pick, joining works cleanest when every square has the same number of rounds — and blocking each square before joining makes the seams line up far more easily. Our blocking guide shows how, and the granny square blanket pattern puts all of this together into a full project.
Our pick
Cotton worsted-weight yarn, 3-pack
Multiple colours in one order makes it easy to try colour-changing between rounds without buying several separate skeins.
View on Amazon →A video walkthrough of the granny square motif, useful for seeing how each round is built on top of the last.
Frequently asked questions
How many rounds does a basic granny square have?
A basic granny square is usually worked to 3 or 4 rounds for a coaster-sized square, roughly 4 to 5 inches across. You can keep adding rounds to make it as large as you like for a blanket — there's no structural limit, just how much yarn and patience you have.
What size hook should I use for a granny square?
Most worsted-weight yarn suggests a 4.5mm or 5.0mm hook, and for a first square I'd lean toward the bigger end — 5.0mm or even 5.5mm — because looser stitches are easier to see and count. If your square is cupping, go up half a size; if it's floppy and loose, drop down.
Do I need to change yarn colour for each round of a granny square?
No — colour changes are a style choice, not a requirement. A granny square worked in a single colour throughout is just as structurally correct as a multicoloured one. Changing colour each round is simply the easiest way to see the round structure while you're learning, because each ring of colour maps to one round.
Can I use a magic ring instead of chain 4?
Yes, and many people prefer it because the centre pulls fully closed with no hole. Chain 4 and a magic ring both work; the magic ring just gives a neater centre. It's a slightly fiddlier start, so if it's new to you, our magic ring tutorial walks through it slowly.
How do I join granny squares together into a blanket?
The two most common methods are whip stitching the edges together with a yarn needle, or single crocheting the squares together as a border. Whip stitch is simpler for a first attempt and lies flat; single crochet joining gives a more finished, raised edge. Match the stitch counts of all your squares before you start so the seams line up.
Why is my granny square curling or cupping instead of lying flat?
Cupping almost always means your stitches are too tight, which pulls the corners in faster than the sides can spread. Go up half a hook size, and loosen your tension specifically on the chain-2 corners, since those are what let the square grow outward.
Why does my granny square look wonky or not actually square?
This is almost always a miscounted corner. Each corner needs exactly 3 double crochet, chain 2, 3 double crochet, worked into the same space. If one corner has an extra or missing stitch, that side grows at a different rate and pulls the whole square off true. Count your corners first.
CrochetGuides is a participant in the Amazon Services LLC Associates Program. As an Amazon Associate we earn from qualifying purchases, at no extra cost to you.