How to Fix a Hole in Crochet (Without Frogging the Whole Thing)
A hole feels like a disaster the first time you find one. Almost every one of them is a five to twenty minute repair, not a reason to start over.
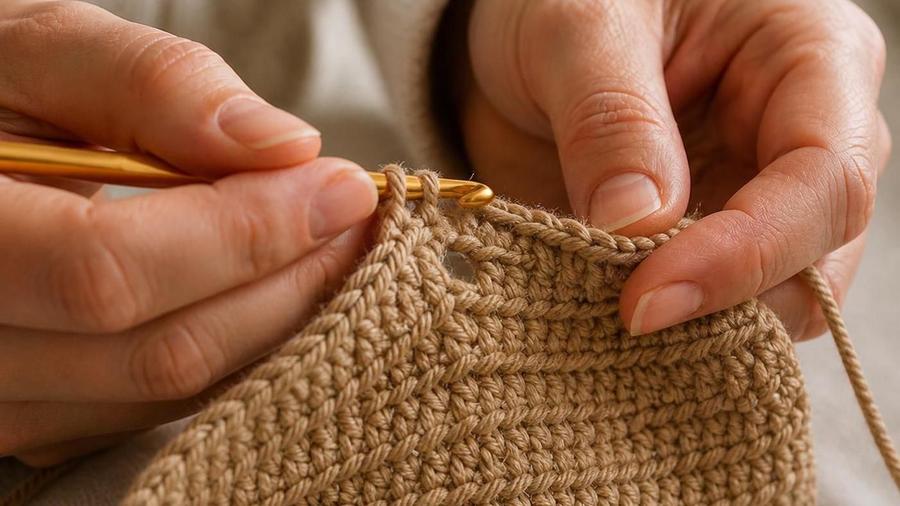
A friend once brought me her late grandmother's afghan, a decades-old wool piece with a small moth hole near one corner, convinced the only options were living with the hole or throwing the blanket away. Neither was true. Twenty minutes with a strand of leftover wool and a yarn needle, working duplicate stitches over the damaged spot, and the hole was gone, close enough to invisible that you'd need to know exactly where to look to find it again. She'd been carrying that blanket around for months, afraid to use it, over a repair that took less time than it took her to drive to my house.
Holes in crochet come from a small number of causes, and every one of them has a reliable fix that doesn't involve unraveling a finished project. A hole on something still on your hook is usually a skipped stitch, caught early enough to simply frog back to. A hole in a finished, worn piece, an old blanket, a favourite hat, a hand-me-down sweater, is usually a snagged stitch, ordinary wear, or moth damage on wool, and each of those responds to the same handful of repair techniques: duplicate stitching over the damage, or a small patch sewn in for anything larger.
This guide walks through diagnosing what kind of hole you're actually dealing with, the step-by-step repair for each situation, and how to prevent the same hole from reappearing once it's fixed.
Diagnosing what kind of hole you have
The right fix depends on both where the hole is and what caused it, so it's worth identifying both before reaching for a needle.
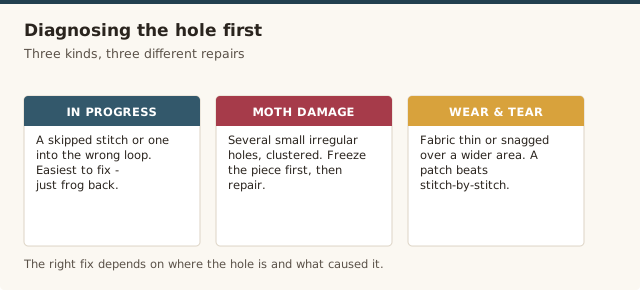
- A hole on a piece still in progress: almost always a skipped stitch, a stitch worked into the wrong loop, or a stitch that slipped off the hook unnoticed. This is the easiest to fix, since the surrounding stitches haven't been blocked or set into a final shape yet.
- A hole in a finished piece, appearing suddenly: usually a snagged stitch that's been pulled and broken, often from a zipper, a ring, a pet's claw, or rough handling. The yarn around the hole is often still intact, just pulled out of position.
- A hole in an old or stored piece, several small holes, or a scattering of tiny holes: a strong sign of moth or carpet beetle damage on wool or other animal-fiber yarn. Check the surrounding fabric and any nearby stored yarn for evidence of an active infestation before repairing, since a repair on an active infestation only creates a new hole in a different spot given enough time.
- A hole from general wear, thinned or worn-through fabric at a friction point like a sock heel or a frequently-gripped bag handle: this is fabric that's genuinely worn out rather than a single broken stitch, and usually needs a small patch rather than a stitch-for-stitch repair.
Fixing a hole while still on the hook
If you spot a skipped stitch or small hole in a project you're still actively working, how far back it is determines the fastest fix.
- Within the last few rows: frog back to just before the mistake and rework from there. This is usually faster than trying to fix it in place while stitches are still loose and easy to unravel.
- Many rows back, in a section you don't want to unravel: use a separate strand of matching yarn and a yarn needle to duplicate the missing stitch in place, following the path the stitch would have taken through its neighbours, then weave in both ends of the repair strand. This adds the missing stitch without touching any of the finished rows above it.
Counting your stitches at the end of every row while you're still building the habit is the cheapest way to avoid discovering a hole many rows later in the first place; our guide to common crochet mistakes covers this and a few other frequent early-stage errors.
Duplicate stitch repair, step by step
Duplicate stitch (sometimes called Swiss darning in the knitting world, and used the same way in crochet) is the core technique behind almost every hole repair on a finished piece. It works by tracing a new strand of yarn over the exact path of a damaged or missing stitch, effectively rebuilding it on top of the surrounding fabric.
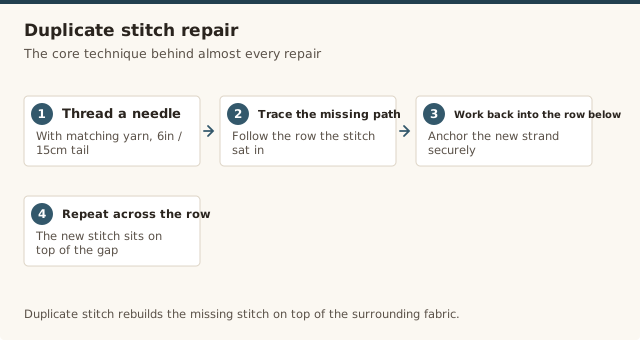
- Cut a length of matching yarn, longer than you think you'll need, and thread it onto a blunt yarn needle.
- Starting an inch or so away from the hole, in solid fabric, weave the needle in to anchor the strand, following the same reverse-direction weaving described in our guide to weaving in ends.
- Bring the needle up through the base of the first stitch you're replacing, then trace the path of that stitch exactly, following the V or post shape of the stitches around it, working stitch by stitch across the damaged area.
- Once the damaged stitches are fully rebuilt, weave the working end back into solid fabric on the other side of the hole, in a different direction than your anchor pass, and trim.
Working slowly and checking the tension of each duplicated stitch against its undamaged neighbours is more important than speed here; a repair worked at noticeably different tension than the surrounding fabric will show, even in a perfectly matched yarn.
Patching a larger hole
For a hole too large to rebuild stitch by stitch, or fabric that's worn thin across a wider area rather than broken at one point, a separate patch is more practical than duplicate stitching.
- Crochet a small swatch in the same stitch pattern, yarn, and gauge as the original piece, slightly larger than the hole on all sides.
- Trim any badly frayed or worn yarn from the edges of the hole, but don't cut back further than necessary.
- Position the patch behind the hole, from the wrong side of the fabric, so the patch's right side shows through the gap.
- Using matching yarn and a yarn needle, sew the patch's edges to the surrounding fabric with small, even whip stitches, working all the way around.
- Weave in the sewing yarn's ends on the wrong side once the patch is fully secured.
This is the same general approach used for other repair scenarios, like a worn dishcloth or a threadbare spot on a well-used bag; our crochet basket pattern uses a similar sturdy stitch base if you want practice with a similar dense fabric before patching something you care about.
Repairing moth damage
Moth holes usually appear as several small, irregular holes rather than one clean gap, often clustered in one area of a wool or animal-fiber piece. Before repairing any moth damage, address the infestation itself: seal the piece in a bag and freeze it for 48 hours to kill any remaining eggs or larvae, and check any yarn or wool items stored nearby for the same problem, since moths spread between neighbouring stored fibers. Repairing a hole while an infestation is still active is wasted effort, since new holes will keep appearing.
Once you're confident the infestation is fully addressed, repair each hole using the duplicate stitch method above, working each one individually even if several are clustered close together. Our guide to storing yarn properly covers moth prevention in more depth if this has happened more than once.
Matching yarn for an invisible repair
The single biggest factor in how visible a repair ends up is how well the patch or duplicate-stitch yarn matches the original, in weight and fiber as much as colour. Leftover yarn saved from the original project is always the best option, since it guarantees an exact match in every respect, which is one more reason our yarn storage guide recommends keeping labeled leftovers rather than discarding them.
Without the original yarn, prioritize matching weight and fiber content over an exact colour match, especially on a textured or multi-coloured stitch pattern where a close colour blends in more easily than an exact colour worked at the wrong weight, which will always show as a difference in fabric density even if the shade is perfect.
Preventing the same hole again
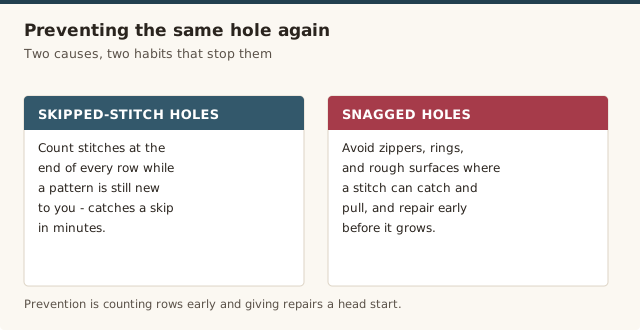
- For skipped-stitch holes: count stitches at the end of every row while a stitch pattern is still new to you, which catches a skip within minutes rather than rows later.
- For snagged and pulled holes: avoid wearing or using crochet pieces around zippers, rings, or rough surfaces where a stitch can catch and pull, and repair a small snag immediately before it's worked into a full hole through continued wear.
- For moth damage: store wool and animal-fiber pieces in sealed containers, following the same precautions as yarn storage, since a finished piece is just as vulnerable to moths as a stored skein.
- For wear-related holes: reinforce known friction points, like a sock heel or a bag's handle join, with an extra round of stitching or a doubled strand of yarn while the piece is still new, before wear has a chance to thin the fabric.
Mistakes that make holes worse
Fix: try duplicate stitching or a small patch first. Both repair the large majority of holes in far less time than unraveling and rebuilding a whole project.
Fix: freeze the piece for 48 hours to kill any remaining eggs or larvae before investing time in a repair, since an active infestation will simply create new holes.
Fix: work slowly and check each repaired stitch against its undamaged neighbours as you go, rather than rushing the repair and checking only at the end.
Fix: prioritize matching yarn weight and fiber content first; a close but not exact colour blends in far better than an exact colour at the wrong weight, which shows as a difference in fabric density.
Fix: repair a snag as soon as you notice it. A small pulled stitch left alone tends to worsen with continued wear and becomes a larger, more visible hole over time.
Hole-repair FAQ
What causes a hole to appear in crochet fabric?
A hole on a piece still on the hook is almost always a skipped stitch or a stitch worked into the wrong loop. A hole appearing in a finished, worn piece is usually a snagged and pulled stitch, a worn-through spot from friction, or moth damage on wool and other animal-fiber yarns.
Do I need to frog my whole project to fix a hole?
Usually not. If you catch a skipped stitch within the last few rows, frogging back to just that point is fastest. For a hole discovered many rows later, or in a finished piece, a targeted repair, duplicate stitch or a small patch, is almost always faster than unraveling.
How do you fix a hole from a dropped or skipped stitch while still crocheting?
If it's within the last few rows, frog back to just before the skipped stitch and rework from there. If it's many rows back and frogging would undo too much finished work, use a crochet hook to duplicate-stitch the missing stitch in place using a separate strand of matching yarn, then weave in both ends.
How do you repair a hole in an old or worn crochet blanket?
Duplicate stitch over the worn or broken stitches with a matching or leftover strand of yarn, following the path of the original stitches as closely as possible. For a larger hole, work a small patch separately and sew it in place from the back, blending it into the surrounding fabric.
Can moth damage in wool crochet be repaired?
Small moth holes can be repaired the same way as any other hole, with duplicate stitching or a patch, once you've confirmed the infestation is fully gone. Treat and isolate the piece first (freezing it for 48 hours kills any remaining eggs or larvae) before investing time in a repair, since an active infestation will keep creating new holes.
What yarn should I use to patch a hole?
Use the original leftover yarn from the project if you saved any, since it will match in fiber, weight, and dye lot. If none is left, choose a yarn matching as closely as possible in weight and fiber content; an exact colour match matters less on a patch worked into a busy or textured stitch pattern than on a plain one.
CrochetGuides is a participant in the Amazon Services LLC Associates Program. As an Amazon Associate we earn from qualifying purchases, at no extra cost to you.