How to Fix Curling Edges in Crochet (And Stop It Happening Again)
If your blanket is trying to fold itself into a taco, it isn't ruined — it's telling you something specific about your tension or your stitch choice.
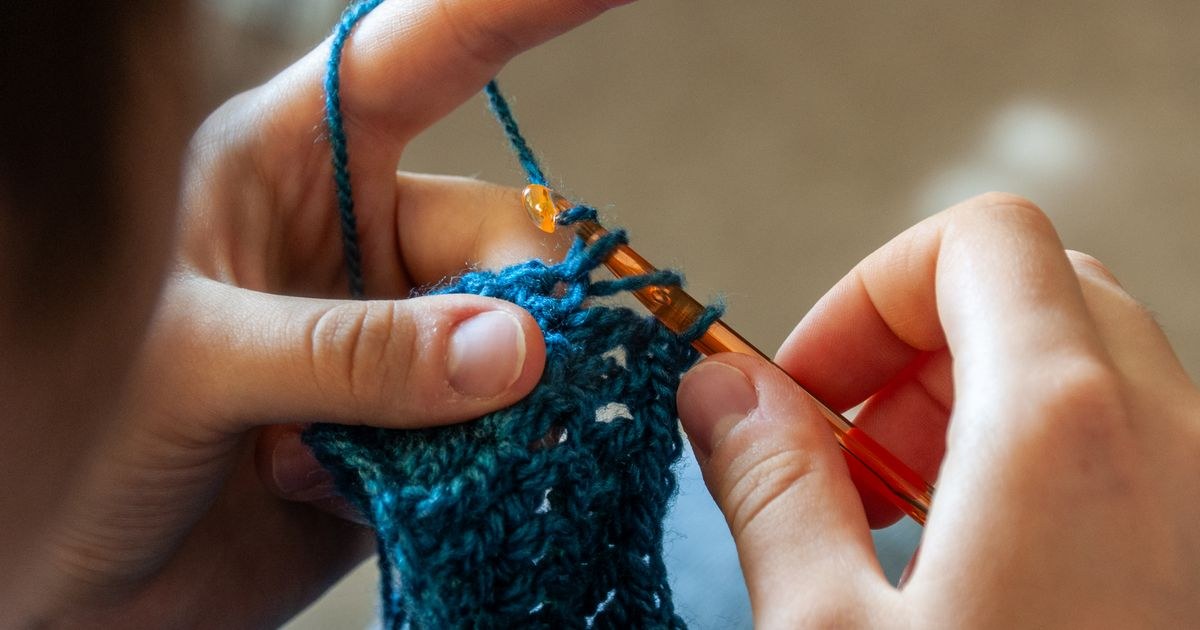
The first time I saw a student's blanket curl into a full cylinder, she was almost in tears. She'd worked forty rows of single crochet in a soft acrylic, and instead of lying flat on the table, it rolled up on itself like a yoga mat the second she let go of it. She was convinced she'd used the wrong yarn, or the wrong hook, or somehow crocheted it "wrong" from the very first row. None of that was true. She'd simply worked a fabric that's structurally prone to curling, at a tension that made the effect stronger than usual, and nobody had told her that a border was going to be part of the plan all along.
Curling is one of the most common questions I get in class, right after "why does my tension keep changing," and it comes up so often because it isn't really one problem. Sometimes it's the foundation chain pulling tighter than the rows above it. Sometimes it's the stitch pattern itself, because plain single crochet worked flat genuinely wants to curl by design. Sometimes it's tension that's crept tighter than the pattern's gauge over the course of an evening. Each of these has a different fix, and trying the wrong one — frogging an entire blanket because you assume the yarn is defective, say — wastes hours you don't need to lose.
This guide walks through why curling happens, what to do about a piece that's already curling on your hook or blocking mat right now, and the changes that stop it from happening again on your next project. By the end you should be able to look at a curling edge and know within a minute or two which of the usual causes is yours.
Why crochet edges curl in the first place
Crochet fabric curls when one part of it is under more tension, or built more densely, than the part next to it. There are three usual sources, and it's worth checking your project against all three before you decide which fix to reach for.
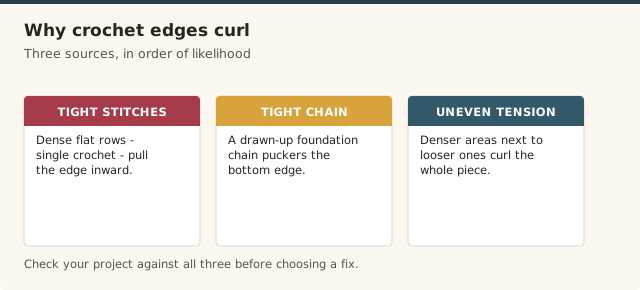
The first is the stitch pattern itself. Single crochet worked in flat rows produces a dense, tightly packed fabric, and dense fabric has a natural tendency to cup toward its right side, the same way a piece of felt curls when you cut it. This is precisely why amigurumi is worked in single crochet: the curl is the mechanism that lets a flat spiral of stitches become a rounded, three-dimensional shape. On a flat blanket or dishcloth, though, that same tendency shows up as an edge that won't lie down.
The second is tension that's tighter than the pattern's gauge, which compounds the first cause. If your stitches are packed more tightly than intended, the curling effect that's already built into single crochet becomes noticeably stronger. This is the single most common cause I see, and it's also the easiest one to test for: work a fresh swatch at a slightly looser tension and see if the curl softens.
The third is a foundation chain worked more tightly than the rows above it. Chains are quick to make and easy to accidentally cinch tight, especially early in a project before your hands have settled into a rhythm. When the very first row is tighter than everything above it, that edge draws inward on its own, independent of whatever the rest of the fabric is doing.
Quick fixes for a piece that's curling right now
If you're mid-project or just finished and the curl is bothering you, work through these roughly in order, since each is progressively more involved.
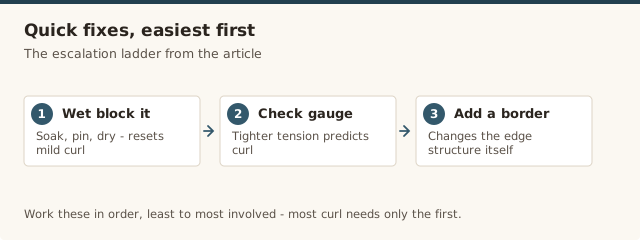
- Wet block it first. Before changing anything about how you're crocheting, block the piece (see the blocking section below). Mild curling from normal tension variation often resolves with nothing more than pinning it damp and letting it dry flat.
- Check your hook size against gauge. If your swatch is coming up smaller than the pattern's stated gauge, your tension is tighter than intended, and that tightness is very likely what's driving the curl. Go up half a hook size and swatch again.
- Add a border round. If blocking alone doesn't hold, a single crochet or slip stitch border worked around all sides adds a firmer, evenly tensioned edge that physically counteracts the pull from the body of the piece. This is the most reliable fix and the one I reach for first on anything already finished.
- Re-tension just the foundation chain. If only the bottom edge is curling while the rest lies flat, the chain itself is the problem rather than the fabric above it — see the section below for how to fix that specifically.
Fixing curl caused by a tight foundation chain
You can tell the foundation chain is the culprit when the bottom edge of your piece pulls inward or puckers while the rest of the fabric sits flat. This happens because chains are worked with a slightly different hand motion than crochet stitches, and it's very easy to draw them tighter than you realize, especially in the first few inches of a project.
If you're partway through and notice this, the cleanest fix is to go up one hook size for the chain only, then switch back down to your working hook size for the first row and beyond. This gives the chain the extra ease it needs to match the tension of the rows above it without changing the gauge of the piece itself.
If the piece is already finished and the chain edge is visibly tighter than the rest, a slip stitch border worked directly into that foundation edge will absorb the difference and let the whole bottom lie flat. Work one slip stitch into each foundation chain stitch, keeping your tension deliberately loose as you go, since the point is to add ease back into that edge rather than tighten it further.
For future projects, a chainless foundation single crochet (sometimes written as "foundation sc" or "fsc") builds the base row and the first row of stitches in one pass, which sidesteps the tight-chain problem entirely because there's no separate chain to over-tighten. It takes a little practice to learn, but it's worth it if you find your chains consistently come out tighter than your rows.
Adding a border that stops curling for good
A border is the single most dependable fix for curling, because it changes the structure of the edge rather than trying to talk the existing fabric out of its natural shape. Here's the version I teach in class for a plain curling rectangle, like a dishcloth or the body of a blanket:
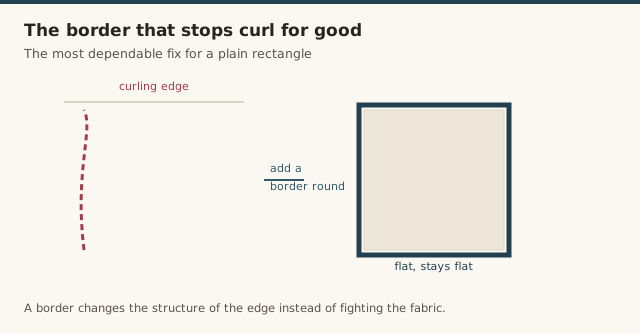
- With the right side facing you, join yarn in any corner stitch.
- Work one single crochet in each stitch along the row, and three single crochet stitches in each corner stitch to keep the corner from puckering as it turns.
- Continue around all four sides, working evenly along the ends of rows (roughly two stitches for every three row-ends, adjusted so the border lies flat rather than rippling or cupping).
- Join with a slip stitch to your first single crochet, and fasten off.
One round is often enough. If the piece still wants to curl after one round, work a second round the same way — the extra density at the edge usually finishes the job. For a slightly firmer, less bulky alternative, a slip stitch border does the same job with a flatter finish, though it's less forgiving of uneven row-ends, so single crochet is the safer default if you're not sure which to pick.
If you're not confident with border stitches yet, our basic crochet stitches guide covers single crochet and slip stitch from scratch, and our guide to joining granny squares covers corner turns in more detail if you're working on something square rather than a simple rectangle.
Blocking: what it can and can't fix
Blocking means wetting or steaming a finished piece, then pinning it into its intended shape while it dries. It resets the fibers into a flatter, more relaxed position, and for mild curling it's often all you need.
To wet block: soak the piece in cool water for about twenty minutes, squeeze out the excess water without wringing or twisting, then lay it flat on a towel or blocking mat and pin the edges into shape. Let it dry fully before removing the pins, which can take a full day or more depending on yarn thickness and humidity.
Blocking works best on natural fibers like wool, cotton, and blends with a high natural-fiber content, because those fibers hold a new shape once they dry. Acrylic yarn is more stubborn: it can be blocked, but the effect is less permanent, and a curling acrylic piece will often relax back toward its original shape after a wash or two unless the curl was also mild to begin with. If your project is acrylic and the curl is significant, don't rely on blocking alone — pair it with a border for a fix that actually holds.
Steam blocking, done carefully with an iron held just above the fabric rather than pressed directly onto it, works faster than wet blocking but carries more risk of scorching or flattening texture you wanted to keep, like a bobble or cable pattern. For a first attempt, wet blocking is the safer choice.
Curling in blankets, garments, and amigurumi
Not every curling project needs the same fix, because the shape you're making changes what "success" actually looks like.
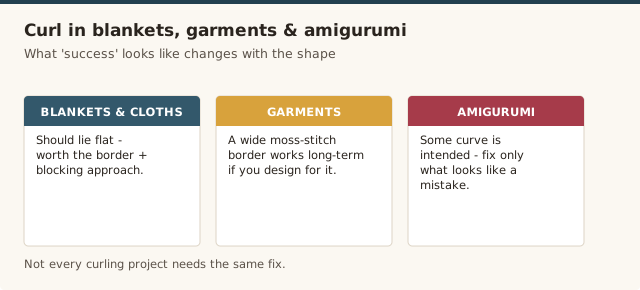
Blankets and dishcloths should lie flat, so any curl here is worth fixing with the border and blocking approach above. A wide moss stitch or double crochet-based border is a good long-term choice if you're designing your own project rather than following a set pattern, since those stitches curl far less than plain single crochet.
Garment hems curling is common on the bottom edge of a sweater or the cuff of a sleeve when the body is worked in single or double crochet without a distinct edging. Many patterns build in a ribbed or seed stitch band specifically to prevent this; if yours doesn't and the hem curls, a few rounds of single crochet or a simple seed stitch band added afterward will usually flatten it without needing to reknit the body.
Amigurumi is the one place curling is supposed to happen. The tight, dense curl of single crochet is what lets a flat starting circle grow into a sphere, and what gives a cylinder its shape. If you're making a stuffed toy and the fabric is cupping rather than lying flat, that's the stitch working correctly, not a mistake to correct. Our amigurumi for beginners guide covers how that shaping works from the very first magic ring.
Preventing curl on your next project
A few habits make curling much less likely before you've even picked a pattern.
- Swatch and check gauge before starting. If your swatch comes up smaller than the pattern's stated measurement, your tension is tighter than intended, and that's the single biggest predictor of curling. Adjust hook size until your swatch matches.
- Choose a border-friendly stitch pattern for flat pieces. Patterns built from double crochet, moss stitch, or alternating stitch heights curl far less than plain single crochet rows, since the fabric they produce is naturally looser and more open.
- Chain deliberately loose. If you know your chains tend to come out tight, consciously loosen your grip on the working yarn for just that first row, or go up a hook size for the chain as described earlier.
- Plan for a border from the start. If you're designing your own flat project, build the border into your stitch and yarn calculations up front rather than treating it as an afterthought once the piece is already curling.
- Keep tension consistent through a project. Tension often tightens gradually over a long session as your hands fatigue. Taking short breaks and re-checking your gauge against your first few rows periodically catches this before it becomes visible curling.
Common mistakes & fixes
Fix: try blocking and a single border round first. The large majority of curling projects flatten out with these two fixes alone, with no need to unravel any stitches.
Fix: deliberately work the border round a touch looser than the body of the piece, since a border worked at matching or tighter tension won't add the ease needed to counteract the curl.
Fix: pair blocking with a border on acrylic yarn. Synthetic fibers don't hold a blocked shape as permanently as wool or cotton, so blocking by itself is often a temporary fix rather than a lasting one.
Fix: leave it alone. That curl is what shapes the toy once it's stuffed; flattening it out beforehand usually just makes the piece harder to seam and stuff evenly.
Fix: lay the piece flat and look at just the bottom edge on its own. If that edge alone is pulling while the rest sits flat, the fix is a looser chain or a slip stitch border along just that edge, not a full re-tension of the project.
Frequently asked questions
Why does my crochet project curl at the edges?
Curling almost always comes from tension that's tighter than the pattern's gauge, from a foundation chain worked more tightly than the rows above it, or from a stitch pattern like plain single crochet rows that naturally pulls inward. Most curling is a tension and stitch-choice problem rather than a sign anything is ruined.
Will blocking fix curling edges?
Blocking fixes mild curling caused by normal tension variation, especially on natural fibers like wool or cotton. It won't hold against strong curling caused by a genuinely tight foundation chain or an all-single-crochet fabric, since acrylic yarn in particular will relax back toward its original shape within a wash or two.
Does adding a border stop crochet from curling?
Yes, in most cases. A slip stitch or single crochet border worked around all four sides adds a firmer, evenly tensioned edge that counteracts the pull from the body of the piece, and it's the single most reliable fix for a finished project that curls.
Why does only my foundation chain curl, not the rest of the piece?
A tight foundation chain is one of the most common causes. If you chain more tightly than you crochet the rows above it, that first edge draws in on itself while the rest of the fabric sits at normal tension, creating a visible pull along just the bottom edge.
Is it normal for amigurumi to curl?
Yes. Amigurumi is worked in single crochet specifically because that fabric is dense and wants to cup inward, which is what lets a flat round of stitches curve into a sphere or cylinder shape. That's the stitch doing its job, not a mistake to fix.
Should I go up a hook size to stop curling?
Often, yes. Curling is frequently a sign your stitches are tighter than the pattern's gauge expects. Going up half a hook size loosens the fabric slightly, which softens the pull at the edges without changing the stitch pattern itself, and is worth trying before you assume you need a structural fix like a border.
Why does my crochet hem curl but the pattern didn't warn me?
Many written patterns assume you'll block the finished piece or work the stated border, and skip mentioning curl because it's expected to be handled by those steps. If a pattern's hem is plain single or double crochet with no edging round, some curl before blocking is normal rather than a flaw in the pattern.
CrochetGuides is a participant in the Amazon Services LLC Associates Program. As an Amazon Associate we earn from qualifying purchases, at no extra cost to you.