Puff Stitch: A Complete Tutorial
How to work a raised, rounded puff stitch, with yarn-over count, spacing, and troubleshooting for consistent, well-shaped puffs.
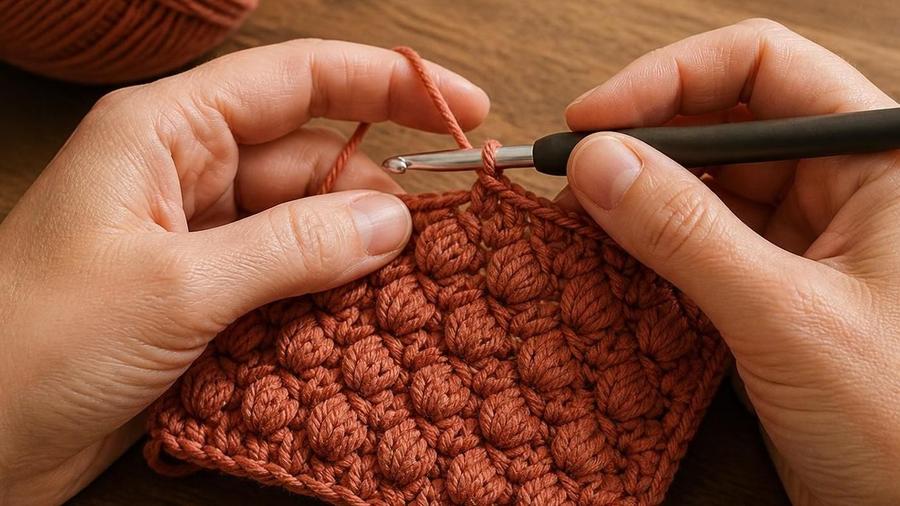
The first time I tried a puff stitch from a pattern that just said "work a puff stitch" without specifying the loop count, I built up five loops on the hook, pulled through, and got a texture so flat it barely registered as raised at all. It turned out I'd been working half double crochets when the swatch I was copying used full double crochets, and that one difference in the base stitch changes the loop count on the hook and, with it, the whole size and roundness of the finished puff. Puff stitch isn't one fixed technique, it's a small family of closely related variations, and knowing which loop count you're actually working is the first thing that needs to be clear before anything else about the stitch makes sense.
This tutorial covers the mechanics of building and closing a puff stitch cleanly, how the yarn-over count changes its size and roundness, and the spacing and tension habits that keep a row or round of puffs looking even rather than lumpy or gapped.
Puff stitch rewards patience more than most basic stitches, since the actual motion, several incomplete stitches held on the hook and pulled through together, is a little fiddly the first several times you try it. It's also one of the more satisfying textures to finally get consistent, since the visual payoff, a row of neat, evenly rounded bumps, is immediately obvious the moment your tension settles into a rhythm.
Materials for practicing
- A worsted or aran-weight yarn in a smooth, solid or subtly heathered color
- A hook one size larger than you'd typically use for that yarn weight (this makes the multi-loop pull-through easier while learning)
- Stitch marker, scissors
Abbreviations (US terms)
| Abbr. | Means |
|---|---|
| ch | Chain |
| hdc | Half double crochet |
| dc | Double crochet |
| yo | Yarn over |
See our abbreviations glossary and basic stitches guide if hdc and dc aren't familiar yet.
Working the basic puff stitch
A puff stitch, in its most common double-crochet-based version, is built like this: yarn over, insert the hook into the stitch, yarn over and draw up a loop (3 loops on the hook), then yarn over and draw up another loop in the same stitch without completing it (5 loops on the hook), repeat that draw-up step 2 more times (9 loops on the hook total across 4 incomplete double crochets), then yarn over one final time and pull through all 9 loops at once. Chain 1 to close and secure the puff before moving on to the next stitch.
The chain-1 close is easy to skip by accident since it happens right after the satisfying moment of pulling through all those loops, but it's what actually locks the puff's shape in place. Without it, the top of the puff can loosen and flatten slightly as you continue working, undoing some of the roundness you just built.
Keep your tension slightly looser than usual while building up the incomplete stitches, then tighten normally on the final pull-through and chain-1 close. Working the whole thing at your normal tight tension makes the multi-loop pull-through noticeably harder on the hook and on your hand, without actually improving the finished puff's appearance.
How loop count controls puff size
Every additional incomplete stitch built into the same puff adds 2 more loops to the hook before the final pull-through, and that loop count is the single biggest factor in how large and round the finished puff looks. A 3-loop puff, built from a single yarn-over base stitch like a half double crochet worked incompletely, gives a subtle, gentle texture, useful when you want just a hint of dimension without a dramatic bump. A 5-loop puff, built from two incomplete double crochets, stands up more noticeably. Patterns that call for a larger "cluster puff" push this further, sometimes to 7 or 9 loops, for a genuinely prominent, chunky bump.
This means the specific loop count called for in a pattern isn't an arbitrary stylistic choice, it's directly controlling how the finished texture will look, and substituting a different count than specified will change the puff's proportions relative to the rest of the stitch pattern around it. If a pattern doesn't specify clearly, a 4-loop puff (built from double crochets) is a reasonable, moderate default that reads clearly as a puff without becoming overly bulky.
Yarn weight interacts with loop count too: the same loop count produces a visibly larger puff in a bulky yarn than in a DK-weight yarn, so if you're substituting yarn weight from what a pattern specifies, expect the puff's relative size within the fabric to shift somewhat even if you keep the stitch instructions identical.
Spacing puffs so the fabric lies flat
A puff stitch takes up more physical width at its base than a standard stitch worked into the same single foundation stitch, since all those extra yarn-overs and draw-ups add bulk right at the point where the puff meets the row below. Working puffs into every single stitch, with no skipped stitches between them, packs that extra bulk too densely and causes the fabric to gather and ripple rather than lying flat.
Most puff stitch patterns account for this by skipping 1-2 plain stitches between each puff, sometimes replaced with a chain space instead of a skipped stitch, which gives the surrounding fabric room to accommodate the puff's width without being pulled out of shape. Keep this skip-and-space rhythm completely consistent across a row or round, since even one puff placed without its usual neighboring gap will visibly bunch compared to the puffs around it.
When working puffs in the round rather than in rows, plan the total stitch count against your puff-and-skip repeat before starting, so the pattern divides evenly and the puffs land in a consistent rhythm all the way around rather than leaving an odd, uneven gap wherever the round happens to close.
A practice swatch worth building
Rather than jumping straight into a full project, work a swatch of about 20 stitches across 4-5 rows, alternating a plain row with a puff row, before committing to anything larger. This gives you enough repetitions to find a consistent rhythm for the multi-loop pull-through, and it's a low-stakes place to experiment with different loop counts side by side to see how a 3-loop puff actually compares to a 5-loop puff in your own yarn and gauge, rather than relying on a written description alone.
Keep that first swatch rather than unraveling it once you've moved on to a real project. Puff stitch tension has a tendency to drift again after a break from the technique, and having a reference swatch on hand to compare against is a faster way to recheck your rhythm than re-reading the written instructions from scratch each time.
Once the basic puff feels comfortable, try combining it with a plain stitch in an alternating checkerboard layout across several rows, offsetting the puff placement so each row's puffs sit between the previous row's puffs rather than directly above them. This is a common way puff stitch appears in finished blanket and cushion patterns, and it's worth practicing the offset placement specifically, since working directly above bunches the bulk in vertical columns rather than distributing it evenly across the fabric.
Where puff stitch goes wrong
Fix: check the yarn-over count specified for the puff stitch variant being used, fewer loops produces a flatter puff, and going up in loop count is what creates a rounder, more three-dimensional bump.
Fix: work the stitch on either side of the puff at the tension specified rather than pulling tight to "close up" the gap next to the puff, which is a natural and expected part of the texture.
Fix: keep the exact same yarn-over count on every single puff rather than varying it, since even one extra loop noticeably changes a puff's size.
Fix: puff stitches decrease the visible stitch count differently than a standard stitch, count actual worked stitches against the row instruction rather than counting puffs as a single stitch by eye.
Fix: this is a genuinely fiddly motion at first, hold the base of the puff firmly with your non-hook hand while pulling the yarn through, rather than trying to do it one-handed.
If a pattern combines puff stitch with color changes, work the color change on the chain-1 that closes the puff rather than mid-puff, since changing color partway through the incomplete stitches leaves a visible fleck of the old color trapped inside the closed loop. Finishing the puff fully in one color, then switching on the closing chain, keeps each puff a single clean color from every angle.
Puff stitch FAQ
What's the difference between a puff stitch and a bobble stitch?
A puff stitch is built from incomplete double or half double crochets, all pulled through together at the end, which gives it a softer, rounder bump. A bobble is typically built from several complete double crochets worked into the same stitch and gathered at the top, giving it a firmer, more angular texture. They're both raised-texture stitches, but they look and feel noticeably different up close.
How does the yarn-over count change the puff's size?
More loops on the hook before the final pull-through produces a larger, rounder puff, while fewer loops produces a flatter, more subtle bump. A 3-loop puff (using half double crochets) reads as a gentle texture, while a 5-loop puff (using double crochets) stands up noticeably more.
Can puff stitch be worked in the round as well as in rows?
Yes, puff stitch works the same way in the round as in rows, the main adjustment is planning the spacing between puffs relative to the round's total stitch count so they land evenly rather than bunching at the seam or wherever the round happens to start.
What yarn weight shows off the texture best?
A worsted or aran weight yarn in a smooth, non-fuzzy fiber shows the puff's rounded shape most clearly, since the stitch definition needed to see the texture gets muddied by a very fuzzy or highly textured yarn. A solid or subtly heathered color also shows the raised texture more clearly than a busy variegated colorway.
Is puff stitch good for a beginner, or better attempted after basic stitches feel comfortable?
It's a reasonable stitch to try once single and double crochet feel comfortable and automatic, since the puff itself involves a slightly fiddly multi-loop pull-through that's easier to manage once your hands aren't also still thinking about basic stitch formation.
What projects use puff stitch well?
Hats and cowls benefit from the extra warmth a puff stitch's thickness adds, blankets and cushion covers show off the texture at a larger scale, and a single row of puffs makes an effective textured border or accent stripe on an otherwise plain piece.
CrochetGuides is a participant in the Amazon Services LLC Associates Program. As an Amazon Associate we earn from qualifying purchases, at no extra cost to you.