Free Amigurumi Unicorn Pattern
A soft white body, a small gold horn, and a sweeping pastel rainbow mane and tail made entirely from cut yarn fringe — no complicated colorwork required.
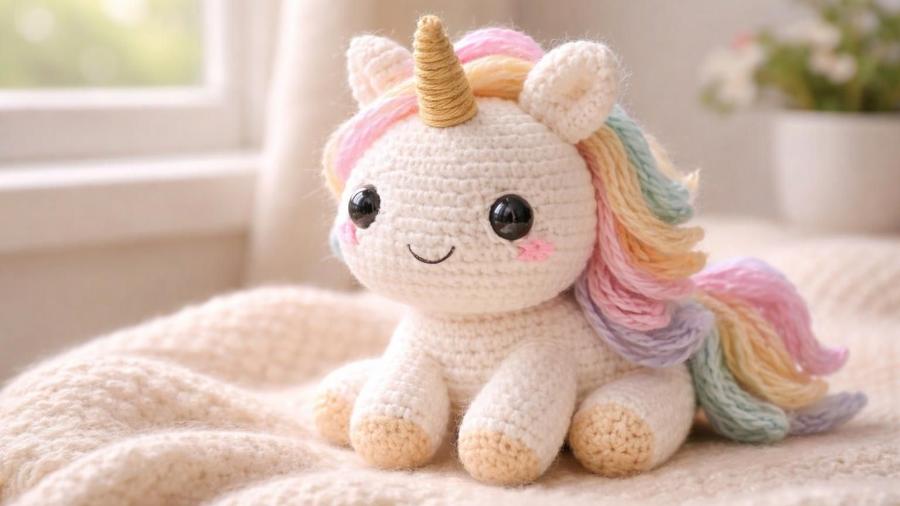
I put off making a unicorn for a long time because I assumed the mane would mean learning some complicated multicolor crochet technique I didn't have the patience for. It turns out the mane isn't crocheted at all. It's fringe, the exact same technique you'd use to finish the edge of a scarf, just worked in a line along the top of the head and neck instead of along a hem. Once I realized that, the unicorn went from an intimidating someday-project to something I made in an afternoon.
The body itself uses the same simple amigurumi shaping as almost any stuffed animal on this site: magic ring, increase rounds, straight rounds, decrease rounds. The horn is just a small tapered cone, stuffed firmly enough to stand upright. All of the pastel rainbow color and movement comes entirely from cutting short lengths of several yarn colors and knotting them through the fabric one at a time, which is genuinely one of the easiest techniques in amigurumi despite how impressive the finished mane looks.
Below is the full pattern in US terms, along with notes on fringing the mane and tail properly, keeping the horn standing upright, and the mistakes that make a fringed mane look thin rather than full. If you're new to amigurumi shaping in general, our amigurumi for beginners guide is a good place to start first.
Materials
- 1–2 skeins worsted-weight yarn in white
- Small amount of gold yarn for the horn
- Small amount of tan yarn for the hooves
- Small amounts of 4–5 pastel colors for the mane and tail fringe
- 3.5mm hook (smaller than standard, for tight amigurumi stitches)
- Polyester fiberfill stuffing
- Safety eyes, or embroidery thread for a child-safe embroidered face
- Stitch marker, to track the start of each round
- Scissors and a yarn needle
Abbreviations (US terms)
| Abbr. | Means |
|---|---|
| sc | Single crochet |
| st(s) | Stitch(es) |
| inc | 2 sc in same stitch (increase) |
| dec | Sc 2 sts together (decrease) |
| rnd(s) | Round(s) |
See our abbreviations glossary for the full list including UK terms.
Gauge
Gauge isn't critical here — the goal is tight, even stitches that keep the stuffing from showing through. If you can see stuffing between your stitches, size down your hook.
Notes
- Written in US terms, worked in a continuous spiral without joining, the same basic technique as our mini amigurumi ball pattern.
- The mane and tail are not crocheted; they're added afterward with cut yarn fringe, a standard finishing technique borrowed from scarves and blankets.
- Made from nine crocheted pieces (head, body, horn, 2 ears, 4 legs) sewn together, plus the fringed mane and tail.
Pattern
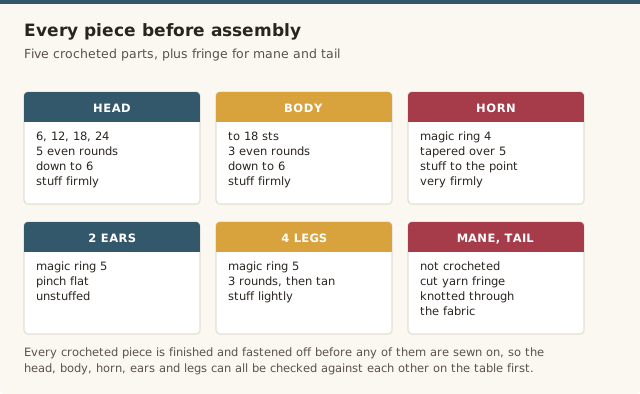
Magic ring, 6 sc. (6) → Inc around. (12) → [sc 1, inc] around. (18) → [sc 2, inc] around. (24)
Sc every st around for 5 rounds, no shaping. (24 sts each round)
[sc 2, dec] around. (18) → [sc 1, dec] around. (12) → Dec around, stuffing firmly as you close. (6)
Fasten off, leaving a long tail for sewing to the body.
Magic ring, 6 sc. (6) → Inc around. (12) → [sc 1, inc] around. (18)
Sc every st around for 3 rounds. (18 sts each round)
[sc 1, dec] around. (12) → Dec around, stuffing as you close. (6)
Fasten off, leaving a long tail for sewing to the head.
Magic ring, 4 sc. (4). Sc even 1 round. Dec 1 st. (3) Sc even 1 round. Repeat this taper for 5 rounds total, stuffing very firmly all the way to the point so it holds its shape. Fasten off, leaving a tail for sewing.
Magic ring, 5 sc. (5). Sc even 1 round. Dec around to about 2–3 sts. Fasten off, leaving a tail. Pinch flat before sewing, unstuffed.
In white, magic ring, 5 sc. (5). Sc even for 3 rounds. Switch to tan for the final round. Stuff lightly. Fasten off, leaving a tail for sewing.
Cut 4–5in lengths of yarn in your chosen pastel colors, several strands of each. Fold one length in half, insert your hook from the underside of a stitch along the mane or tail line, pull the folded loop through, then feed the two cut ends through that loop and pull snug to knot it in place. Repeat closely along the top of the head, down the back of the neck, and in a smaller cluster at the back of the body for the tail. Trim the ends evenly once all the fringe is in place.
Sew the body to the bottom of the head. Sew the horn to the top of the head, centered between where the ears will go, and the two ears just behind and to either side of the horn. Sew all four legs to the bottom of the body, tan hoof ends down. Attach safety eyes before stuffing the head if using them, or embroider the eyes with yarn once assembly is complete for a child-safe alternative. Add the fringed mane and tail last, once every other piece is fully assembled.
Fringing the mane and tail
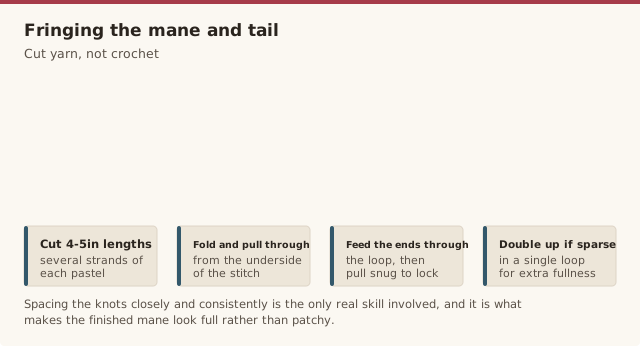
Fringing is a simple two-step motion once you've done it a few times: pull a folded loop of yarn through the fabric from the underside, then feed the two loose ends through that loop and pull tight to lock it in place. The only real skill involved is spacing the knots closely and consistently so the finished mane looks full rather than patchy. Work along the top of the head first, then continue in a line down the back of the neck, alternating your pastel colors or grouping them in small color blocks, whichever look you prefer.
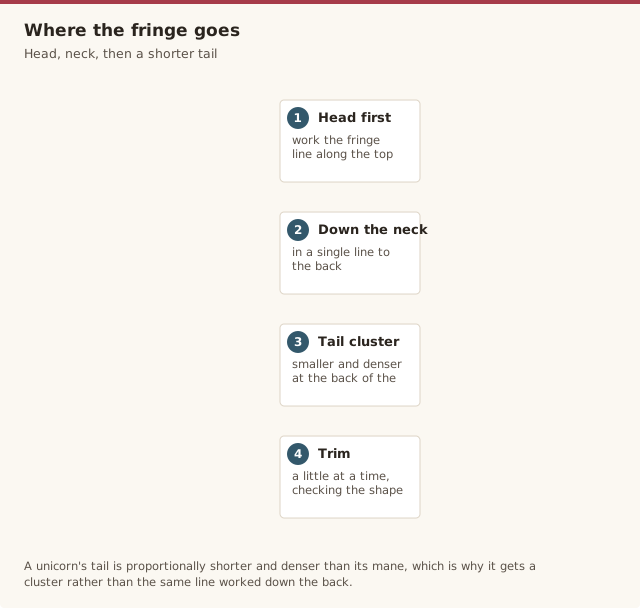
For the tail, work a smaller cluster of fringe knots at the back of the body rather than a full line, since a unicorn's tail is proportionally shorter and denser than its mane. Once every knot is in place, trim the ends to your preferred length with sharp scissors, cutting a little at a time and checking the shape as you go rather than cutting the full intended length in one pass.
Keeping the horn upright
The horn's shape comes entirely from firm stuffing, so don't be shy with it here compared to how lightly you might stuff an ear or a small leg. Push stuffing all the way to the tapered point using the end of a pencil or a stuffing tool if your fingers can't reach, since an unstuffed tip will flop over even if the base is solid. When you sew the horn on, use small, tight stitches all the way around its base rather than just a few anchor points, both for a secure attachment and to help the horn sit perfectly upright rather than leaning to one side.
Color variations
White with a gold horn is the classic unicorn look, but this pattern works just as well in soft blush pink or pale lavender for the body if you'd like something a little less traditional, with the mane still worked in whatever pastel palette you like. If you want the mane to feel more deliberately rainbow rather than randomly pastel, work the fringe in a fixed color order repeating down the neck, such as pink, peach, yellow, mint, and lavender, rather than mixing colors at random.
Common mistakes & fixes
Fix: work the fringe knots closer together than feels necessary, and don't hesitate to double up two strands in a single loop for extra fullness in thinner spots.
Fix: make sure the horn is stuffed firmly all the way to its point, and sew it on with even, tight stitches all the way around its base rather than a few widely spaced stitches.
Fix: pull each knot snug immediately after feeding the cut ends through the loop, and avoid using a very slippery or slick yarn for the fringe, which is more prone to working loose over time.
Fix: trim a small amount at a time rather than cutting the full intended length in one pass, checking the overall shape from a distance between each round of trimming.
Fix: mark both ear positions with a scrap of contrasting yarn before sewing either one on, checking placement from directly above the head so both sides match.
Our pick
Fairfield Poly-Fil Premium Fiber Fill, 32oz
Enough for this unicorn and future amigurumi projects, staying fluffy without clumping over time.
View on Amazon →Frequently asked questions
Is this amigurumi unicorn pattern safe for young children?
For children under 3, or any child who still mouths toys, embroider the eyes with yarn instead of using plastic safety eyes, and securely fasten and reinforce the horn, ears, and legs. The fringe mane and tail should also be trimmed to a length that can't easily wrap around small fingers, and any loose strands should be checked and re-secured periodically. Adult supervision is recommended for young children with any small-parts toy. See our guide to attaching safety eyes for more detail.
How do I make the pastel rainbow mane and tail?
The mane and tail aren't crocheted at all; they're made by cutting lengths of several pastel yarn colors, folding each length in half, and pulling the folded loop through the fabric with a hook before drawing the cut ends through the loop and pulling snug, a technique called fringing. Working several colors in this way, alternating or randomly, creates the striped rainbow effect.
How long does this amigurumi unicorn take to make?
Between the head, body, horn, two ears, and four legs, plus fringing the mane and tail, most confident beginners finish this unicorn over three to four sessions, roughly 4 to 5 hours of crochet time plus the fringing itself.
How do I keep the gold horn standing upright?
Stuff the horn firmly all the way to its point rather than lightly, since a firmly stuffed horn holds its cone shape and stands upright once sewn on. Sew it directly to the top of the head between where the ears will go, using small, tight stitches all the way around its base.
What's the best stuffing for an amigurumi unicorn?
Polyester fiberfill is the standard choice for amigurumi because it stays soft, keeps its shape, and is washable and hypoallergenic, unlike natural fiber stuffing that can clump or felt with handling over time.
Can I make the unicorn bigger or smaller?
Yes. To scale it up, add one more increase round to the head and body before the straight rounds and one more decrease round at the end, and lengthen the legs and horn by a round or two. For a smaller unicorn, do the reverse, and use slightly shorter fringe lengths for the mane and tail so they stay in proportion.
Why does my unicorn's mane look sparse compared to the photo?
This is almost always too few fringe strands worked too far apart. Work the fringe loops close together along the entire length from the forehead to the back of the neck, and don't be afraid to double up strands in a single loop for extra fullness.
CrochetGuides is a participant in the Amazon Services LLC Associates Program. As an Amazon Associate we earn from qualifying purchases, at no extra cost to you.