How to Attach Safety Eyes to Amigurumi (So They Never Pop Off)
Getting the placement right the first time matters more than any trick for attaching them, since safety eyes can't be repositioned once they're locked on.
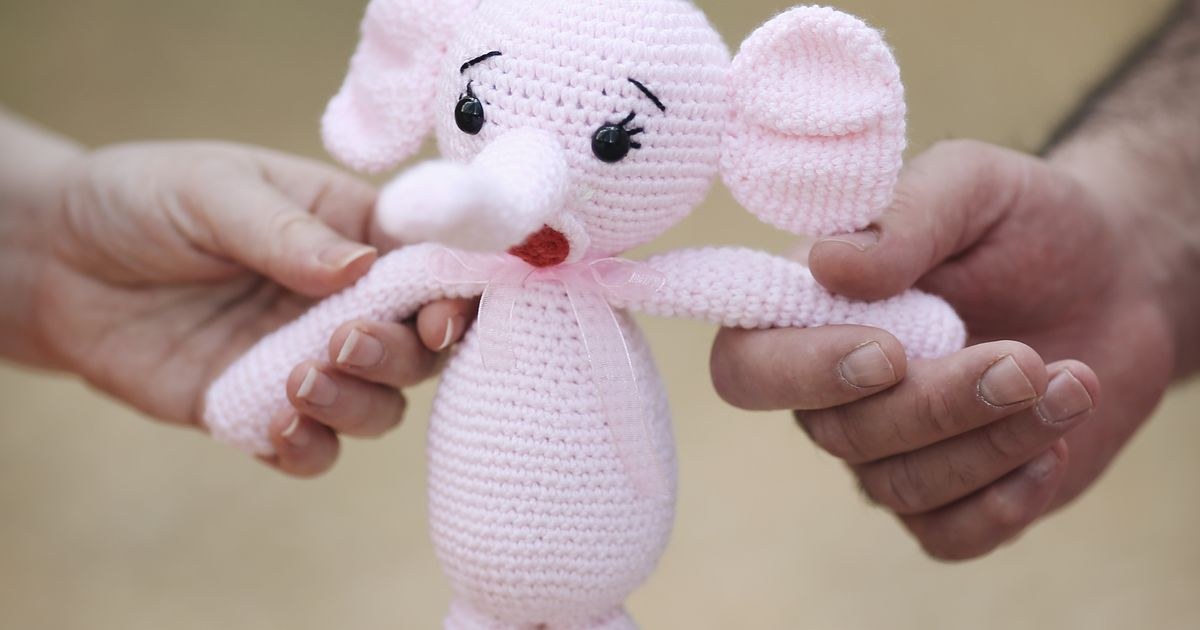
The first amigurumi I ever finished had eyes set slightly too far apart, and I only noticed once the backing washers were already locked on and there was no taking them off without cutting through the fabric. The toy came out looking permanently startled, and I kept it anyway, as a reminder to check placement properly before committing. Safety eyes are one of the few parts of amigurumi that genuinely cannot be undone once attached, which makes the placement step, not the attachment mechanism itself, the part actually worth slowing down for.
This guide covers exactly how safety eyes work mechanically, how to check placement before locking them in permanently, how to reinforce them so they hold up to years of handling, what to do if you've already committed one to the wrong spot, and when to skip plastic eyes altogether in favor of an embroidered face, which matters more than any technique tip if the toy is headed for a baby or toddler.
How safety eyes actually work
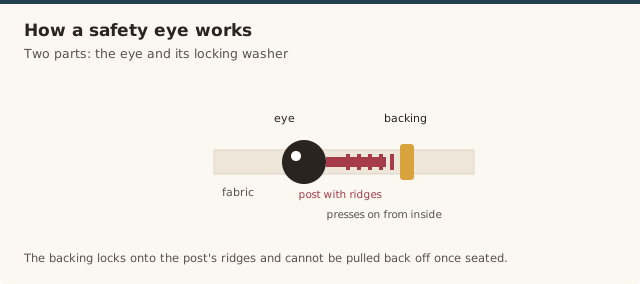
A safety eye has two parts: the eye itself, with a plastic post extending from the back, and a separate washer-style backing that presses onto the post from the inside of the toy. The post has small ridges or teeth that the backing locks onto as it's pressed on, and once fully seated, the backing cannot be pulled back off the post without being cut or broken. This one-way mechanism is exactly what makes safety eyes secure enough for a handled, hugged, occasionally dropped toy, but it's also why placement has to be right before that backing goes on, not after.
Checking placement before you commit
Because the attachment is permanent, placement is the step to slow down for. Insert both eye posts through the fabric from the outside, following whatever round and stitch count the pattern specifies, but don't attach the backings yet. With both eyes loosely in place, hold the piece at arm's length and look at it the way you would the finished toy, checking that the eyes are level with each other, evenly spaced from the center, and set at a height that reads correctly for the character's expression. Small asymmetries are much easier to see from a short distance than up close.
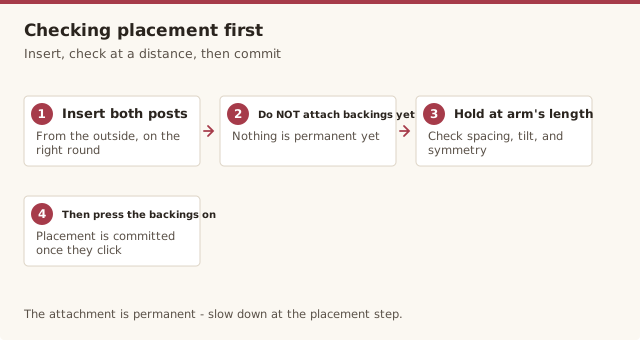
If anything looks off, adjust now: remove the loose post, count stitches again, and reinsert. Once you're satisfied, attach one eye's backing, recheck the overall look with the second eye still loose, and only then attach the second. This staggered approach catches an asymmetry the first eye's placement might have introduced before it's too late to fix.
Attaching the eyes, step by step
- With placement confirmed, hold the eye's post steady from the outside of the piece.
- From the inside, press the backing washer onto the post, flat side facing the fabric, pushing firmly and evenly until it clicks and seats fully against the ridges.
- Give the eye a gentle tug from the outside to confirm the backing has locked, rather than assuming it's seated from feel alone.
- Repeat for the second eye, using the same firm, even pressure.
If a backing won't seat fully, check that the post isn't caught on a strand of stuffing or yarn from inside the piece, which can prevent it from pressing flush; clearing the post fully usually resolves it without needing more force.
Reinforcing eyes for a well-loved toy
For a toy that will see heavy handling, a young child's favourite stuffed animal, for instance, adding a small dab of fabric-safe glue to the back of the washer before pressing it onto the post gives extra insurance beyond the mechanical lock alone. Some crocheters also work a few reinforcing stitches through the fabric directly behind each washer once it's seated, catching the washer's edge with matching yarn, which adds a second, independent layer of security beyond the plastic mechanism itself. Neither step is strictly necessary for a decorative toy that mostly sits on a shelf, but both are worth doing for anything that will be actively played with for years.
Baby and toddler toys: embroider instead
Even a correctly attached, reinforced safety eye is still a small, hard plastic part, and enough sustained pulling, gnawing, or force over years of handling can eventually work one loose. For any toy intended for a baby, toddler, or any child under about 3 years old, the safer choice is to skip plastic safety eyes entirely and embroider the face instead, using a needle and yarn or embroidery thread worked directly into the fabric. A sewn face, worked with small, secure stitches and the tail woven in thoroughly, cannot detach as a single hard piece the way a safety eye can, which removes the choking-hazard risk at its source rather than just reducing it.
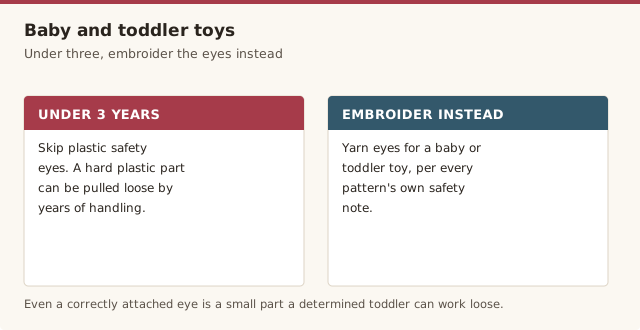
If you're making a gift and unsure of the intended child's age, embroidering the face is the more cautious default, since it's a permanent choice you can't easily reverse once a toy has been given. Many toy safety standards and hospital donation programs specify the same restriction for exactly this reason, so if you're crocheting for a donation drive or a charity that supplies newborn or toddler items, check whether they have a stated policy on safety eyes before assuming plastic eyes are acceptable. Our amigurumi for beginners guide covers basic embroidered face techniques if this is new to you.
Choosing the right eye size
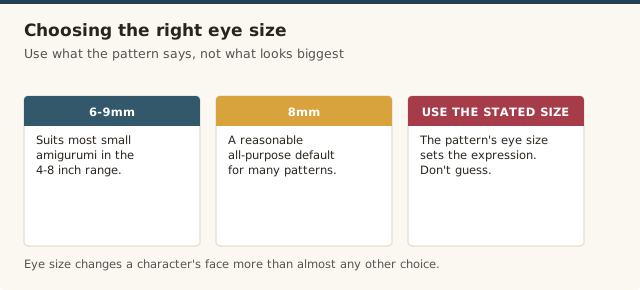
Most amigurumi patterns state a specific eye size, and it's worth using that stated size rather than guessing, since eye size affects the character's expression more than almost any other single choice. As a general guide, 6mm to 9mm eyes suit most small amigurumi in the 4 to 8 inch range, with 8mm a reasonable all-purpose size if a pattern doesn't specify. A mixed-size pack is a practical way to always have the right size on hand without ordering per project.
If you've already attached one in the wrong place
Since the backing washer can't be removed intact, fixing a misplaced eye almost always means sacrificing that eye rather than salvaging it. Carefully cut the washer off from the inside of the piece using small sharp scissors, working slowly and checking your progress often so you don't cut into the surrounding fabric, then push the post back out from the front. The stitches the post passed through will usually have a small visible hole or looser gap; work a few small reinforcing stitches with matching yarn to tighten that spot back up before reinserting a fresh eye and washer in the corrected position.
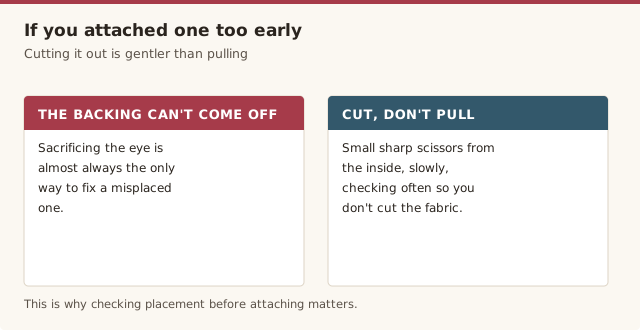
This is exactly why the placement-checking step matters more than any technique for the attachment itself: a wasted eye and a few minutes of repair is a minor setback, but it's still real lost time and materials compared to catching the problem before either washer went on. If the fabric around the original hole looks visibly weakened after removing the washer, placing the new eye a stitch or two further from that spot, rather than directly over it, gives the fresh post something sturdier to grip.
Common mistakes & fixes
Fix: insert both eyes loosely first, check placement and symmetry from a short distance, and only attach the backings once you're satisfied, since the attachment cannot be undone afterward.
Fix: embroider the face instead for any child under about 3. A sewn face can't detach as a hard, swallowable piece the way a safety eye can, however securely it was attached.
Fix: check that the post is clear of stuffing or yarn strands from the inside before pressing again; the issue is usually an obstruction, not insufficient force.
Fix: attach one eye's backing, recheck symmetry with the second eye still loose, and only then attach the second, so a placement problem in the first eye is caught before it's locked in place.
Fix: treat plastic safety eyes as unsuitable for children under 3 regardless of how well they're attached, and choose embroidered eyes for that age group instead.
Frequently asked questions
How do you attach safety eyes to amigurumi permanently?
Push the eye's post through the fabric from the right side, then press the backing washer onto the post from the inside until it clicks and locks into the post's ridges. Once seated correctly, the washer cannot be removed without cutting it off, which is what makes safety eyes permanent.
Are safety eyes actually safe for babies and toddlers?
Even correctly attached, safety eyes are a choking hazard if they're ever pulled off, and enough force over time can work a washer loose. For toys intended for babies, toddlers, or any child under 3, embroider the face instead of using plastic safety eyes, since a sewn face cannot detach and become a small, swallowable part.
What size safety eyes should I use for amigurumi?
For small amigurumi, 6mm to 9mm eyes are the most common sizes, with the pattern's stated size generally the safest default. A mixed pack covers most projects without needing to order a specific size mid-way through one.
How do I know where to place safety eyes on an amigurumi head?
Insert the eyes loosely first, without attaching the backing, and check the placement from a distance and from the front before committing. Most patterns state a specific round and stitch count for placement, but checking visually before locking the washer in place catches an off-center or uneven placement while it's still easy to adjust.
Can you remove safety eyes once they're attached?
Not without damaging the fabric. Once the backing washer is pressed on and locked, it's designed to be permanent, so removing it usually means cutting the washer off from the inside, which can leave a visible hole or damaged stitches around the post.
What can I use instead of plastic safety eyes?
Embroidered eyes, worked directly into the fabric with a needle and contrasting yarn or embroidery thread, are the standard alternative, especially for baby and toddler toys. Felt eyes sewn on with many small, secure stitches are another option, though they're generally less secure than embroidery for a toy that will be handled roughly.
CrochetGuides is a participant in the Amazon Services LLC Associates Program. As an Amazon Associate we earn from qualifying purchases, at no extra cost to you.