Crochet Christmas Wreath Pattern
A ring of joined granny-square motifs in holiday colors, finished with a crocheted bow — no wire frame required.
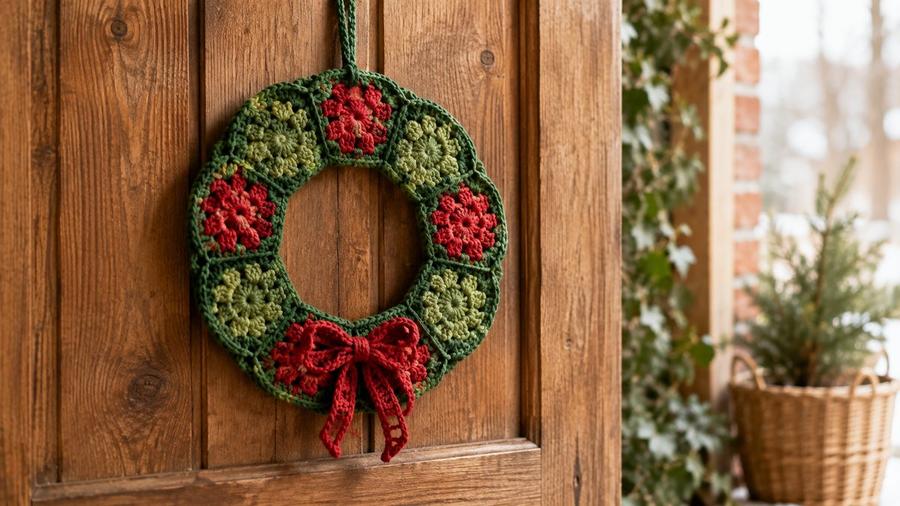
In my classes, the first project that makes students feel like they've made something real is often a ring of granny squares, and a crochet Christmas wreath is the holiday version I bring out every November. I'll never forget the quiet pride on one student's face as she joined her eighth motif and watched the flat little squares turn into a circle that stood on its own, no wire frame underneath. She'd been nervous about the joins, but once she saw the ring close, she was already planning a second one in different colours. It's a forgiving build — if one square sits a touch bigger than its neighbour, blocking and a steady seam will coax it into shape.
The wreath reads as far more advanced than it is, which is exactly the trick I love. Underneath, it's just the granny square you already know, made eight times and sewn in a circle. One of my students, a retired nurse who swore she could only make squares, joined her first ring and stood back with genuine surprise at what eight little squares had become. That moment — watching something flat fold into a circle — is the whole reason I teach this pattern every November.
What you need
- Worsted weight (#4) yarn: green (main), red (motif centers and bow), plus a small amount of a second green for variety if you like
- 4.5mm hook
- Yarn needle
- Stitch markers
Motifs (make 8)
Steps
- Using red, magic ring, chain 3 (counts as first dc), 2 dc, chain 2, *3 dc, chain 2* 3 more times into the ring. Join with a slip stitch to the top of the starting chain. Fasten off red.
- Join green in any chain-2 corner space. Chain 3, 2 dc, chain 2, 3 dc in the same space (first corner made). *In the next corner space work 3 dc, chain 2, 3 dc.* Repeat around all 4 corners.
- Join with a slip stitch, fasten off, weave in ends. This makes one square motif; repeat 7 more times for 8 total.
Joining into a ring
Steps
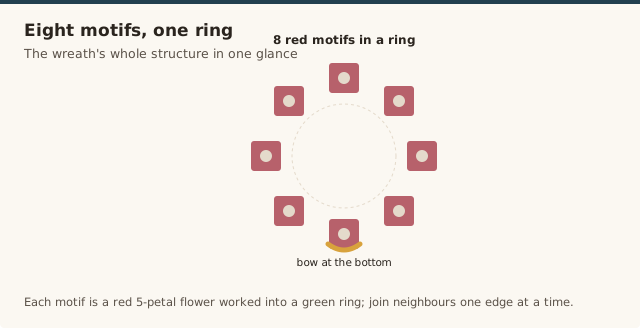
- Arrange the 8 motifs in a circle, each one touching its neighbors along one edge.
- Using a whip stitch or slip-stitch seam, join each motif to the next along the touching edge, working all the way around until the ring closes.
Bow and hanging loop
Steps
- Bow: chain 20, work 1 row of dc back across, fasten off. Make a second, shorter strip (chain 12) the same way for the bow's center wrap. Gather the longer strip in the middle to form a bow shape, then wrap the shorter strip around the center and stitch it closed.
- Stitch the finished bow to the bottom of the wreath, over the join between two motifs.
- For the hanging loop, chain 10–12 at the top of the wreath, slip stitch to form a loop, fasten off.
A demonstration of building a ring-shaped decoration, useful for seeing how the base and embellishments are added.
Yarn and colour choice
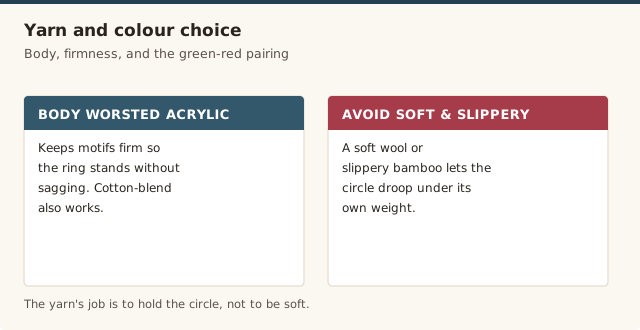
For a wreath that holds its circle, choose a yarn with a bit of body. A worsted-weight acrylic or a cotton-blend is my go-to, because it keeps the motifs firm enough to stand as a ring without sagging, where a soft wool or a slippery bamboo can let the circle droop under its own weight. Green and red are the classic pair, but I like to work two slightly different greens for the borders — a deep forest and a brighter moss — which gives the wreath subtle depth without extra colour changes. If it will live on a door that sees weather, acrylic is the safer choice, since it won't absorb damp or fade the way some natural fibres do. See yarn weight explained for how the weight affects the stiffness.
Joining methods compared
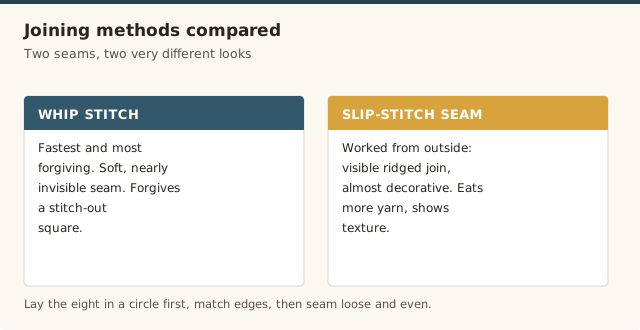
How you join the eight motifs changes both the look and the work. A whip stitch is the fastest and most forgiving — it makes a soft, nearly invisible seam and forgives a square that's a stitch out. A slip-stitch seam worked from the outside gives a visible ridged join that can look almost decorative, but it eats a little more yarn and shows every wobble. Join-as-you-go, where you crochet the final round of each motif onto its neighbour, is the neatest and most durable, but it requires planning ahead, so I save it for a second wreath. For your first one, the whip stitch is the right call — you can undo a seam without disturbing the squares, which is worth a lot while you're still learning to keep them even. Our crochet in the round guide covers the motif construction itself.
Personalising the wreath
Once the ring is made, it becomes a blank you can dress however the season calls for. Stitch a few small bells or wooden beads onto the joins, tuck a sprig of faux greenery under the bow, or swap the crocheted bow for a length of wired ribbon that holds a fuller shape. If it's a gift, a personalised wreath with the recipient's initials worked in one contrasting square is the kind of detail people keep. The only rule is to keep additions light — the ring has no wire frame, so heavy beads or a dense bow will pull the circle into an oval. Balance any weight evenly, and the wreath will keep its shape on the door all season.
Common mistakes & fixes
Fix: the motifs are slightly different sizes or the seam was pulled too tight. Lay the eight squares in a circle first, match like edges together, and seam with a loose, even whip stitch that lets the ring relax into shape.
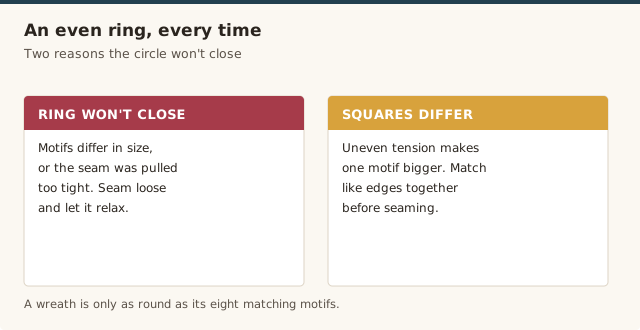
Fix: your tension drifted between motifs. Check each square against the first as you finish it, and if one is noticeably off, block or redo it before joining — a size mismatch is far harder to hide once the ring is sewn.
Fix: the seams were pulled tight in places. Block the finished ring by pinning it to a round shape while slightly damp and letting it dry — the how to block crochet guide shows the pinning technique.
Fix: the longer strip wasn't gathered evenly before wrapping. Pinch the centre into even loops, secure it with a few stitches, then wrap the shorter strip around the middle and stitch it closed rather than just tying it.
Fix: the yarn was too soft or the embellishments too heavy. Choose a firmer yarn next time, keep the bow and beads light, and re-block the ring flat to restore its circle before re-hanging.
Fix: it was anchored through a single stitch. Work the loop through two or three stitches of a top motif and secure it firmly, so the weight of the wreath is spread rather than hanging on one thread.
Frequently asked questions
Do I need a foam or wire wreath form?
No — joining the motifs into a ring gives the wreath its shape on its own, though you can stitch it to a form if you want extra rigidity.
Can I use more or fewer motifs?
Yes — more, smaller motifs make a larger wreath with a bigger center opening; fewer, larger motifs make a denser, smaller wreath.
What if my ring doesn't lie flat?
Block the joined ring by pinning it to a round shape while slightly damp and letting it dry — this evens out any puckering at the joins.
How many motifs do I need for a standard wreath?
Eight small motifs join into a wreath around 30cm across; add or remove motifs in pairs to keep the ring even while you adjust the finished size.
Can I hang it on an outside door?
Yes, though natural-fibre yarn can stretch or fade in wet weather — if it will live outdoors, choose an acrylic or cotton-blend and re-block it now and then.
How long does a full wreath take to make?
At a relaxed pace, each motif takes fifteen to twenty minutes, so the eight squares come together over a couple of evenings, with another hour or so for joining, the bow, and the hanging loop. It's a comfortably two-session project for a beginner.
CrochetGuides is a participant in the Amazon Services LLC Associates Program. As an Amazon Associate we earn from qualifying purchases, at no extra cost to you.